PHP templating walkthrough: Part 3
Introduction
If you aren’t ready for this part yet, that’s OK! This resource can be used at many stages in the learning process.
As you read the code in these figures, take your time. Notice how the HTML syntax and the PHP syntax are woven around each other. They are working together – for a final result. Do not forget that we are essentially writing a computer program – even if it feels like HTML with some other junk in there. It’s a series of instructions for the server to process.
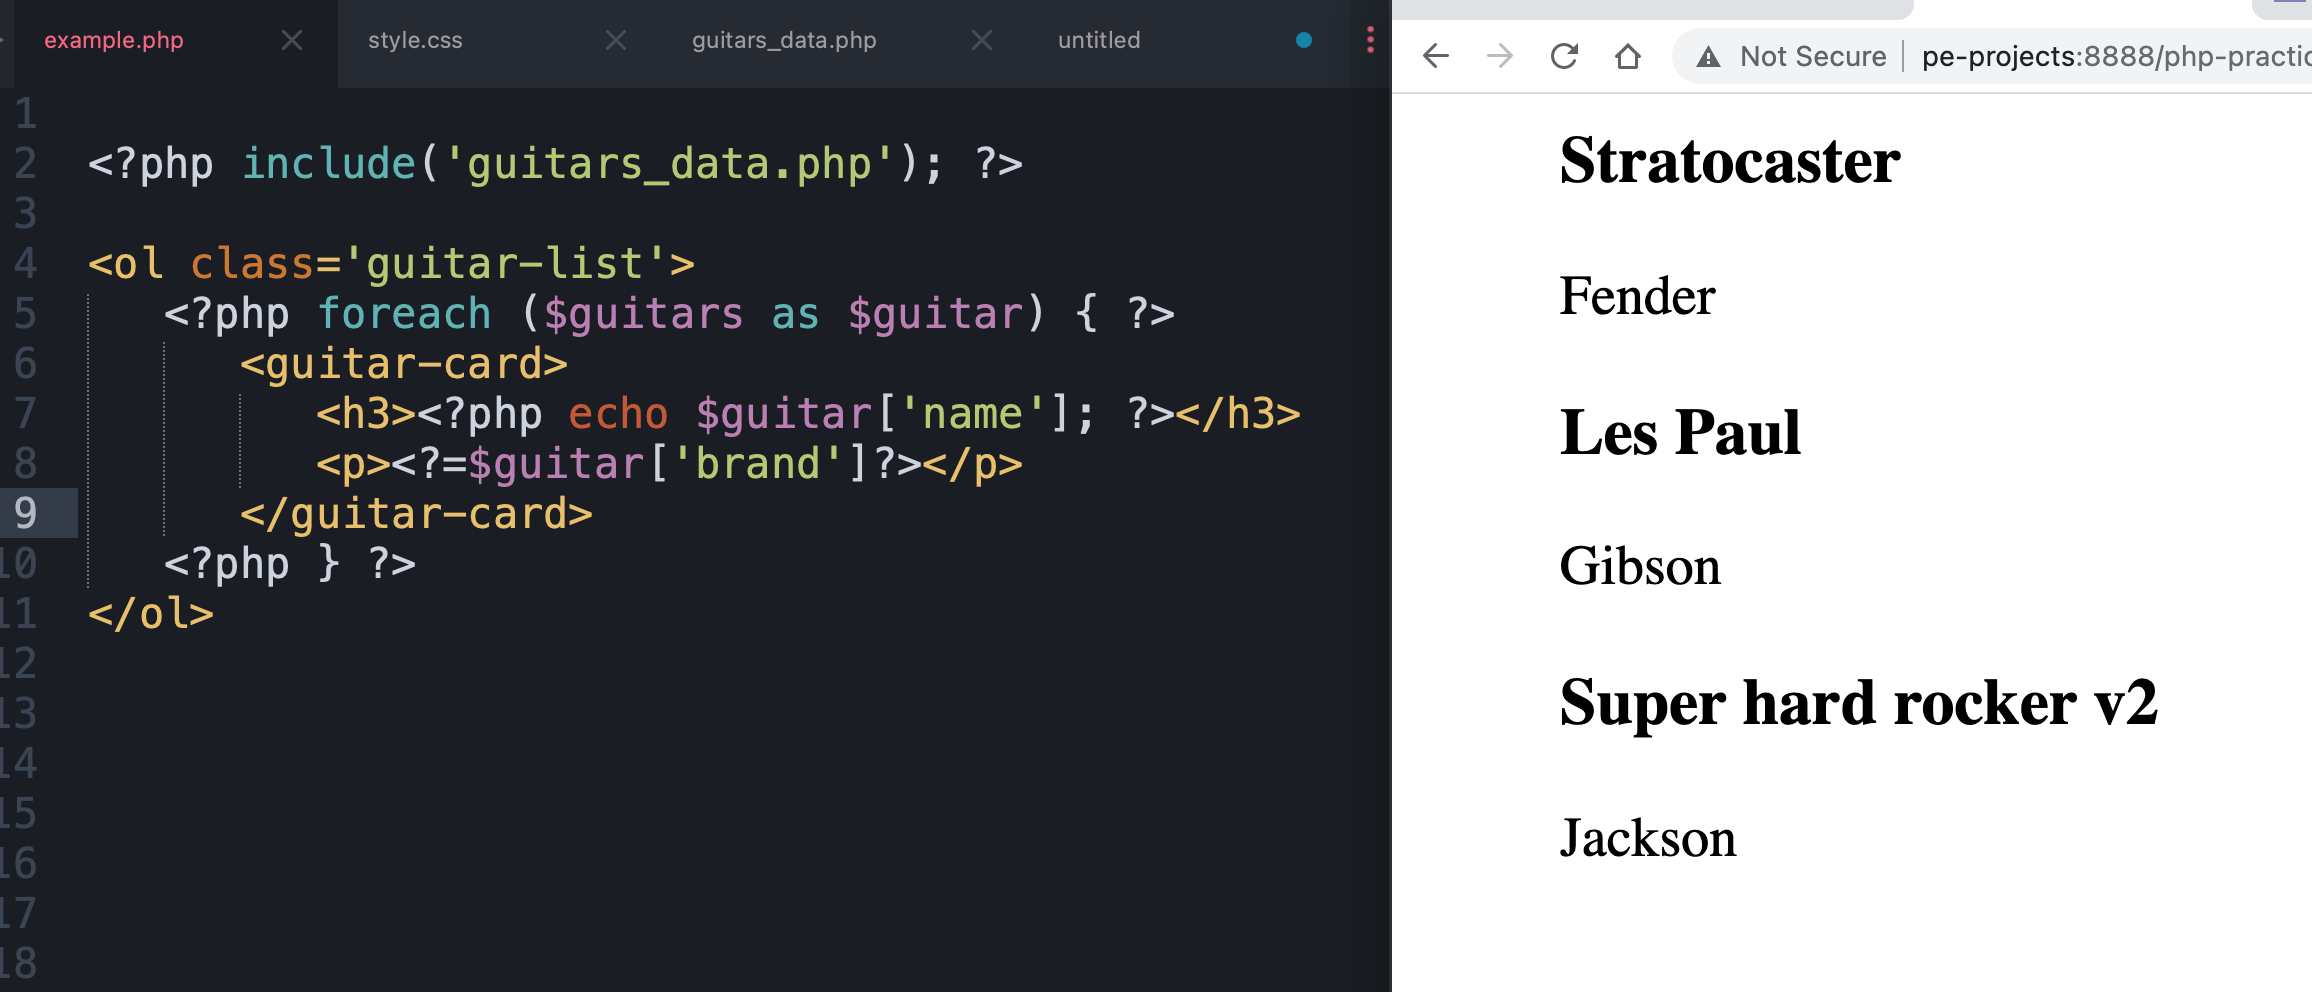
Here’s where we were at in part 2. Good?
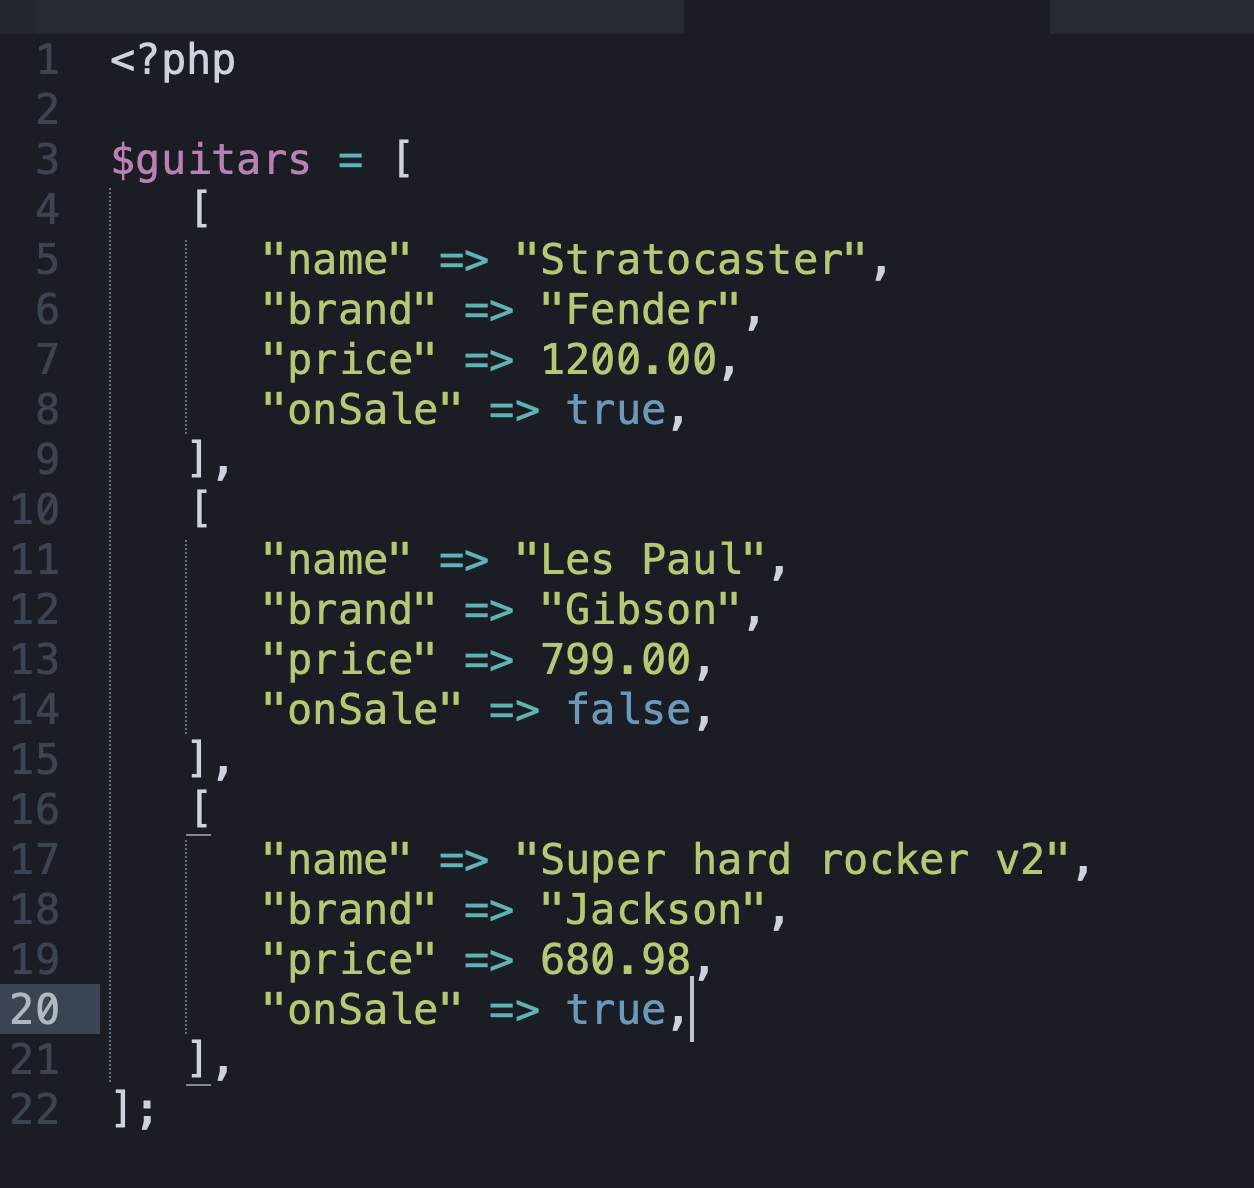
Each product is going to have a lot more info than just the title. We’ll add a few data points: price and a boolean for if the product is on sale.
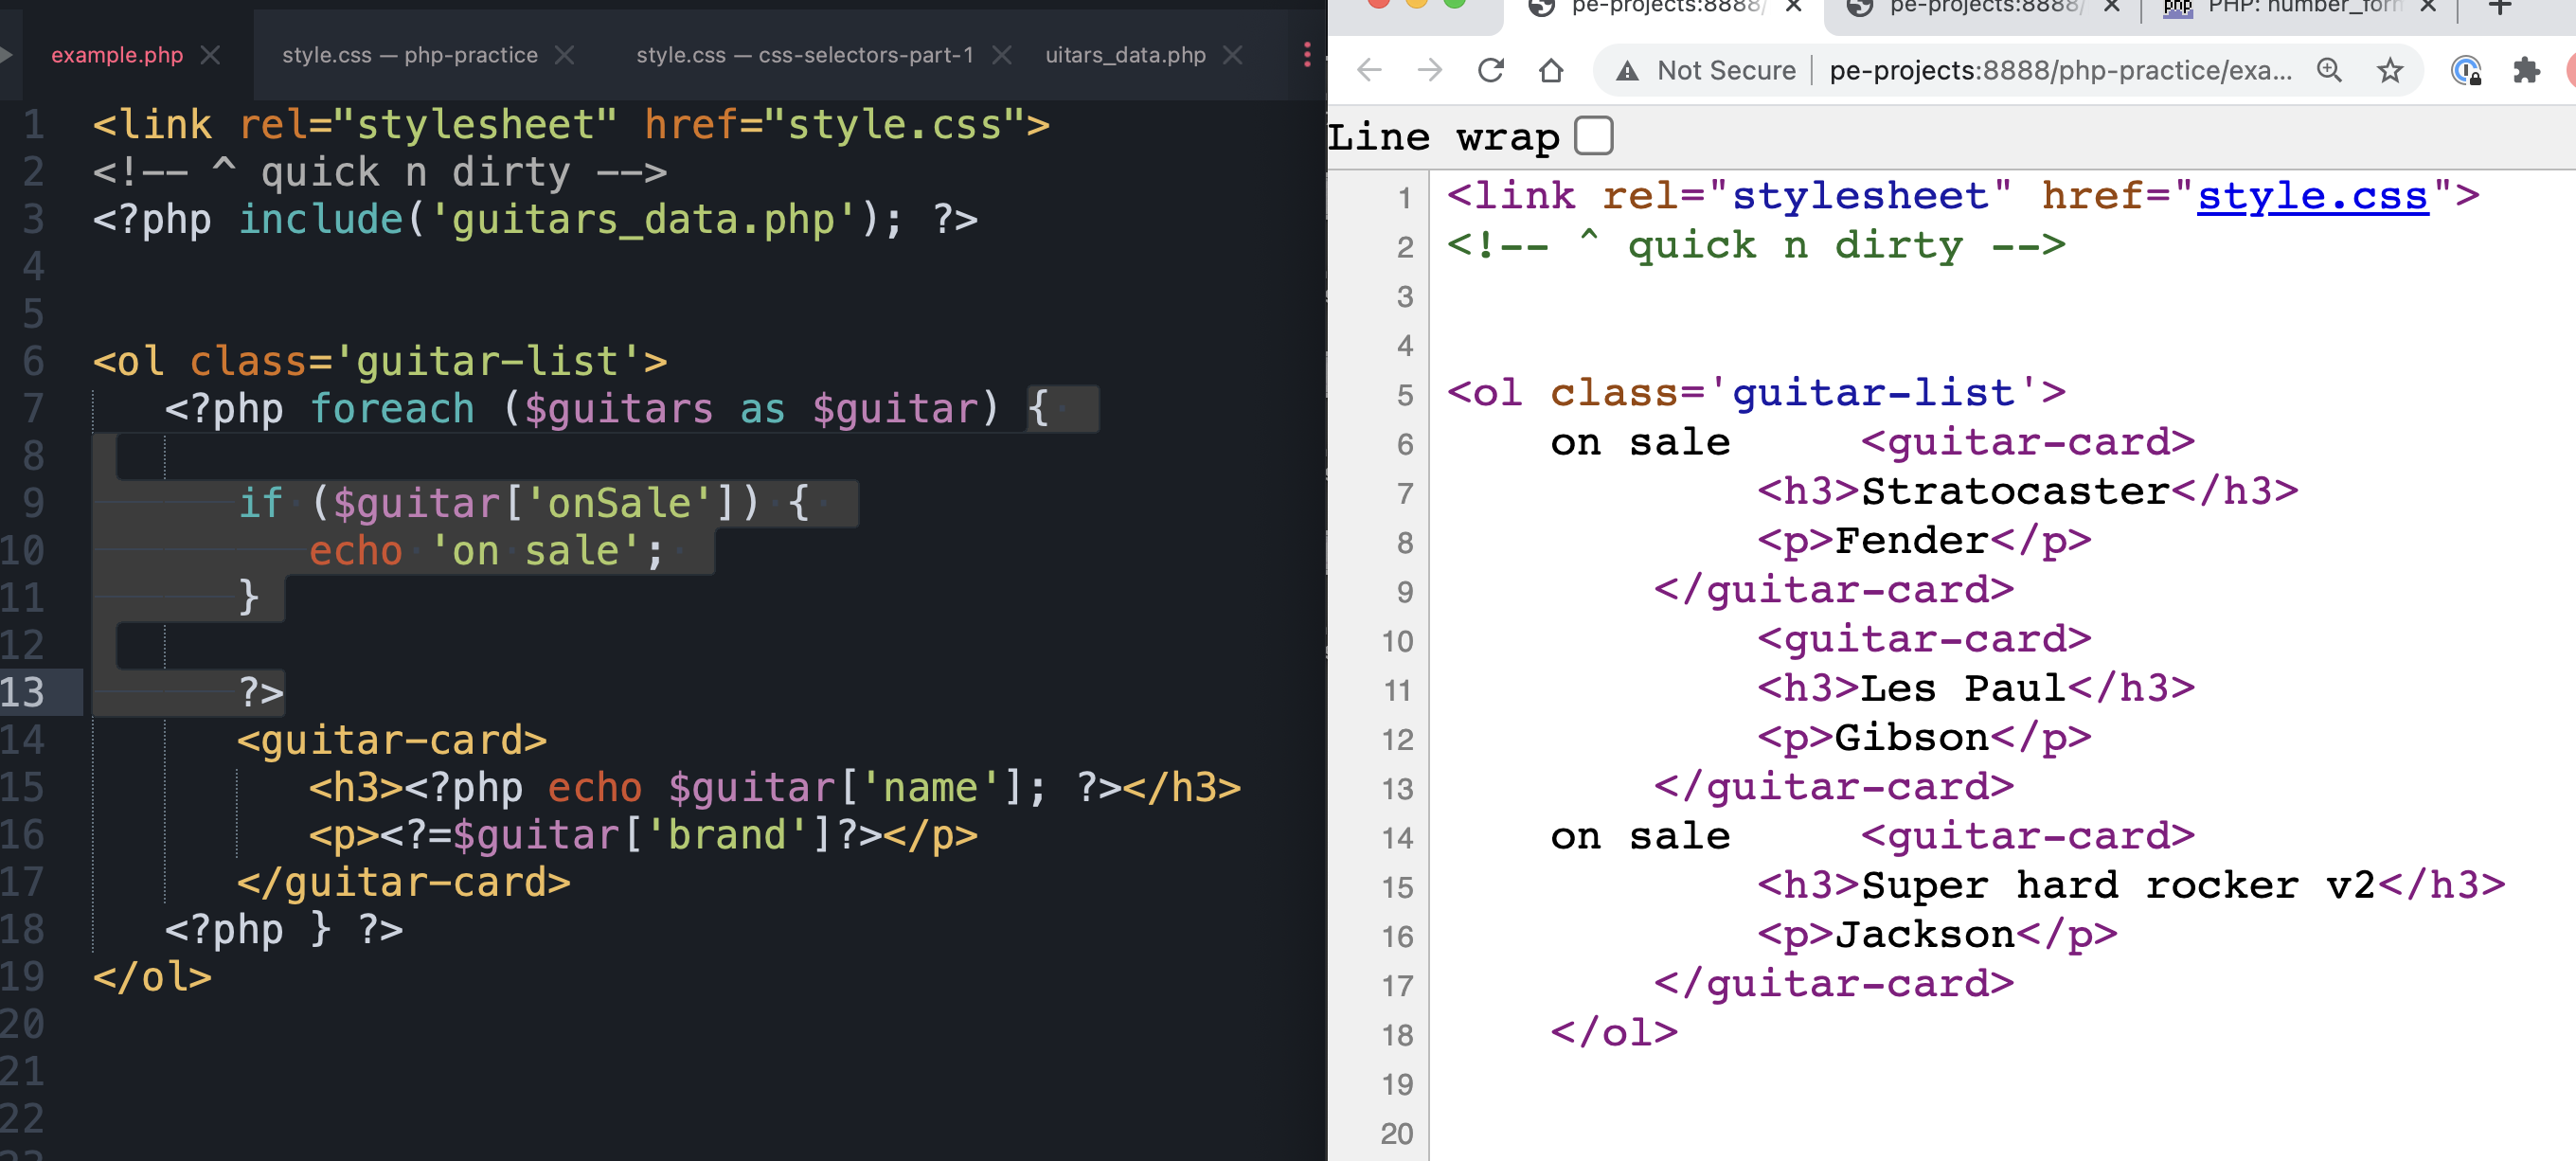
You can use some conditional logic/ control structures – to do anything you want. (as long as you follow the rules, right?
The boolean of ‘onSale’ can be used to print out different markup or change things in any way you can imagine. Here we show it echoing a string (but only if the onSale property is true). It’s just dropping some naked text in there. Not so hot, but great to test it / before getting too tied up with markup and style.
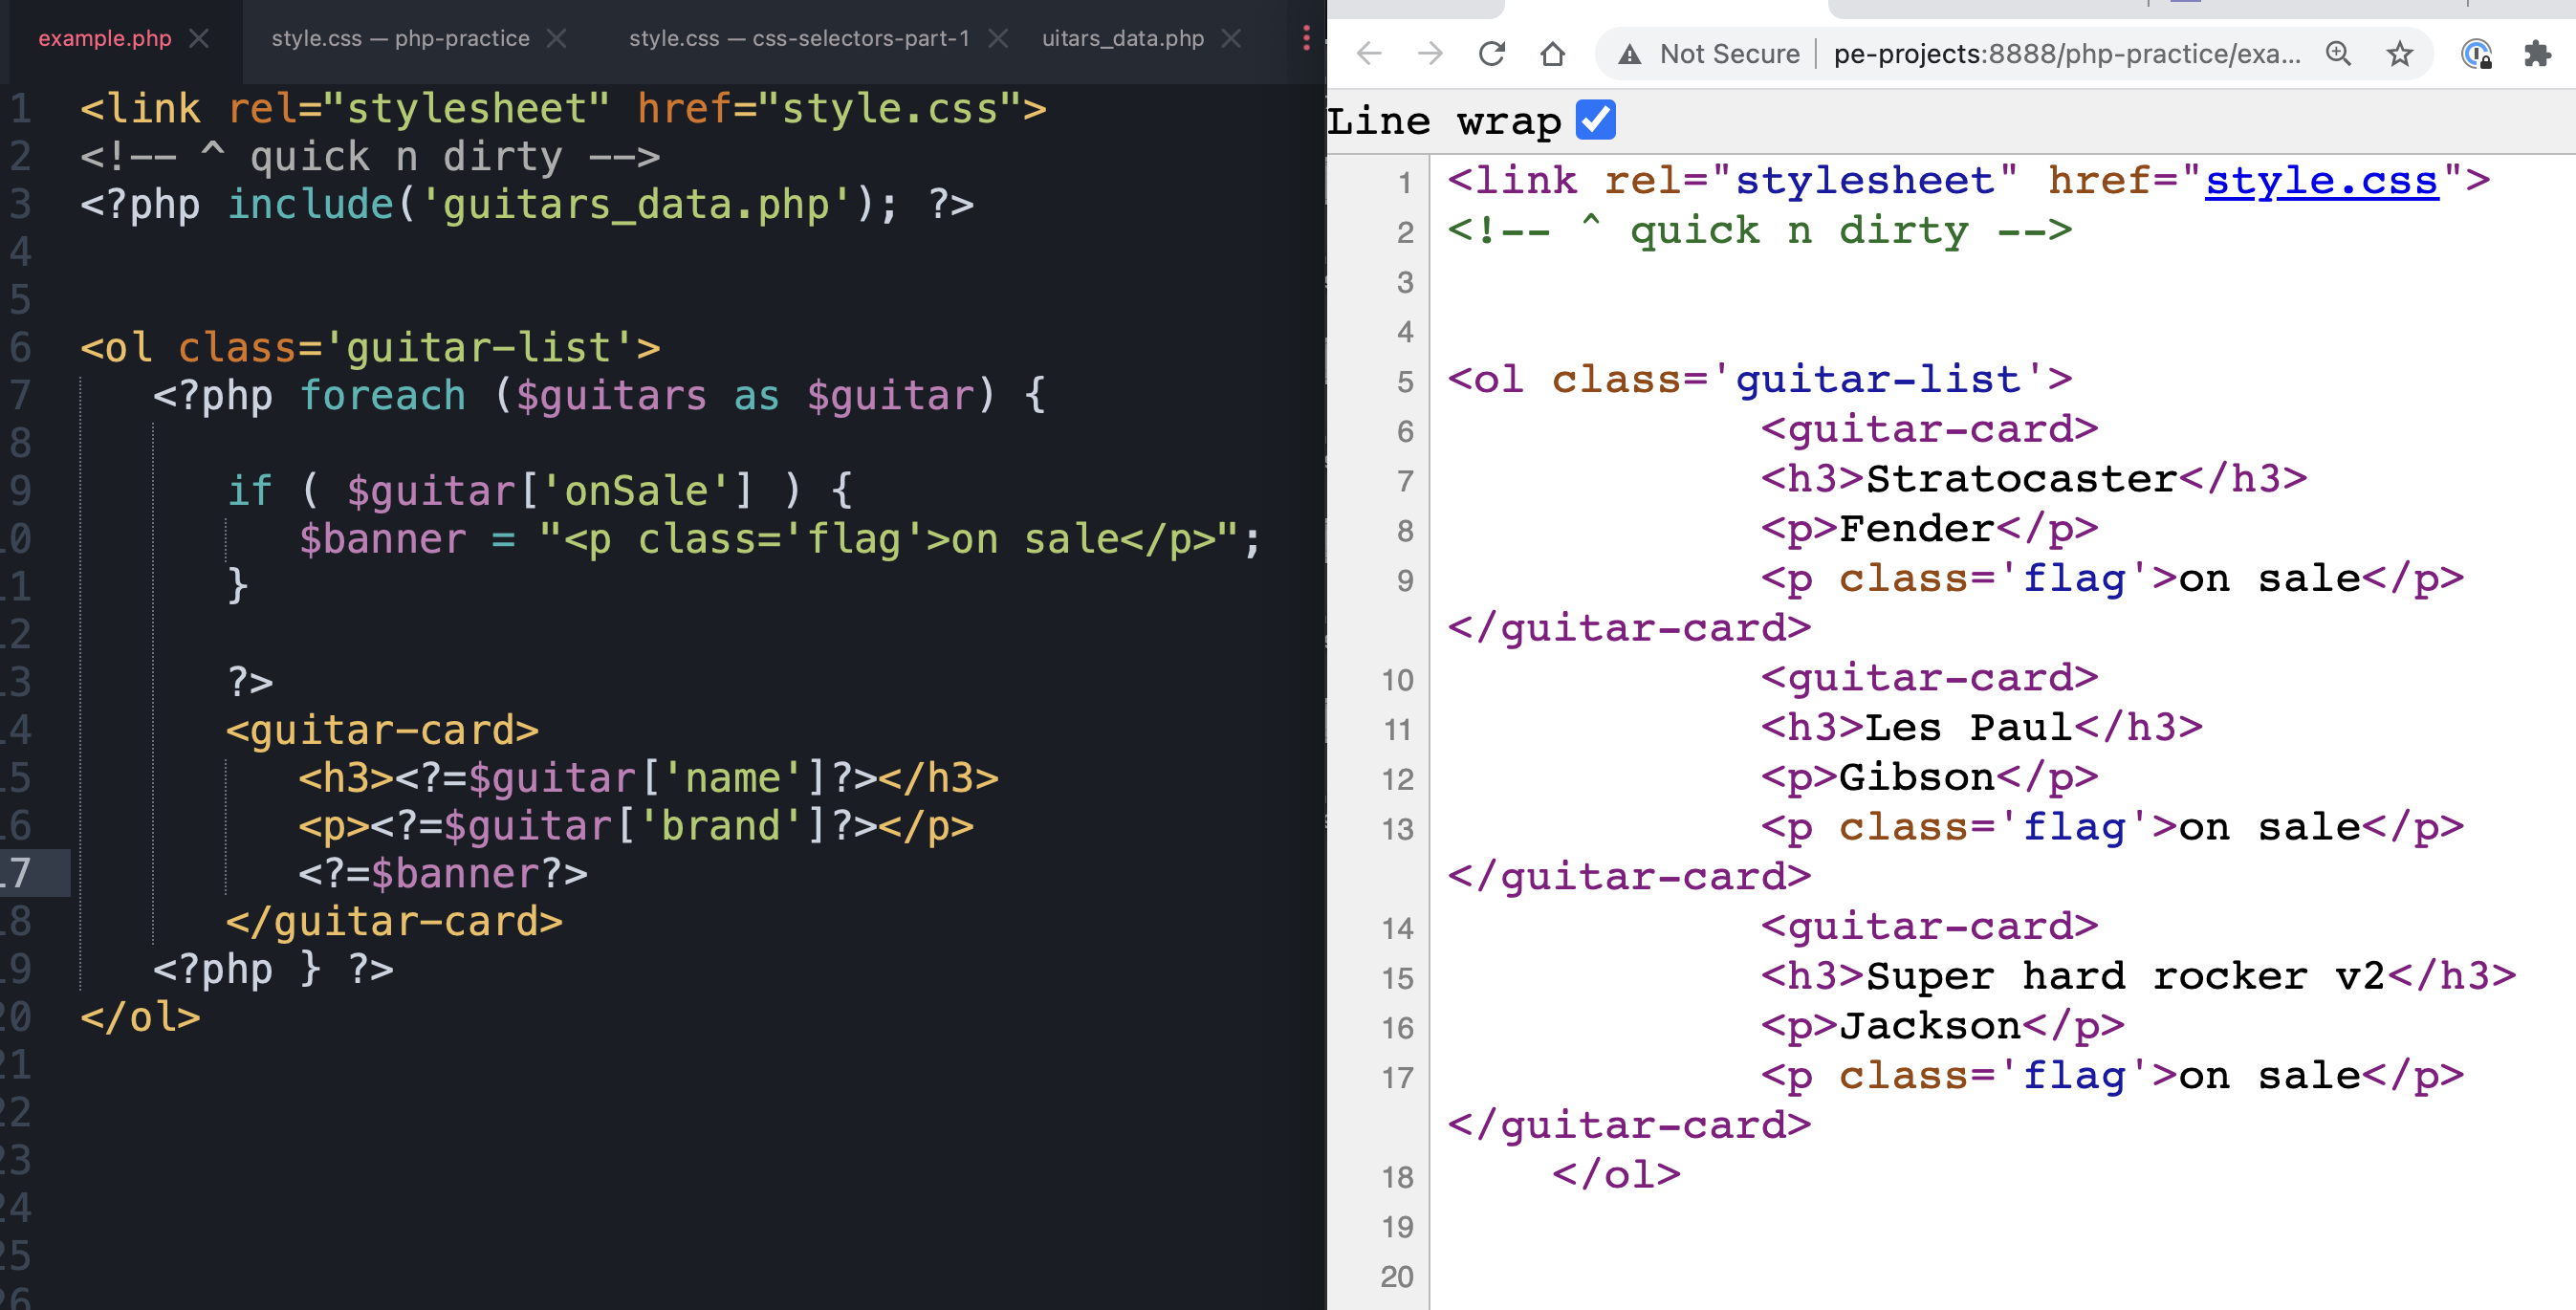
Here’s how you might try and get some markup worked out – and then include it in the template. It’s pretty clean and clear…
But: do you see in the output that it’s printing it on all three? Only 2 of them are supposed to be on sale.
Work through the loop (iteration by iteration) – and see if you can figure out why that is happening.
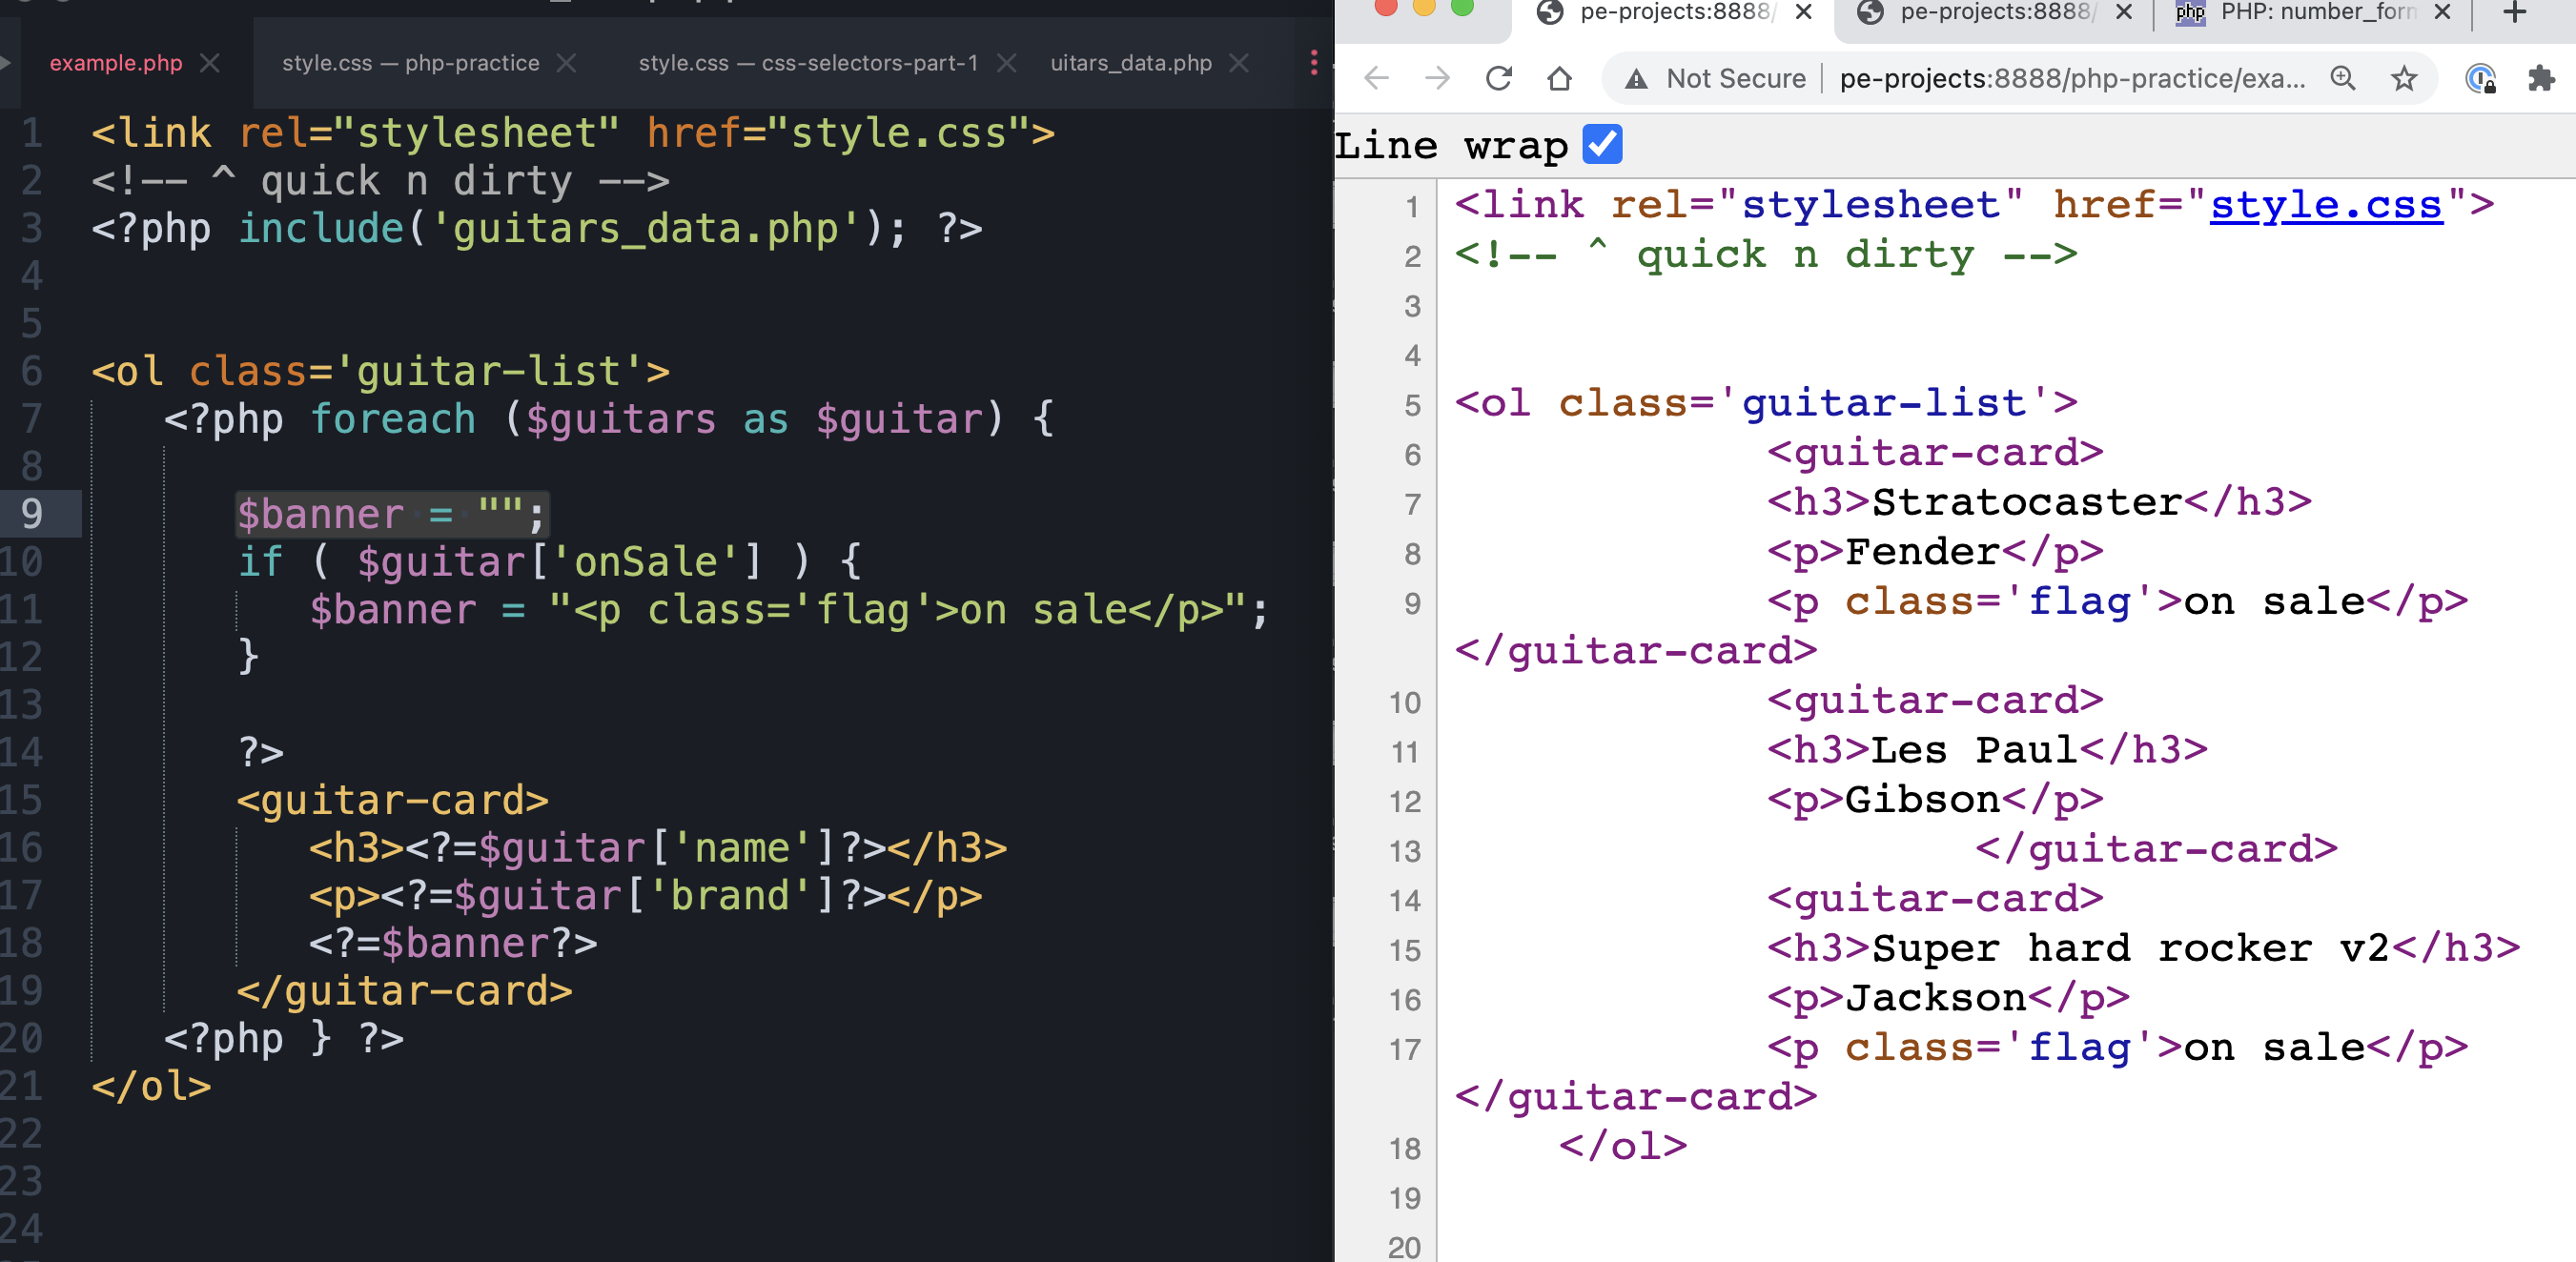
In the previous figure, the $banner variable was being set the first time around / and then just used from there on out.
If you initialize the $banner to an empty string, then – that’s the default. If it’s not on sale, do nothing. If it is, then (and only then) create that bit of HTML and use it in the template.
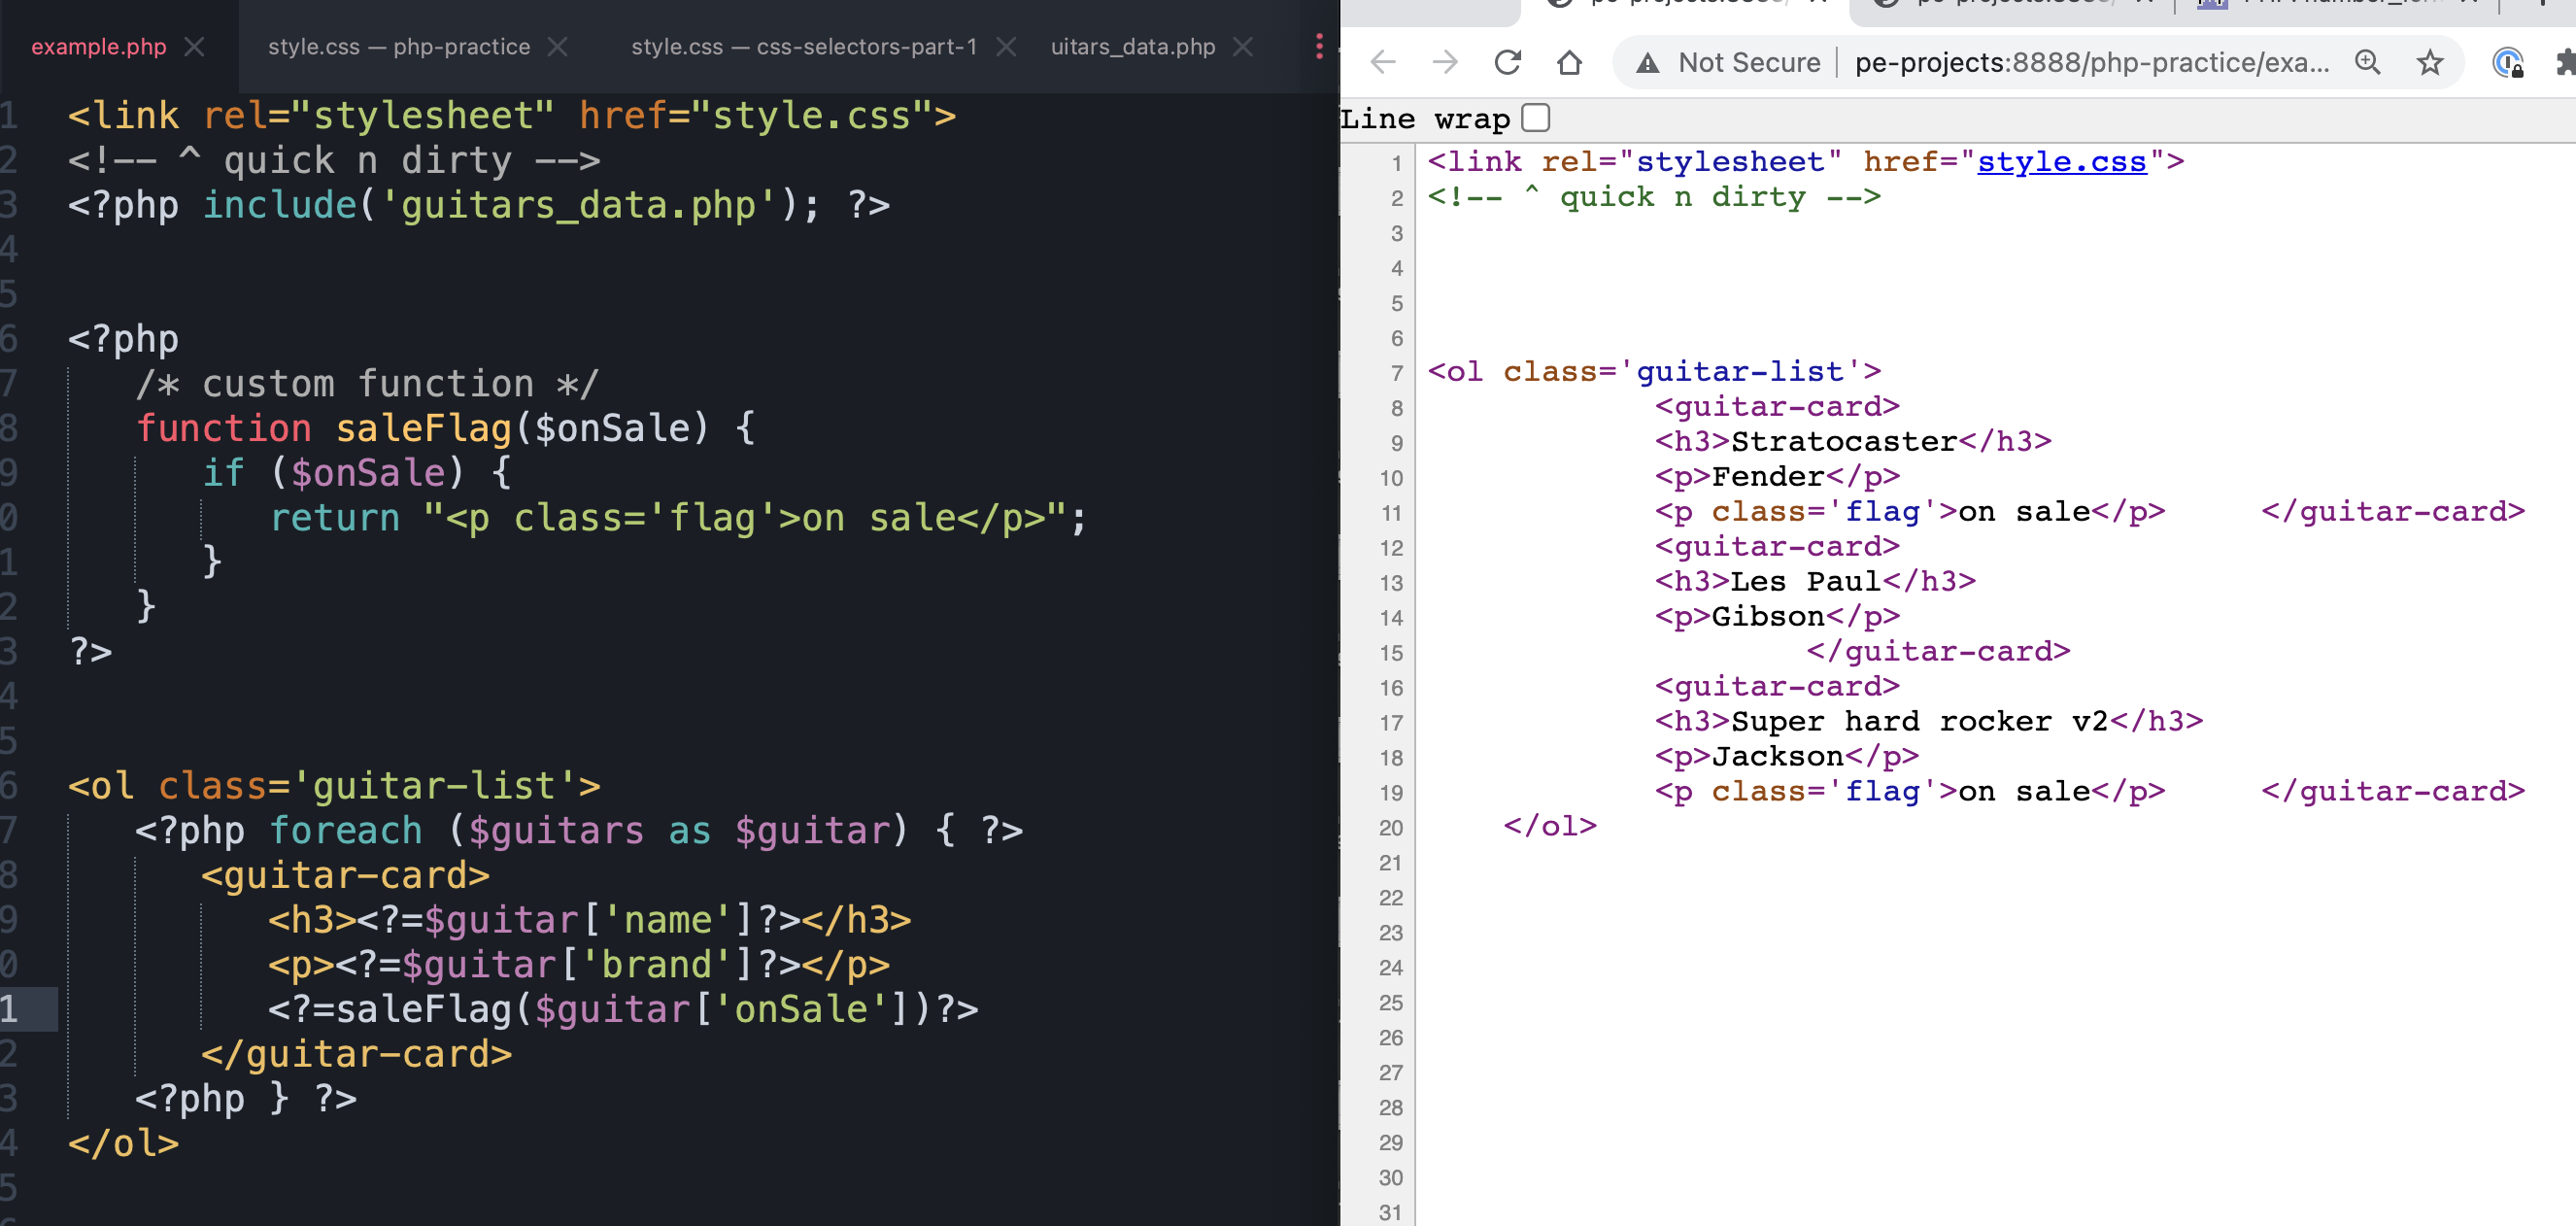
Another thing you could do to keep things modular and tidy – is to create a custom function that handles the creation of the ‘on sale’ markup.
Each time this function is run (for each time the loop runs, right?) – it will either return the markup – or it will return nothing. If you need to change how it works, it’s all collected into one little area. This will make it more maintainable. And if you want to remove it, it’s not all woven into the other parts of the logic and template.
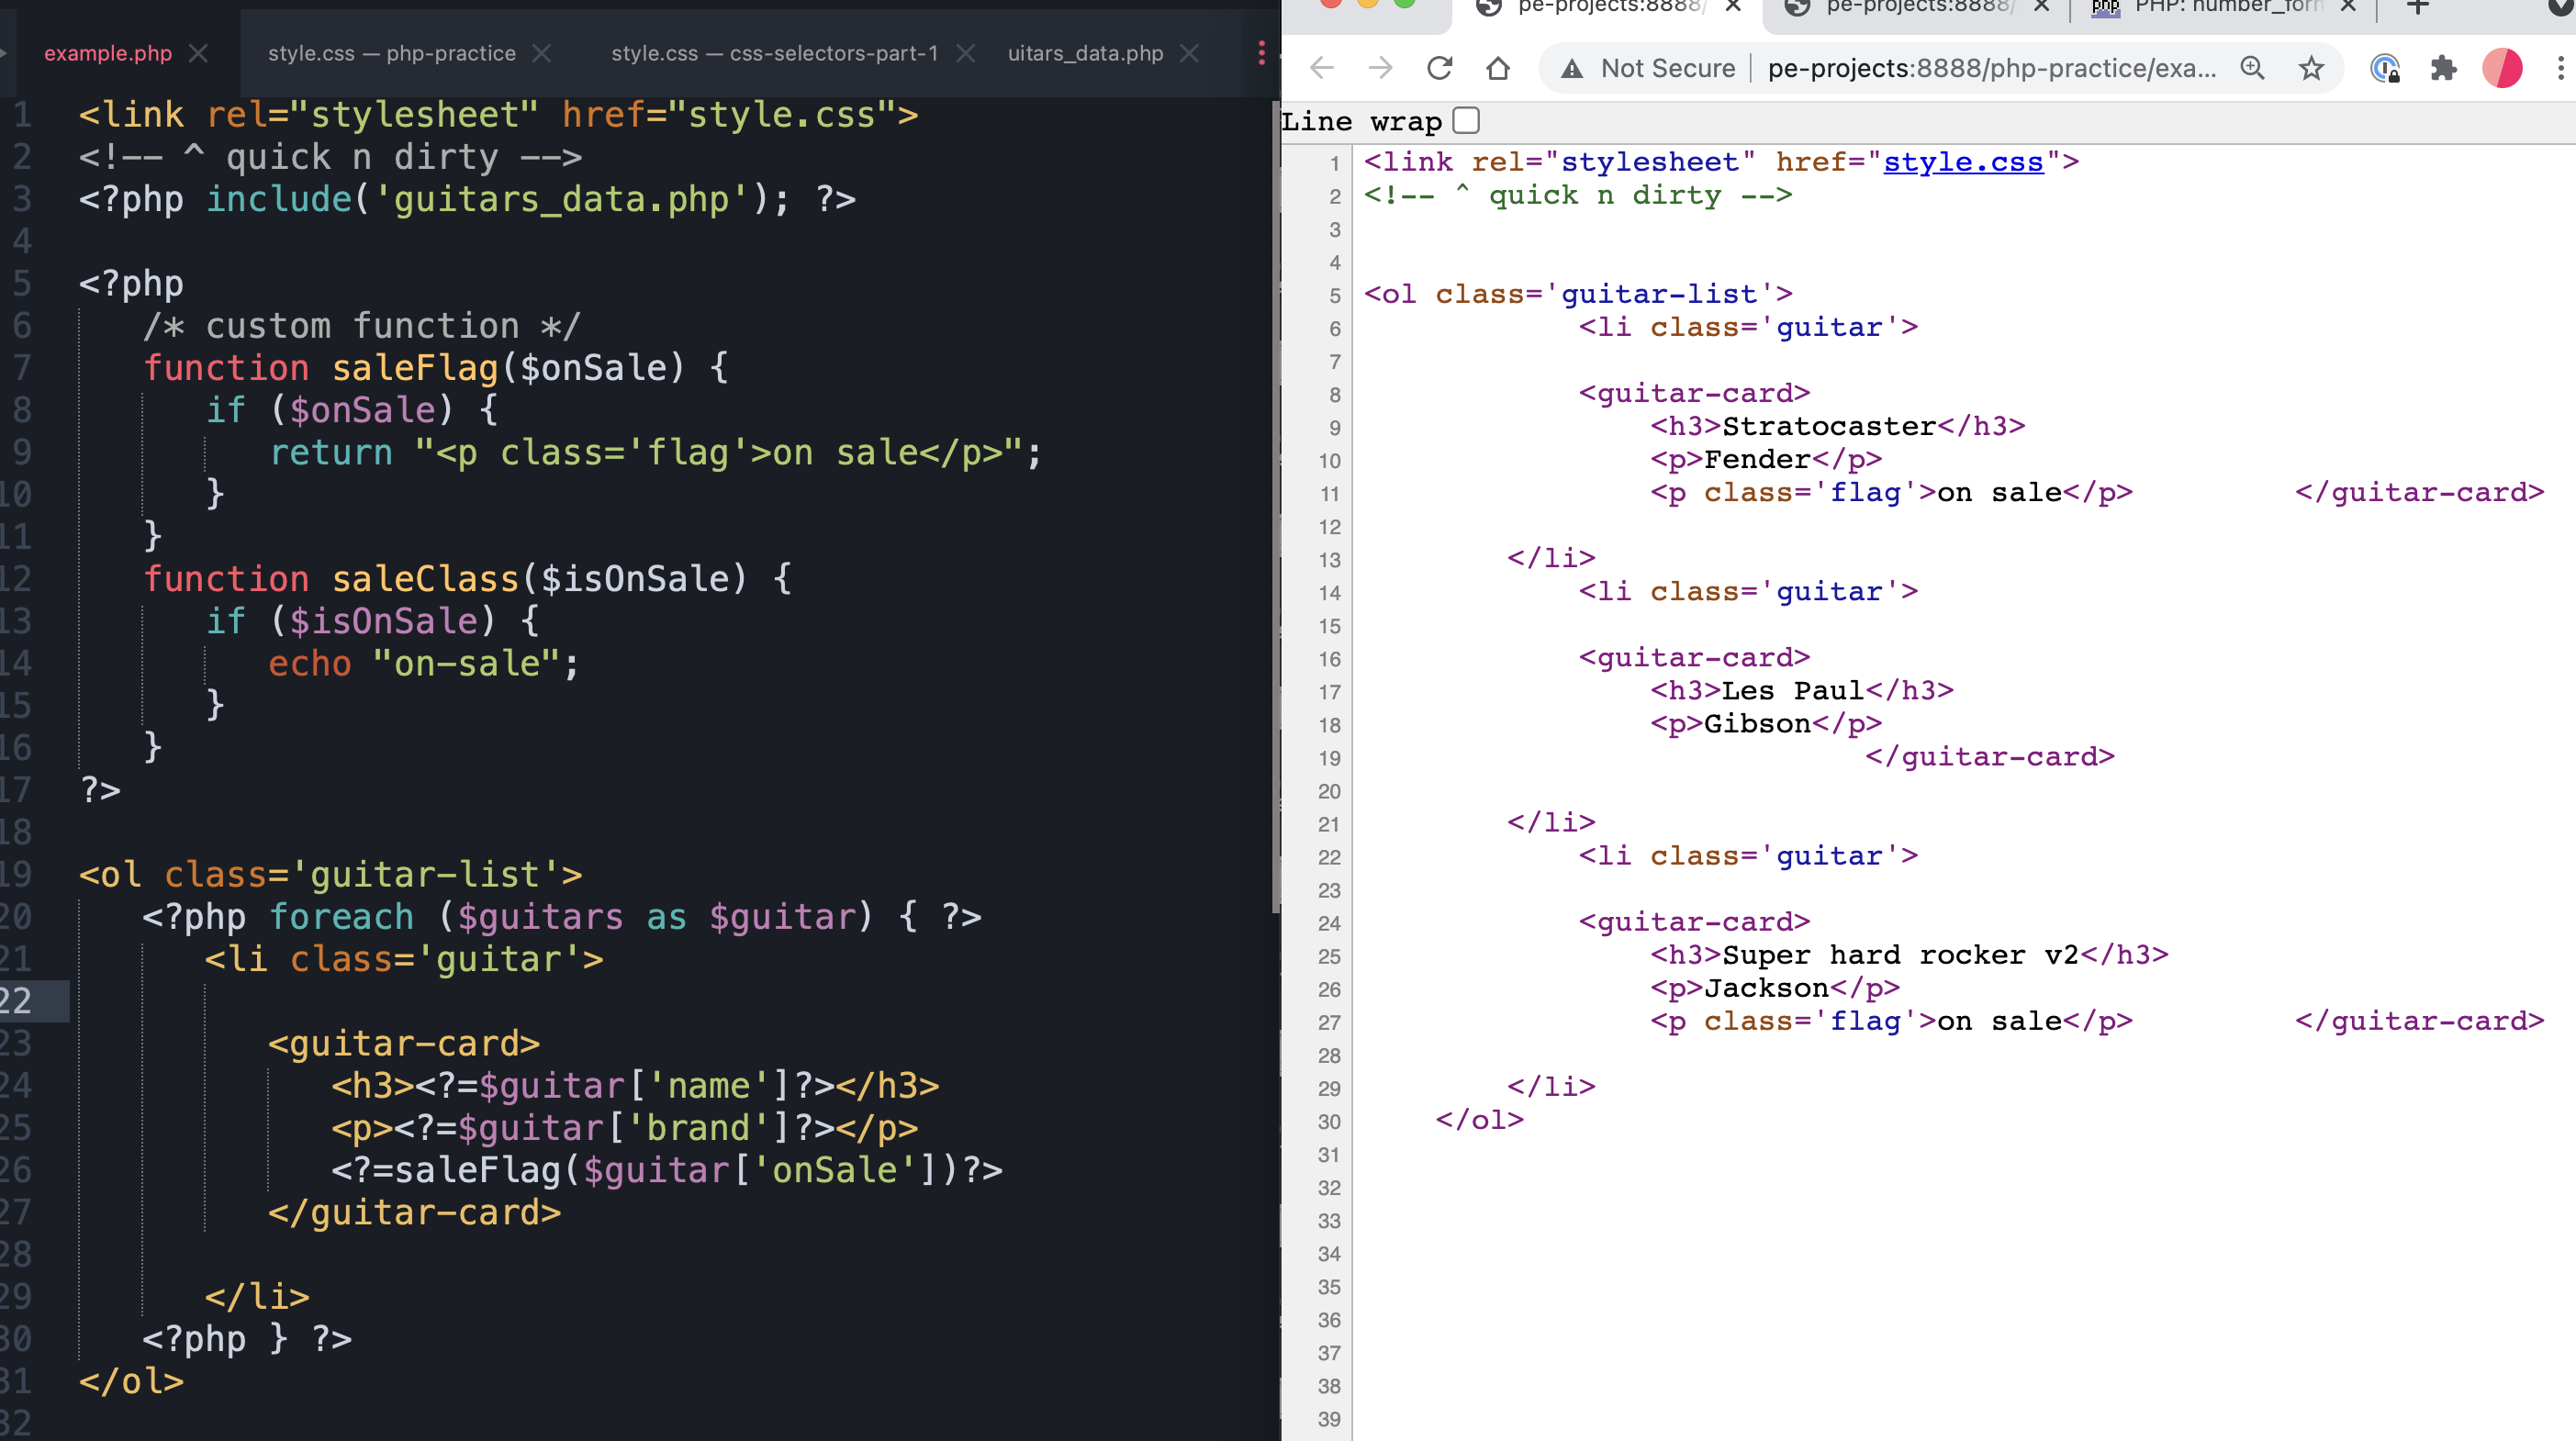
You may have need for many functions. In this case, Scott and I were thinking about somehow giving the guitars that are on sale a special class of on-sale. (that was the whole point of this project really : )
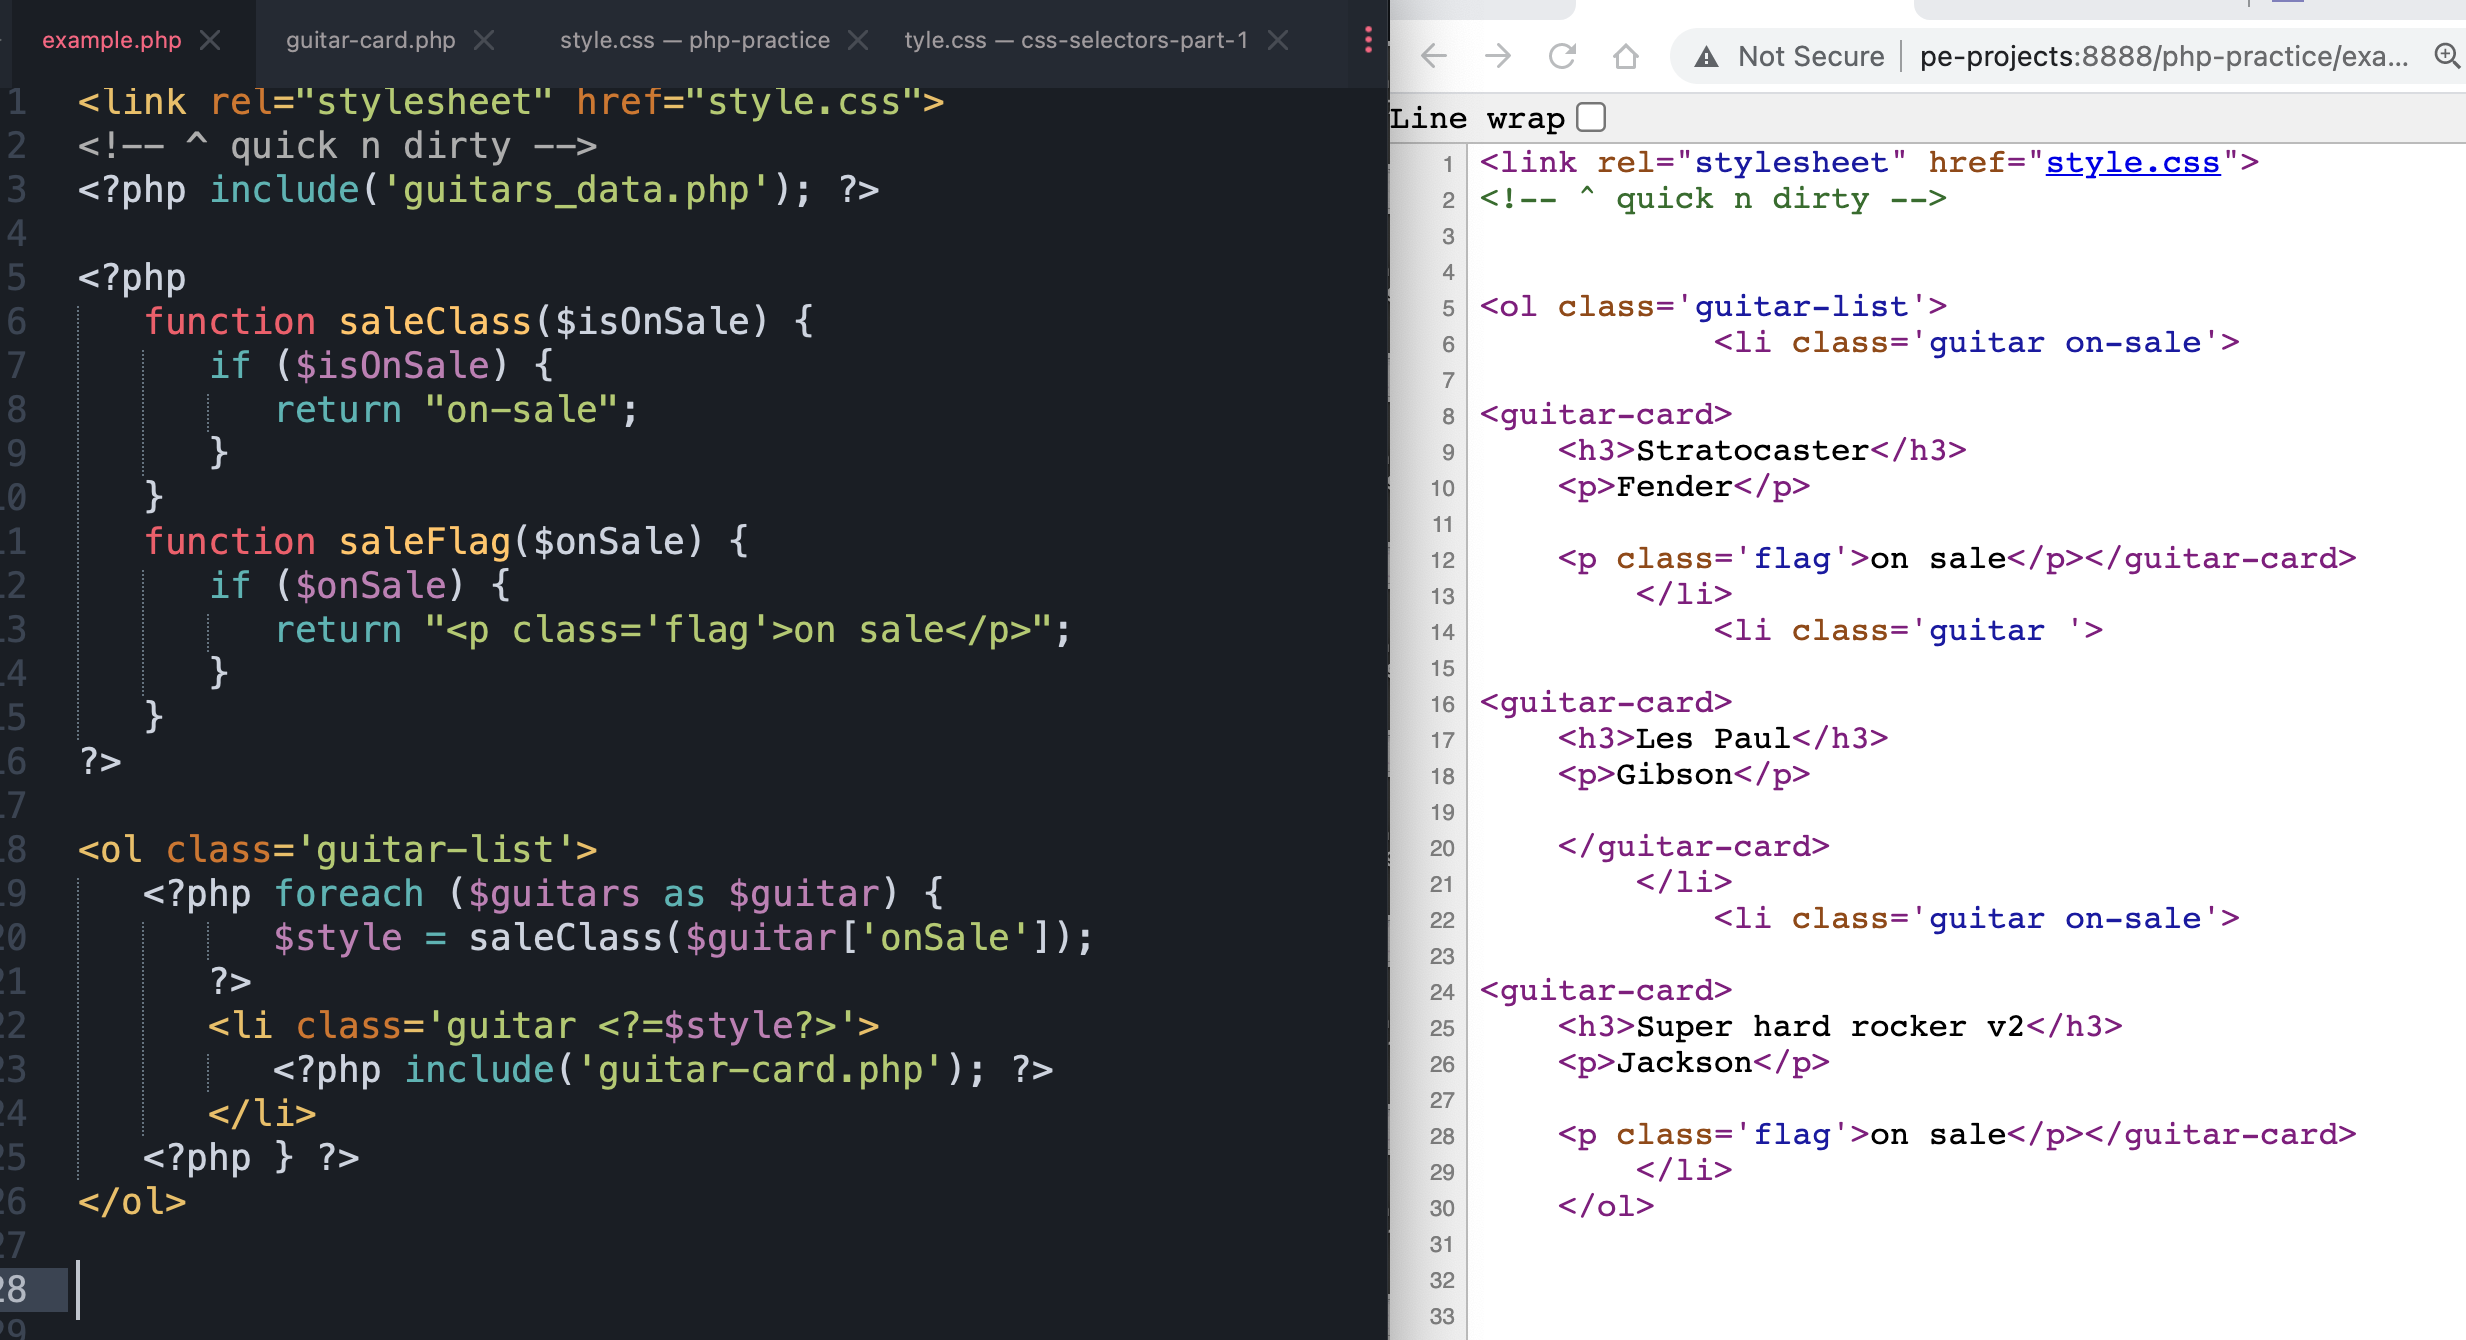
So, who knows if this is the best function name…. but here’s a function that could return a simple string.
Remember, you can mix PHP and HTML syntax in ANY way you want, as long as you follow the rules.
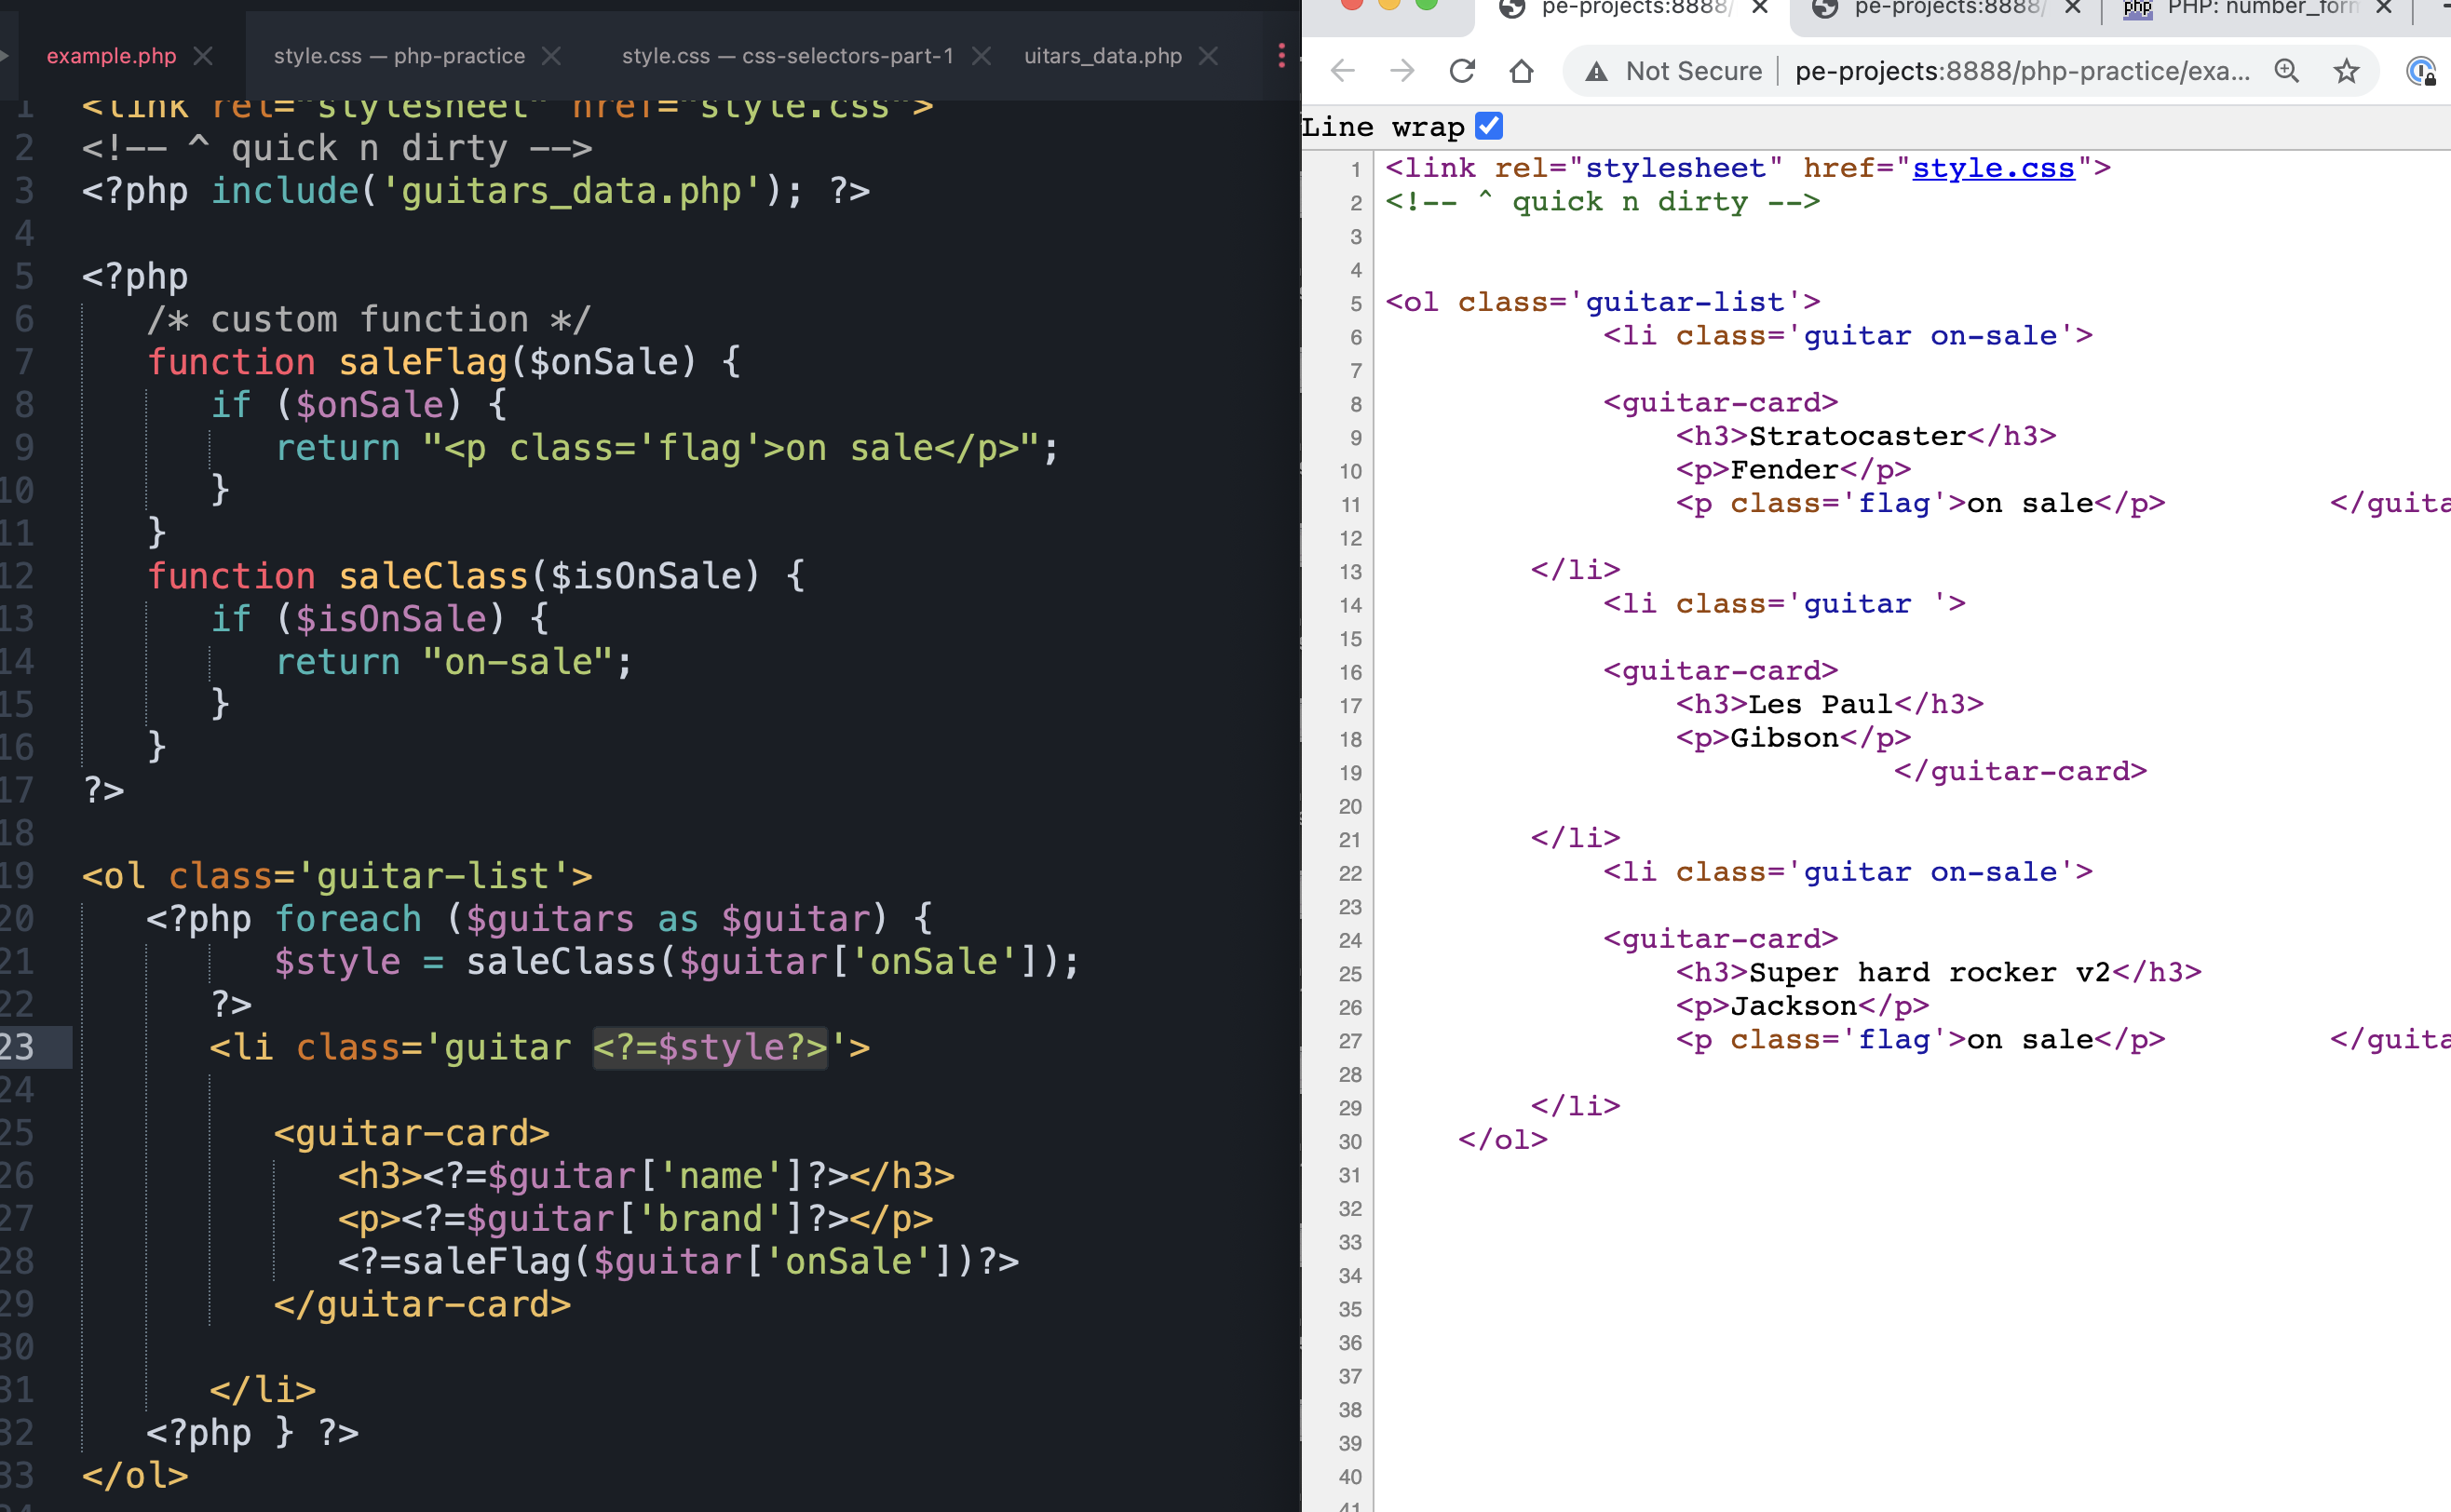
Note lines 14, 21, and 23.
If the guitar is on sale, then you can save that string ( “on-sale” ) to the variable $style.
There’s no reason you can’t echo that string into the class attribute. As long as you delimit the start and the end of where you’re going to write PHP, right? Check out the output. Pretty slick.
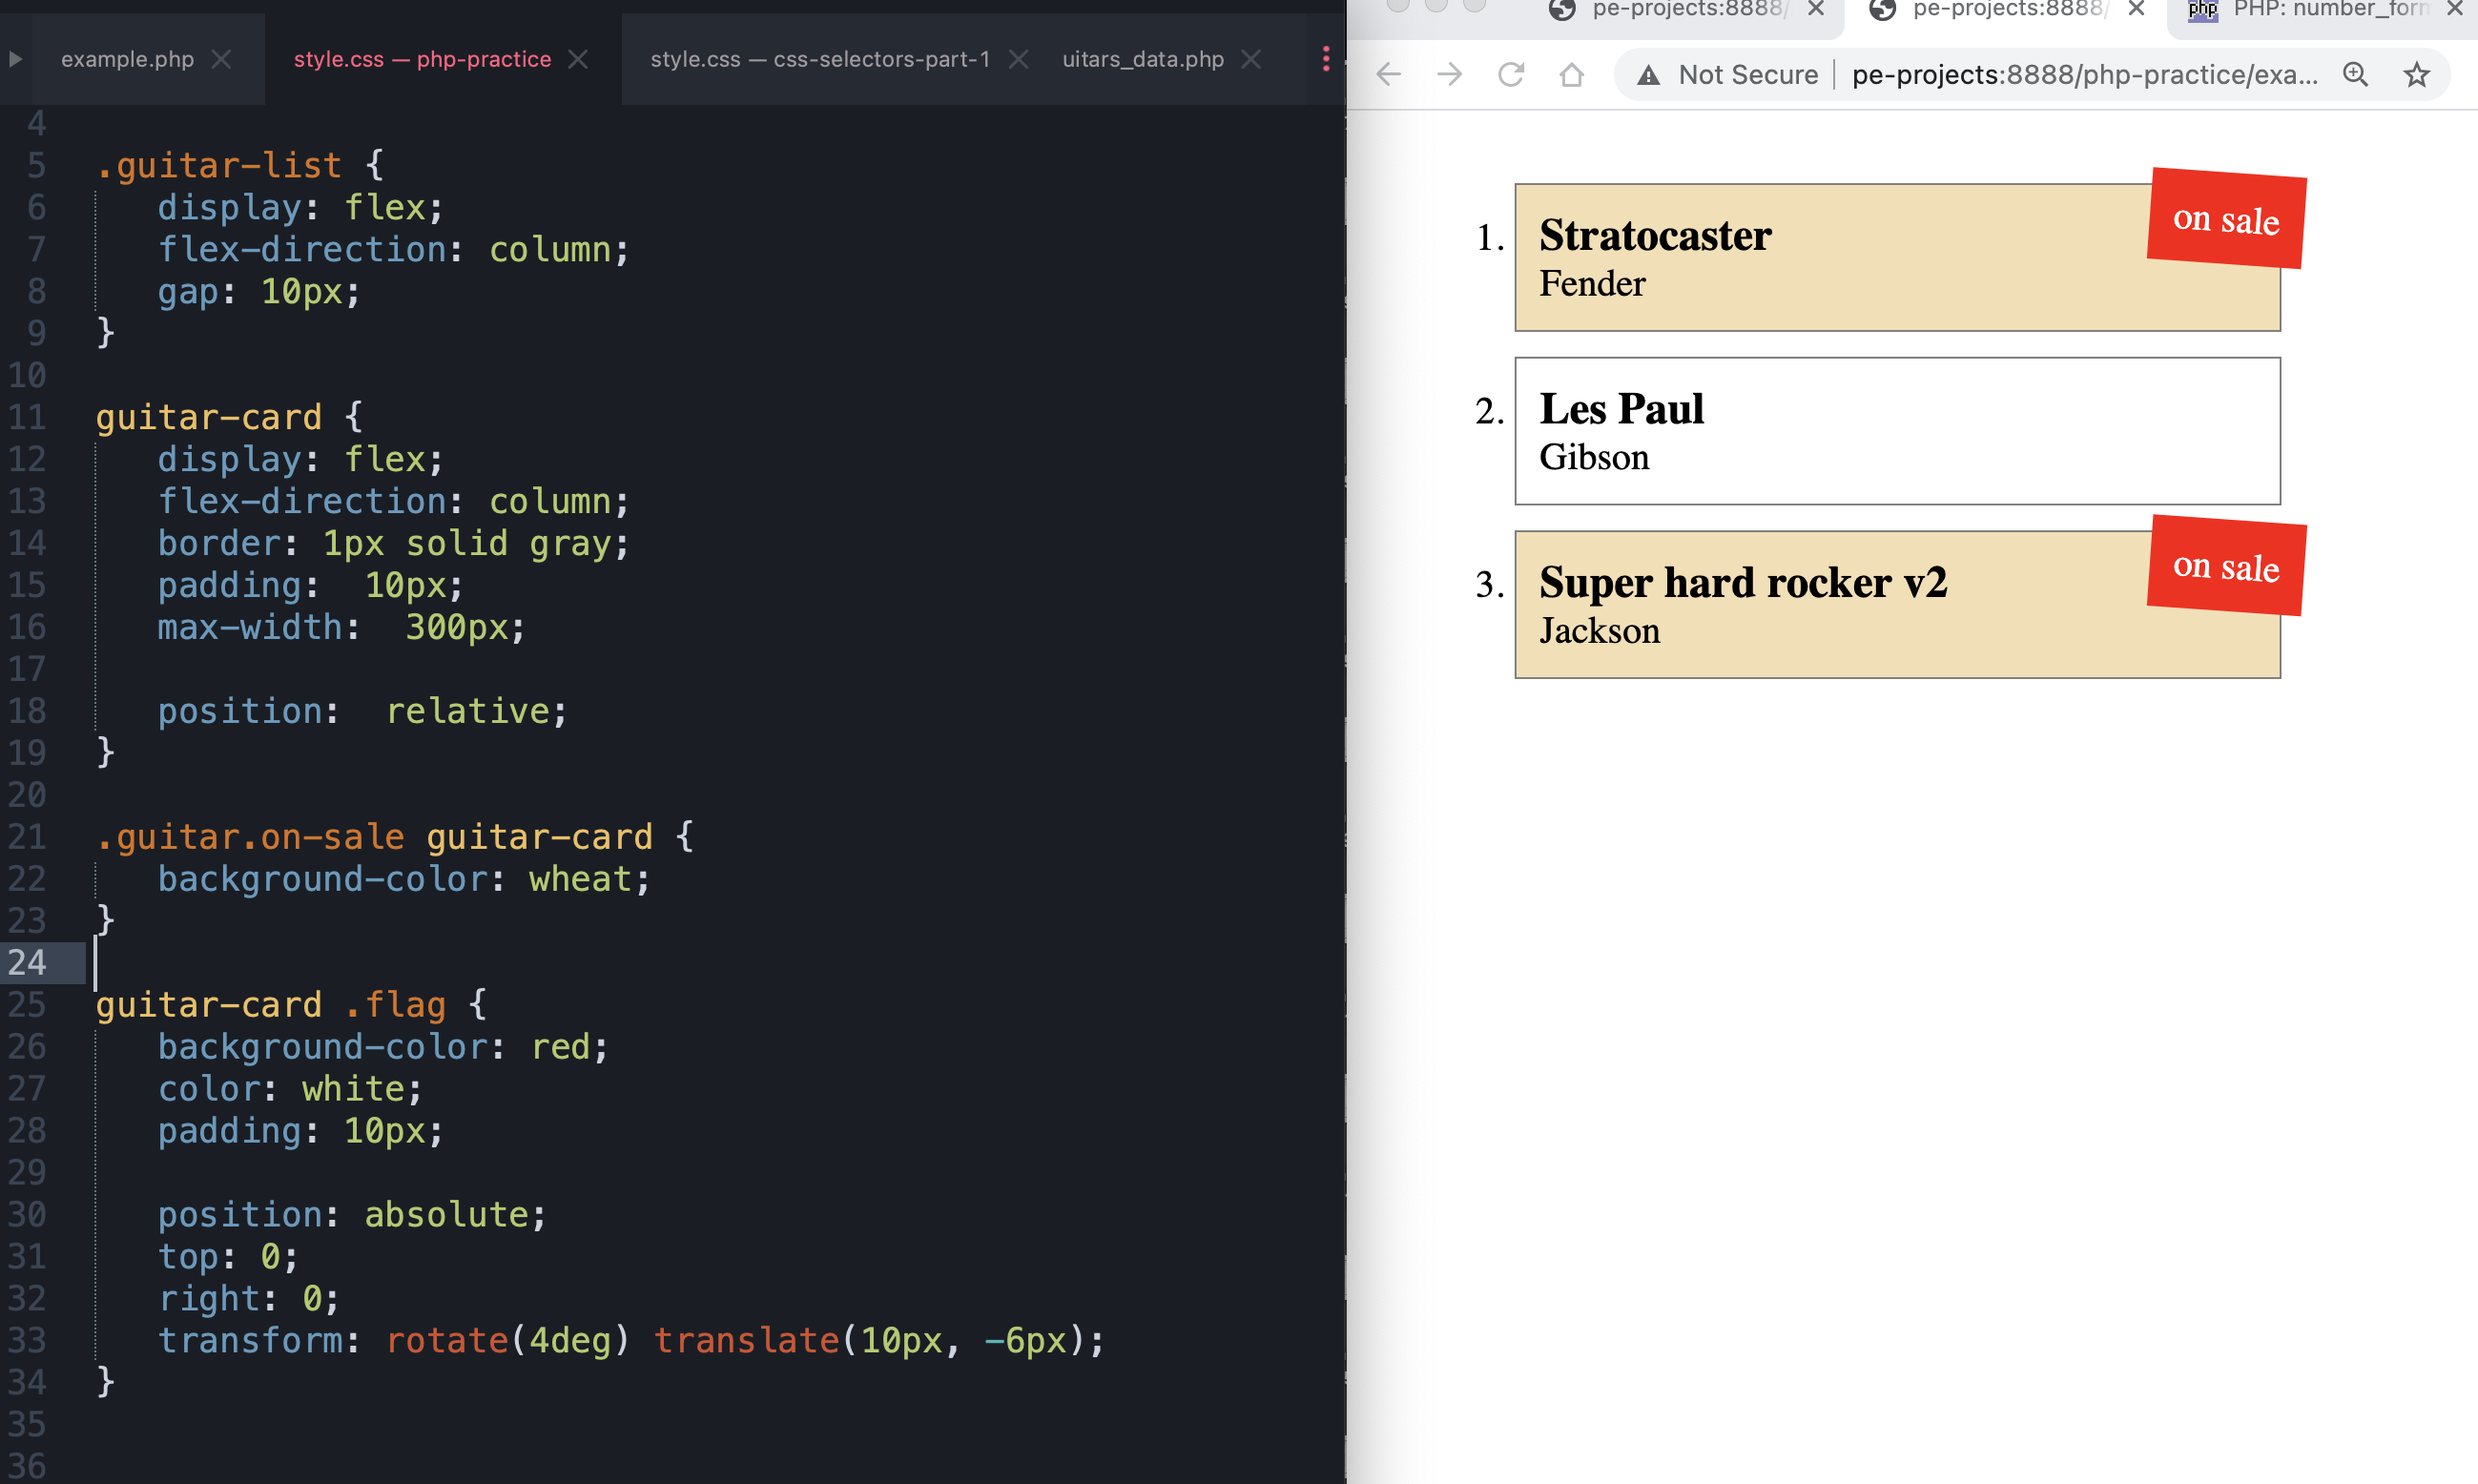
Here’s how we can use that ‘on-sale’ class to style the card differently / based on its state.
What next?
All that stuff is great. You can write it like that. It’s great. There’s no right way. But, there are ways to break things up into more pieces and that can be better or worse – depending on the situation. You don’t want to get caught up with premature optimization when you are learning. The most important part is understanding what the program is doing.
The next parts are some ways to break the files up.
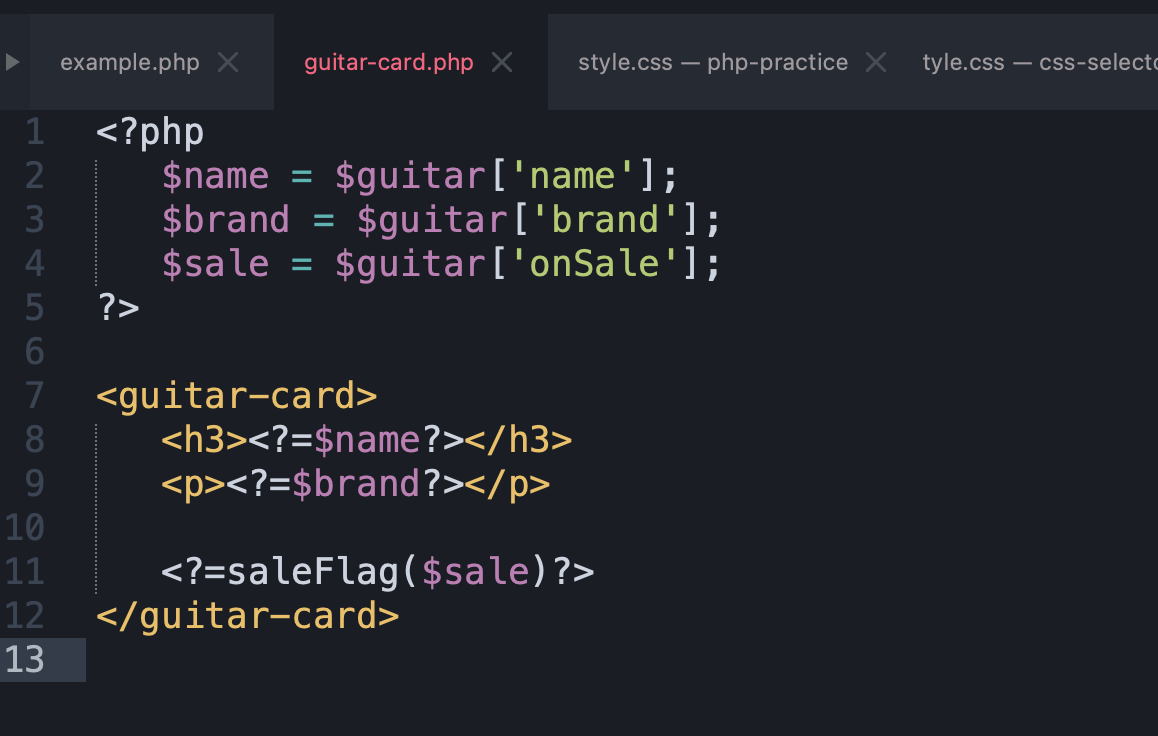
You could break the guitar-card template off into its own file (“partial”). Everything it needs… and nothing it doesn’t. You could also have a .css file just for this module. Two cute little files to work on. Almost as simple as the beginning of this project again! But – it could also just confuse you and make things harder to find. Eventually, this is what we’ll be working toward.
Then you would include that guitar-card file like this.
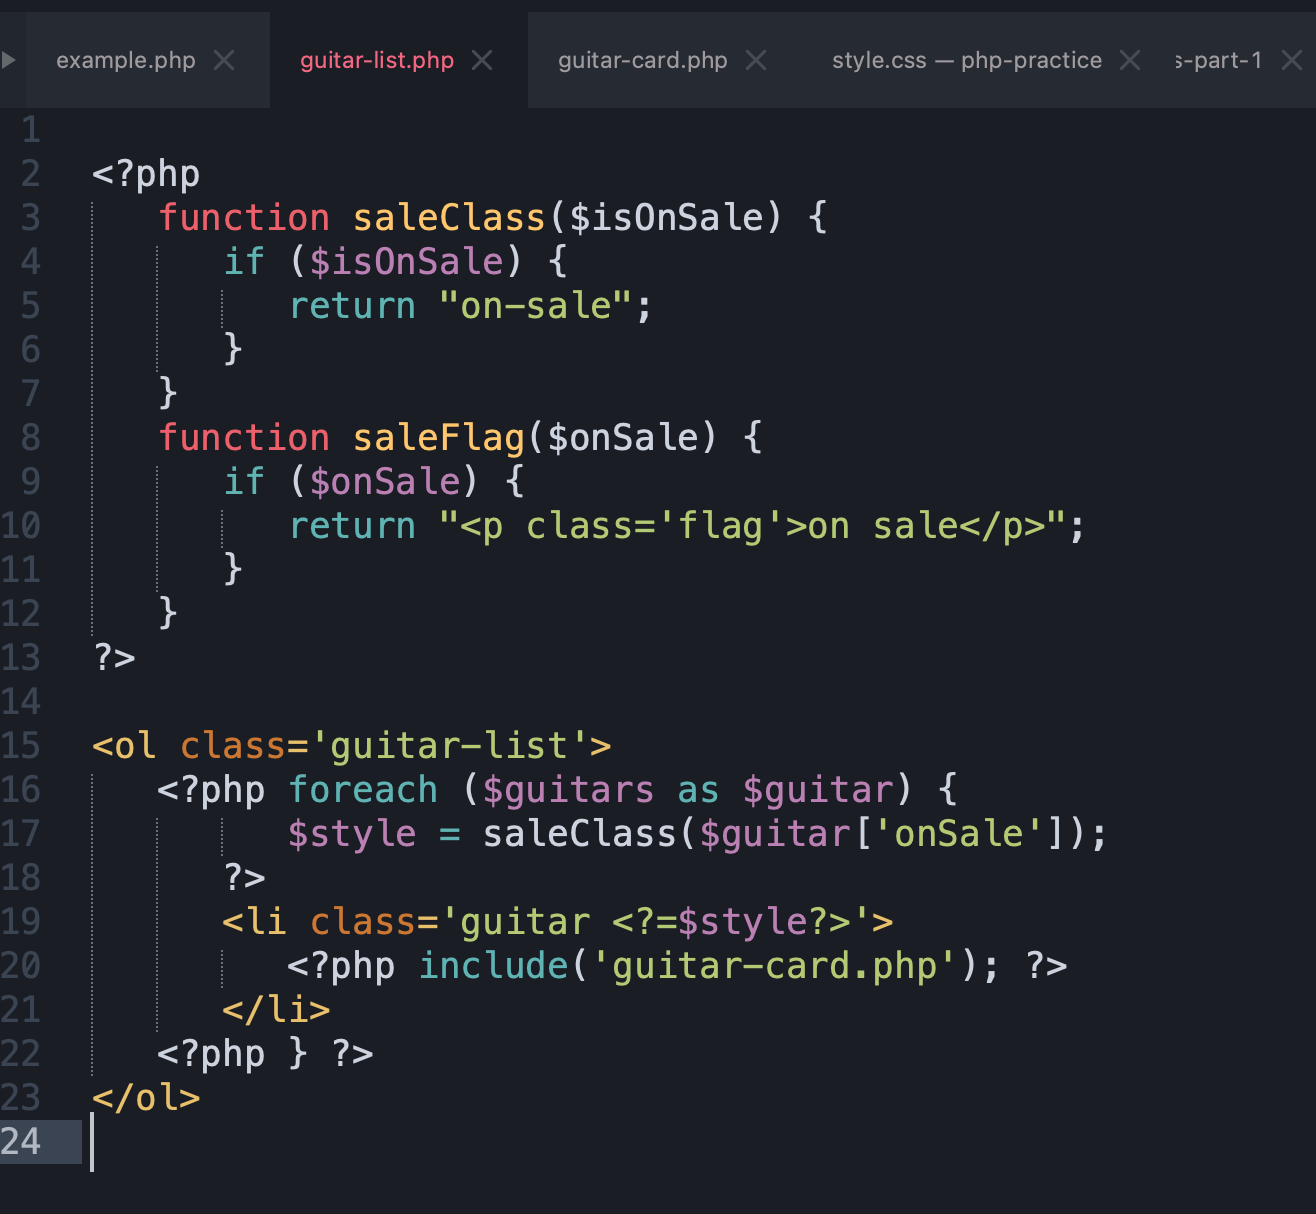
You could also break out the whole guitar list – into its own partial.
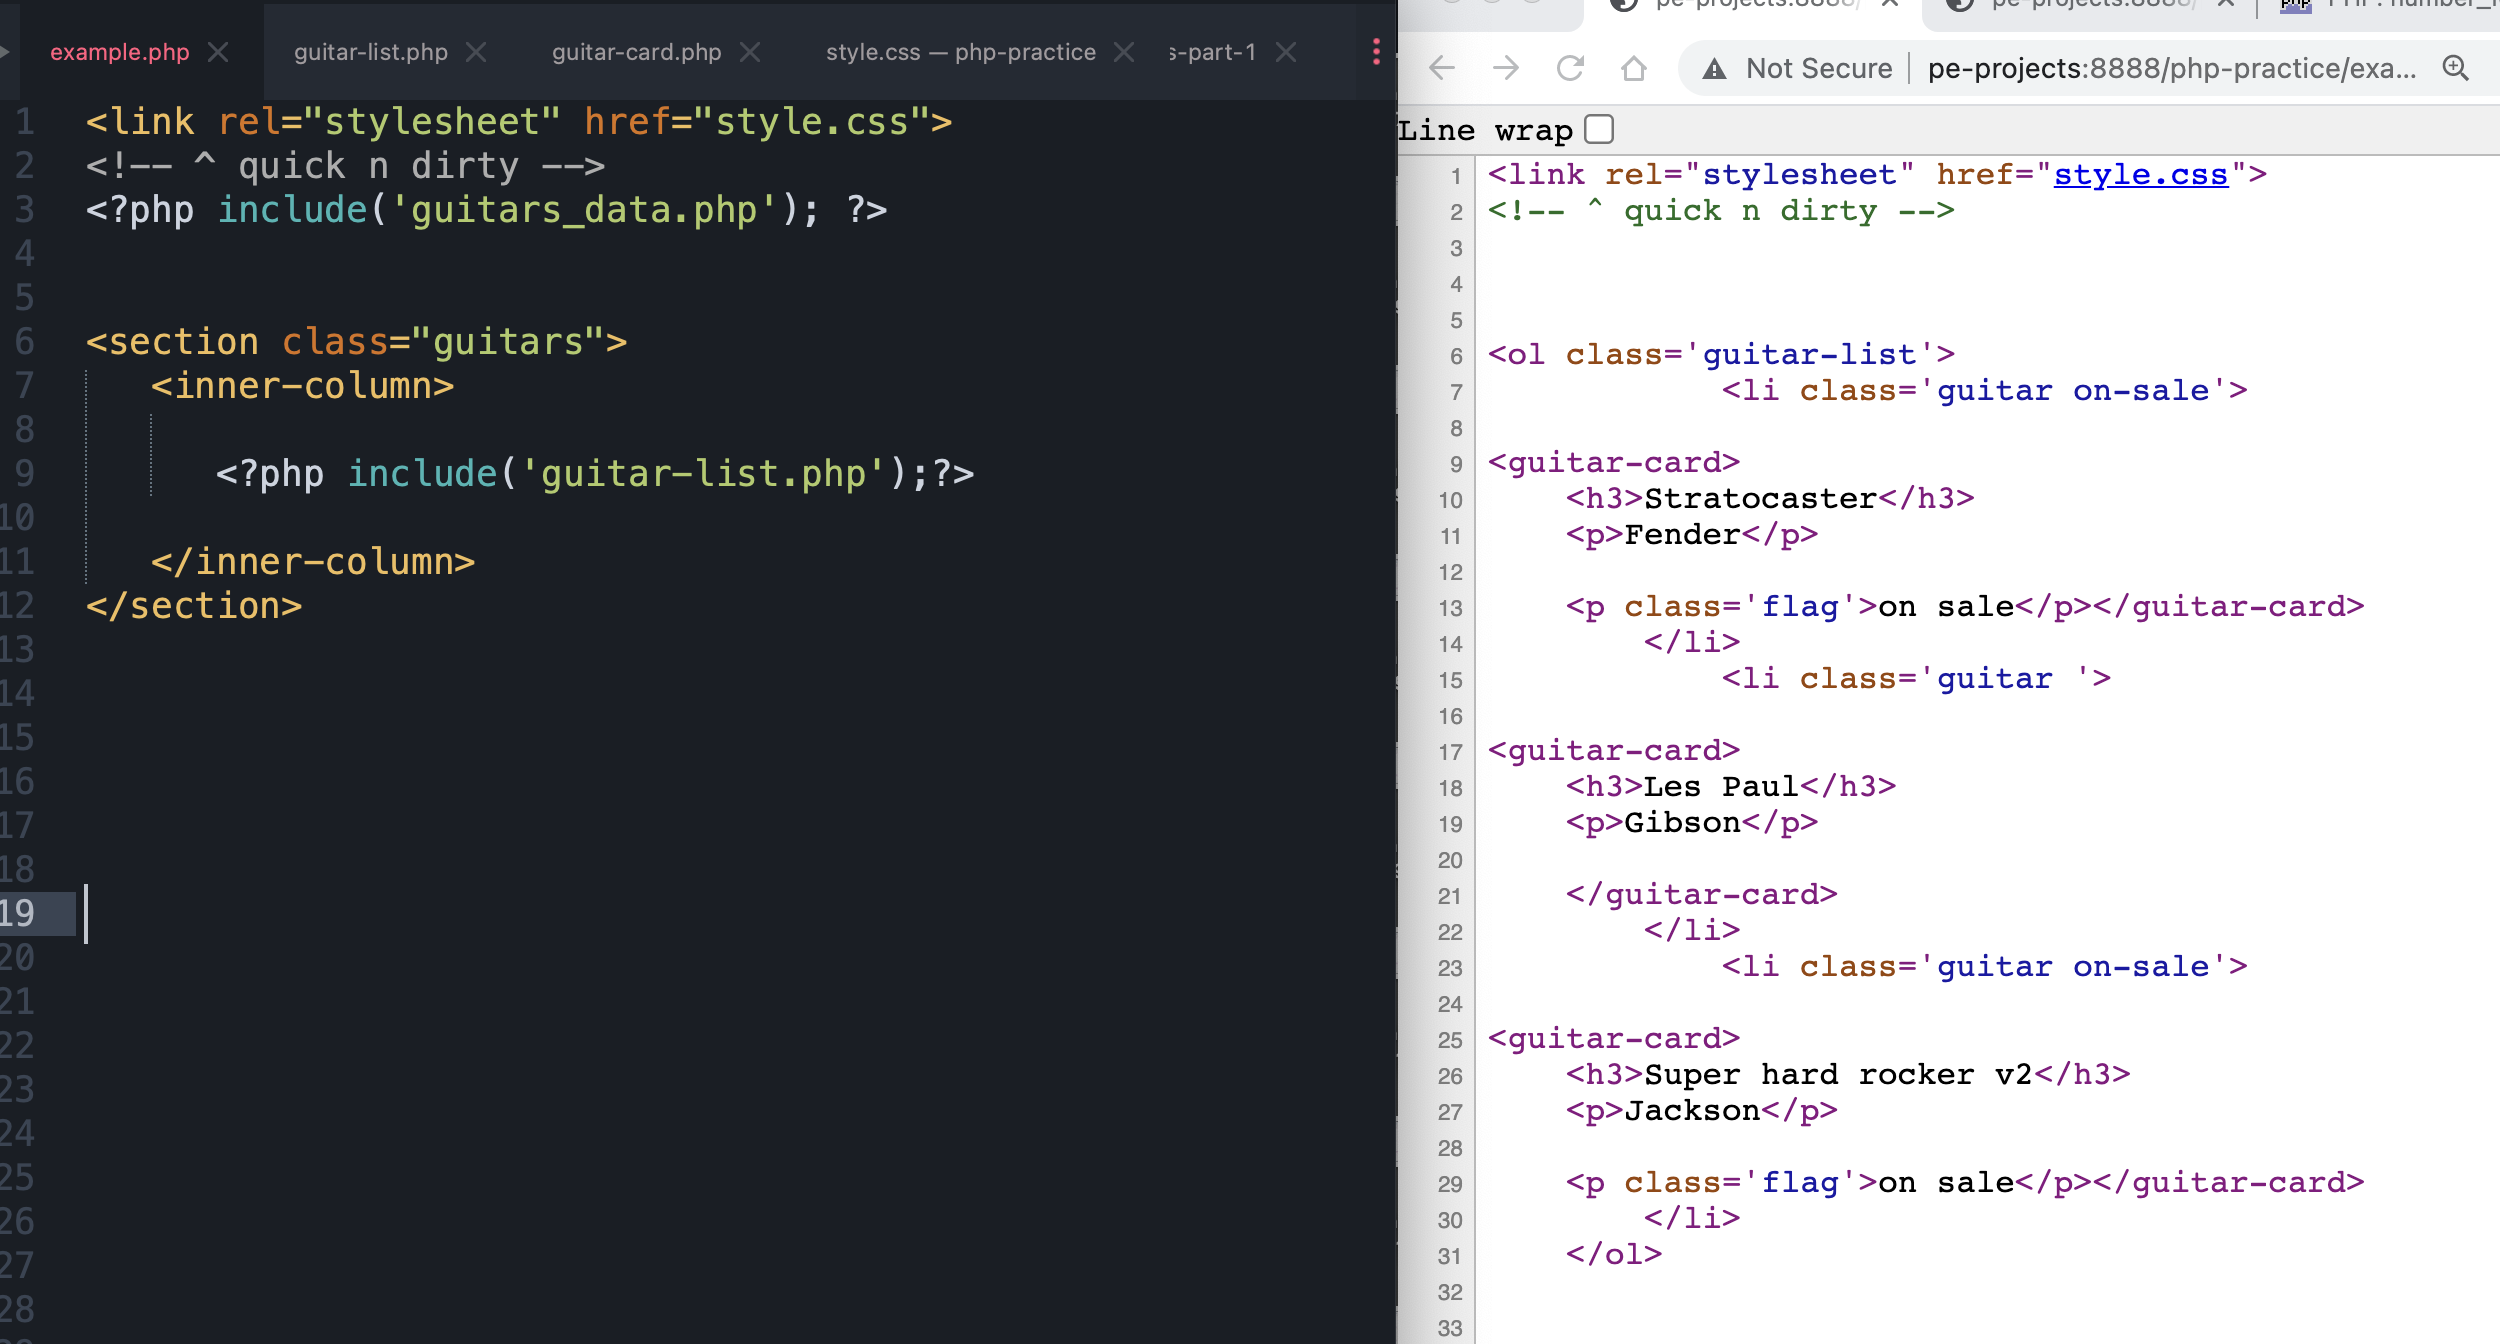
And then, finally – you can have your page markup – and just plop the whole abstracted “show the guitars” code in there like this.
Now, if you’re going to the guitars “page” you can go there… or the “list” or the “card” – and have full control over what scope of the code you are engaging with.
This is really helpful for team collaboration. This way – everyone isn’t working in the same file. You can just work in the areas that matter, and it’s easy to track and commit changes to the larger codebase.
This is just a visual primer to get some practice reading code, so – if it’s confusing – then ask for help – and we’ll have plenty of PHP projects to help cement the concepts. : )