Alphanet PHP planning walkthrough
Hi, there. You're not logged in. So, you must be a visitor. Welcome!
What is this? You are viewing one of our supplemental "Stories." In addition to our core design curriculum, we are constantly building out additional resources. Stories are a collection of real work tasks, design history, UX explorations, and work-throughs. Stories are often off-the-cuff and less concerned with production value.
Introduction
This project is kinda a TEST – but there’s no right answer. It just has to get done. That could happen in many different ways / and in any order. Some are better than others. ALL of the ways / are good to see and compare. So, that’s the goal.
Even if you wrote the whole thing in HTML (and got it done) / and even if it had no styling — then you’d have something that was complete. You can always refactor something that is working.
Here is how Tara and Derek paired up and went through the process. Tara was decision-maker for most of it and Derek typed what she wanted. (He also did most of the refactoring towards the end)
You aren’t expected to understand everything here / but this is one version of the journey.
Derek: What should we do?
Tara: Uh… how about this:
Derek: OK now what?
(repeat for 2 hours)
Here was the assignment
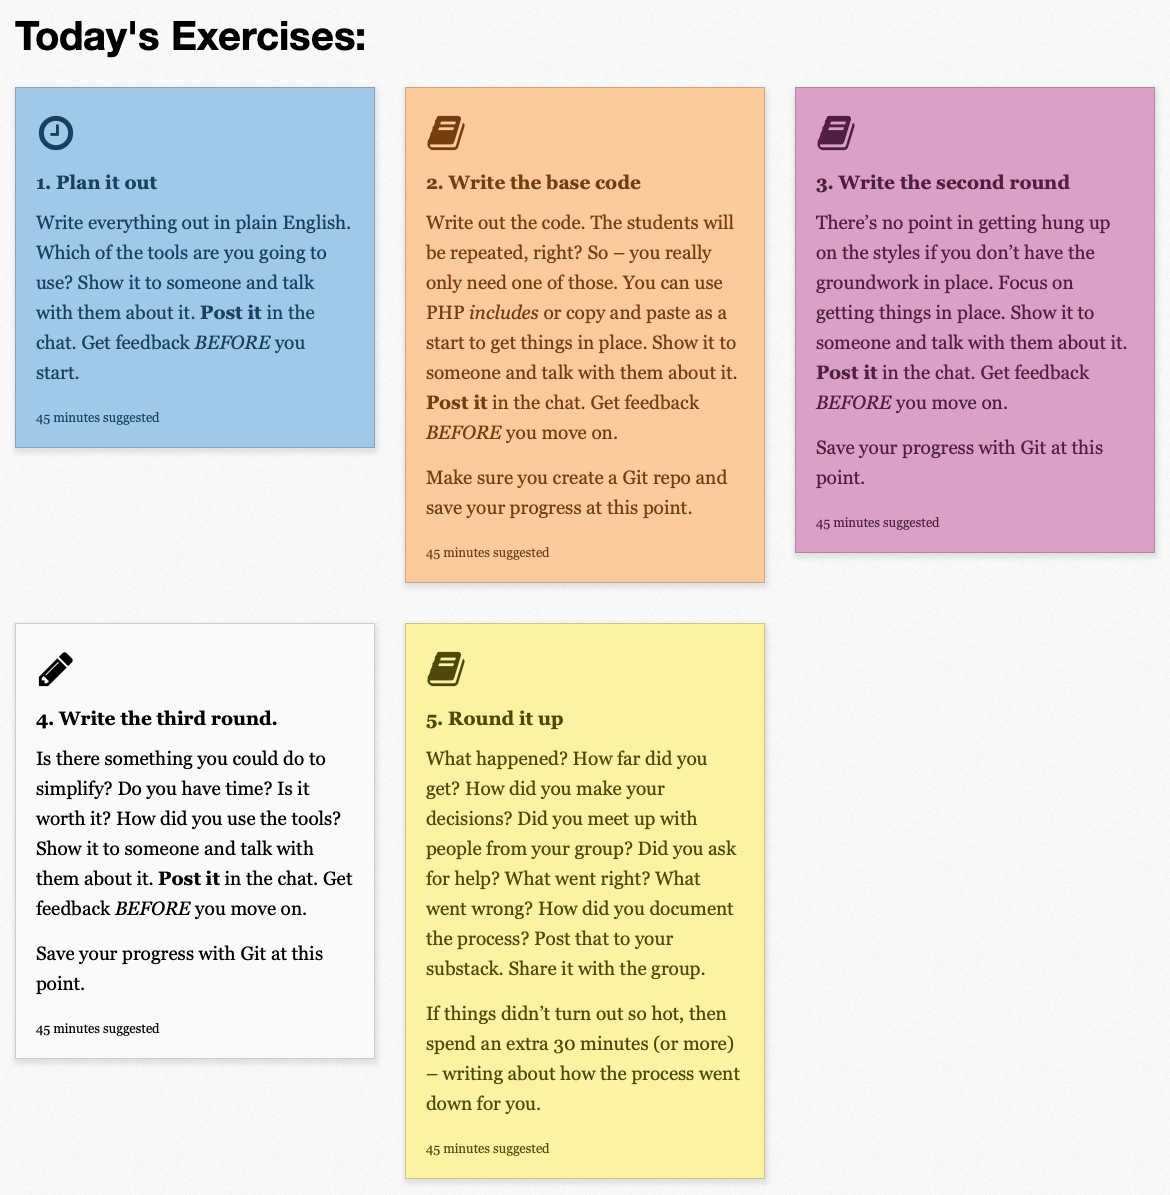
There were 14 steps
Did you see them up there? Listed out in the exercises?
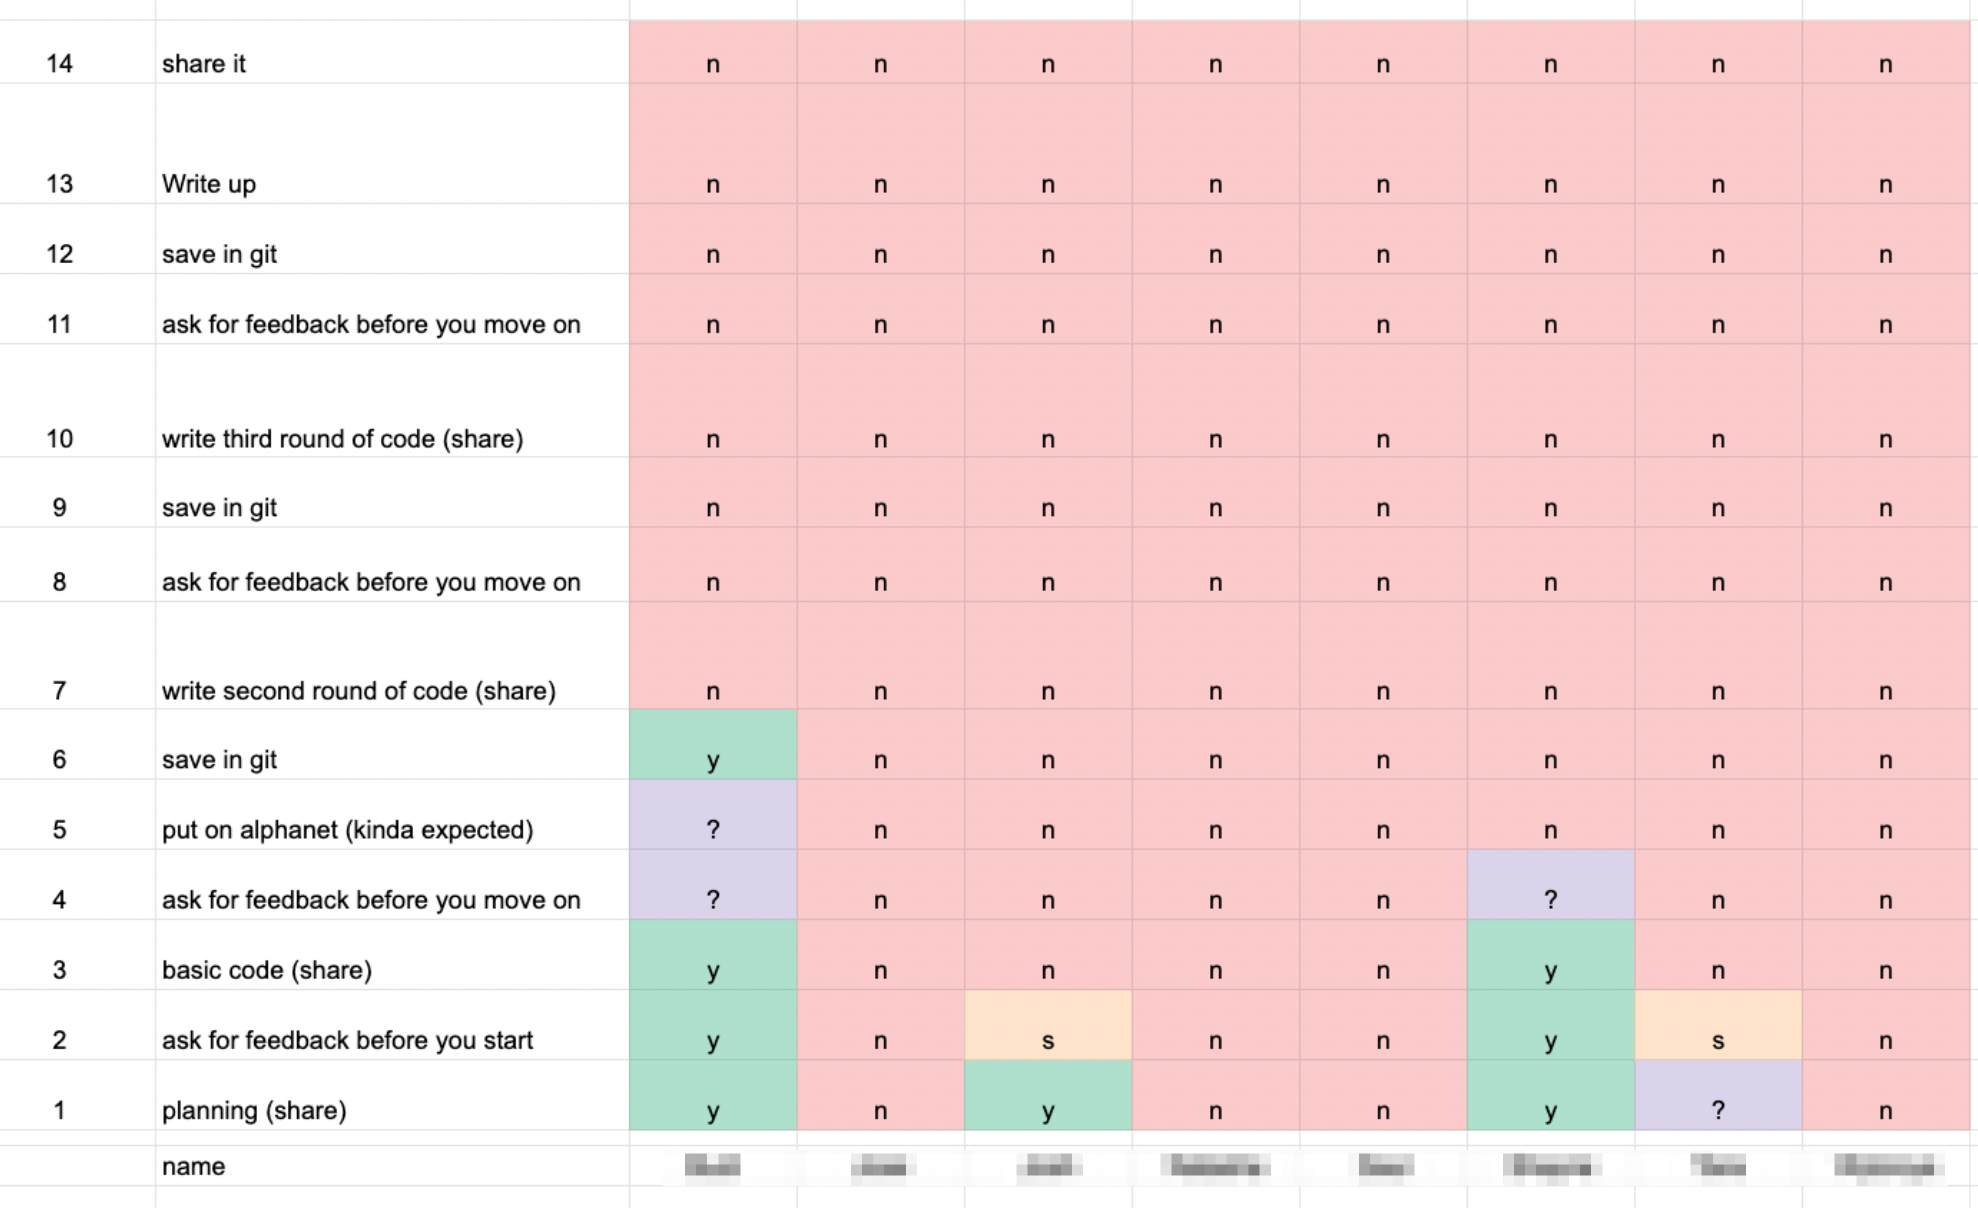
Here’s how one of the groups faired. So, – something went wrong.
Let’s figure out what happened – or didn’t happen.
Planning?
Where should you do your planning? What is easy? What creates more work? What is better in the long run. You have 1 minute to decide 😉
How about this sticky note?
“What do we need to make?”
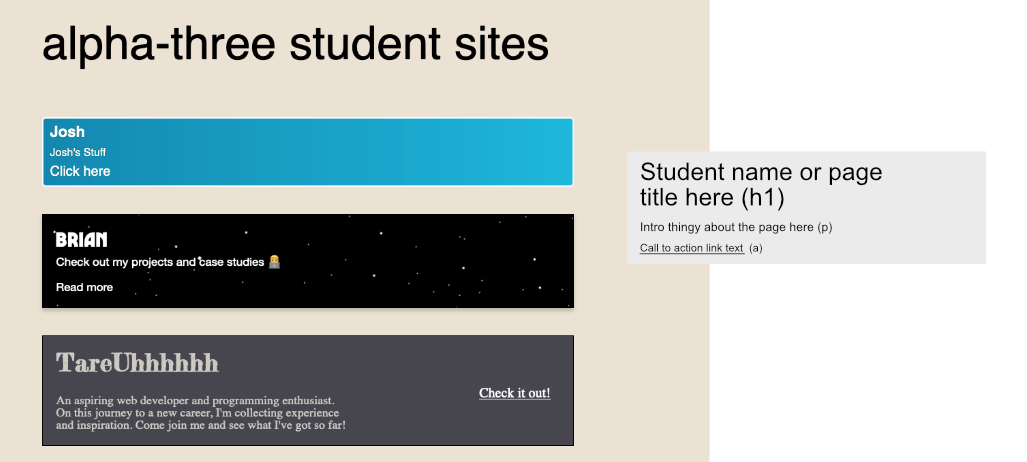
Tara looked at the current version of the site – and noted the things on it.
Or
You could just jump into a code editor and make your notes there.
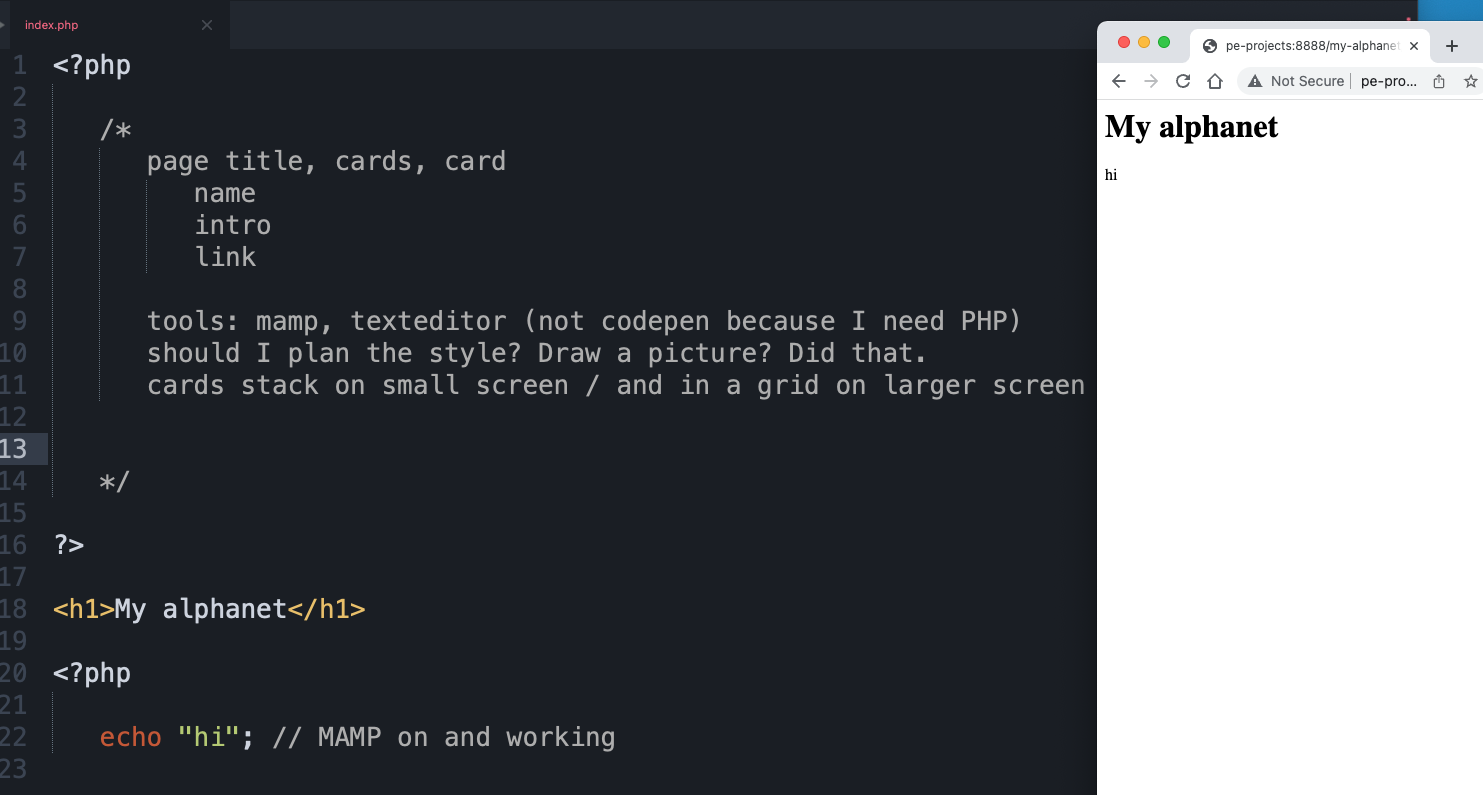
Tara was going to start with an HTML file / but Derek suggested that since they’d be using PHP – that they’d may as well start with a PHP file.
“What will we need to do that?”
Tara knew to start MAMP and how to navigate to the server to see the document in the browser.
A quick sanity check with an echo to make sure it worked.
“Tools” could mean apps – but also consider “lists” “data” “loops” and “templates” and “functions” and other concepts that might help.
Get feedback
This is a good time to show where you’re at. It might help other people, or – people may have suggestions for your – or questions.
Should we draw a picture?
I don’t know. Should we? Well – It’ll be faster to draw one than to try and decide (in this case).
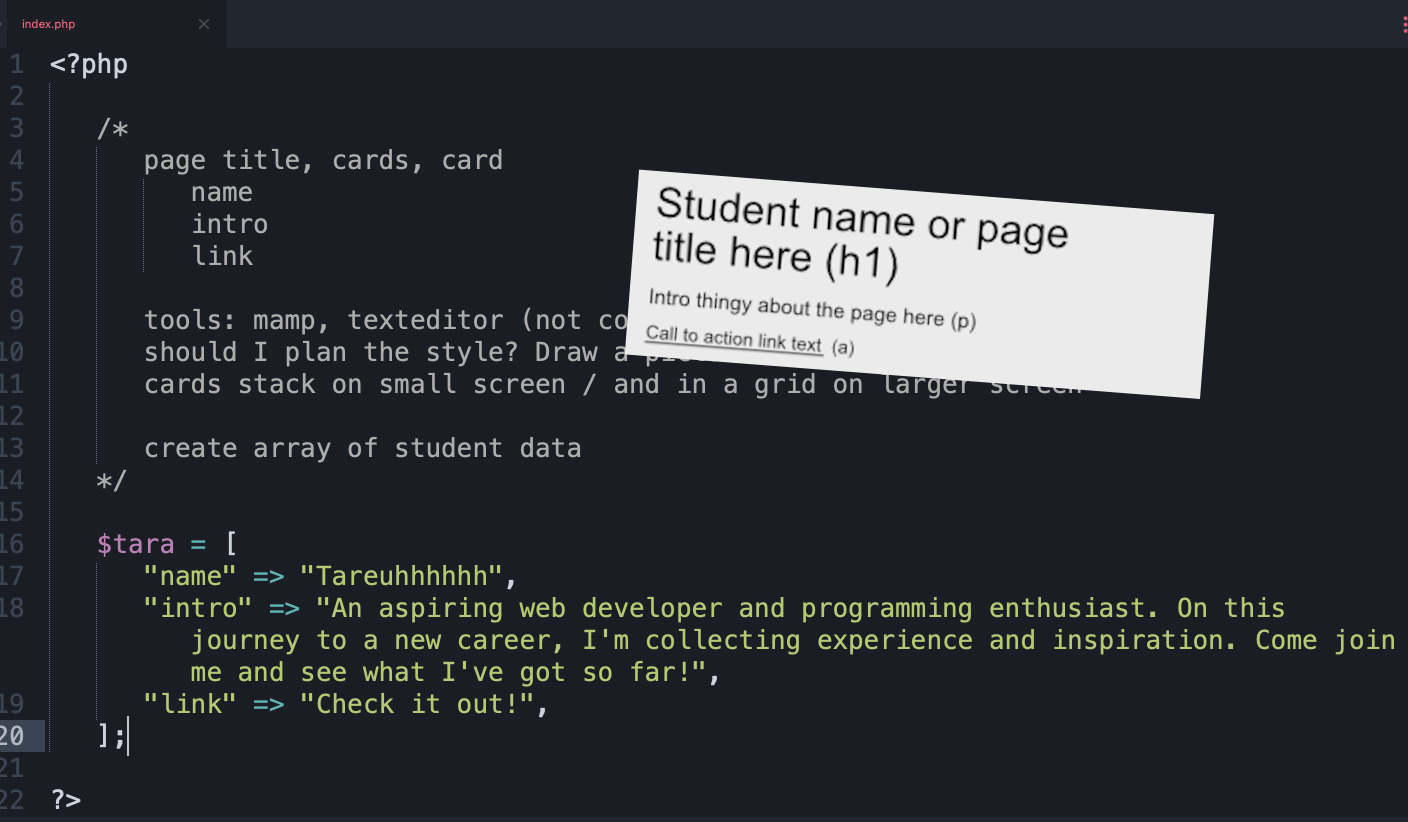
Tara suggested we use Affinity Designer. Derek took a screenshot of the current site and dragged it in to use as a reference.
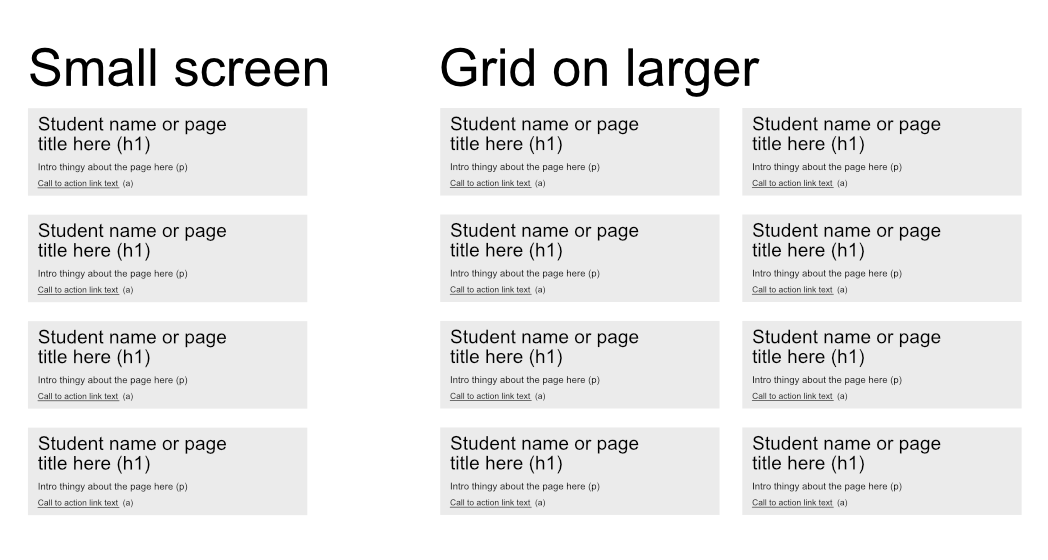
Here’s the data. And you can think about the elements you’ll need for the HTML while you’re at it.
Layout
It doesn’t really matter. The HTML is the content. You can always style it however you want later / but also – knowing what you’re going for might change how you structure your markup.
Elements
Maybe it’s a list and items. Either way, you can see that this could be a grid. There’s a parent element and a bunch of the same child elements. As you practice, this will become so familiar that you’ll skip drawing it out.
Break
Maybe you want to try some things before moving on? Here’s your chance.
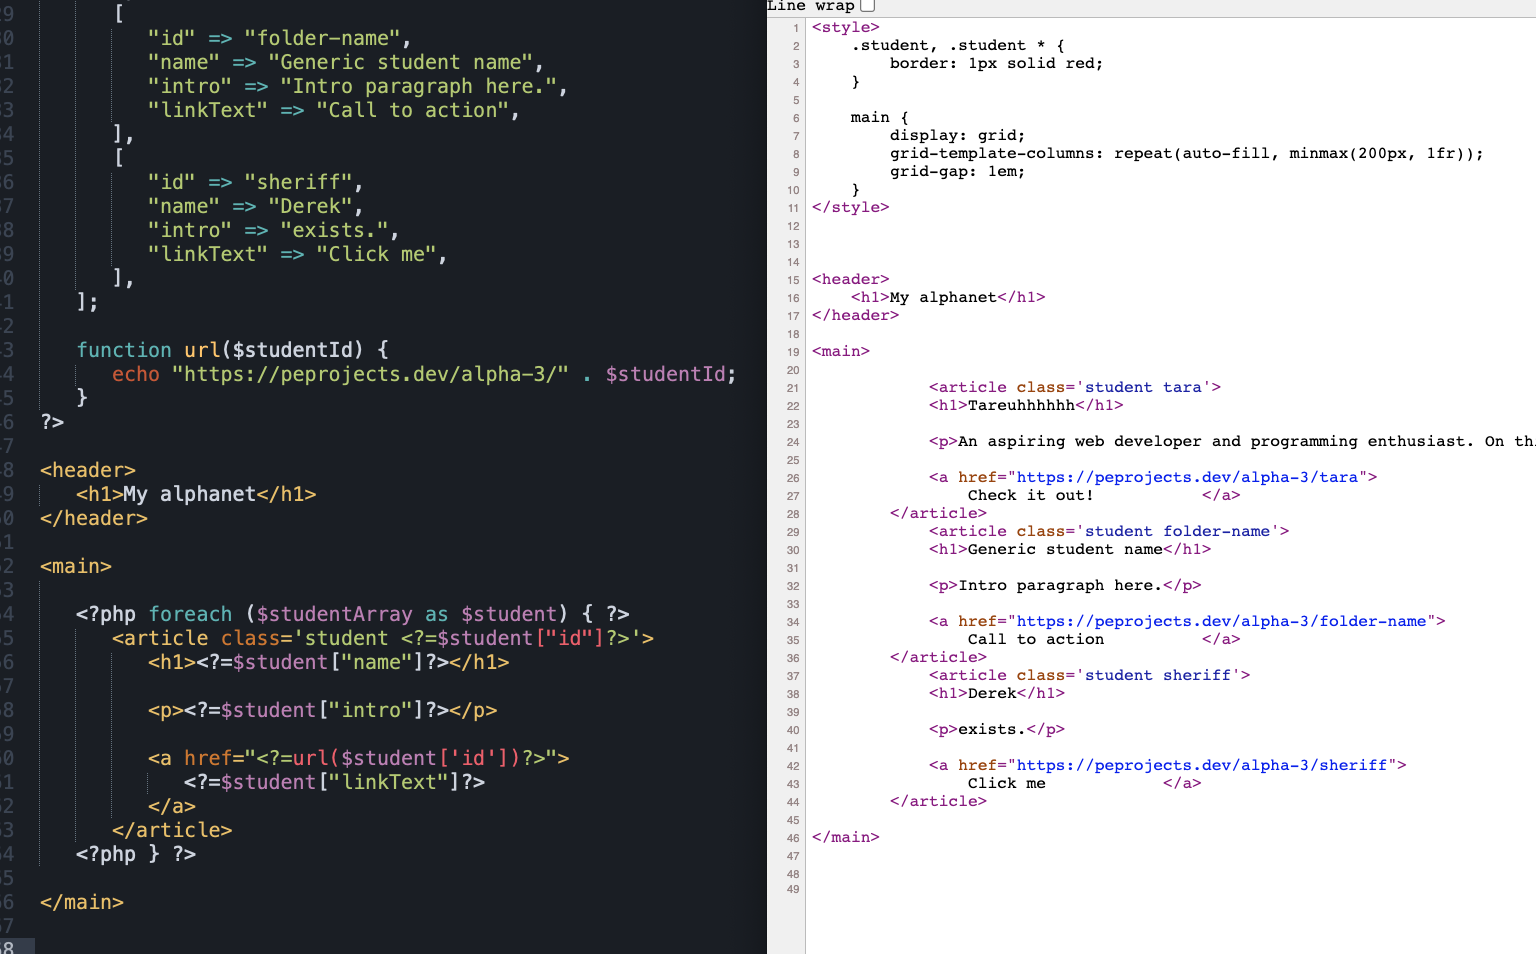
Data
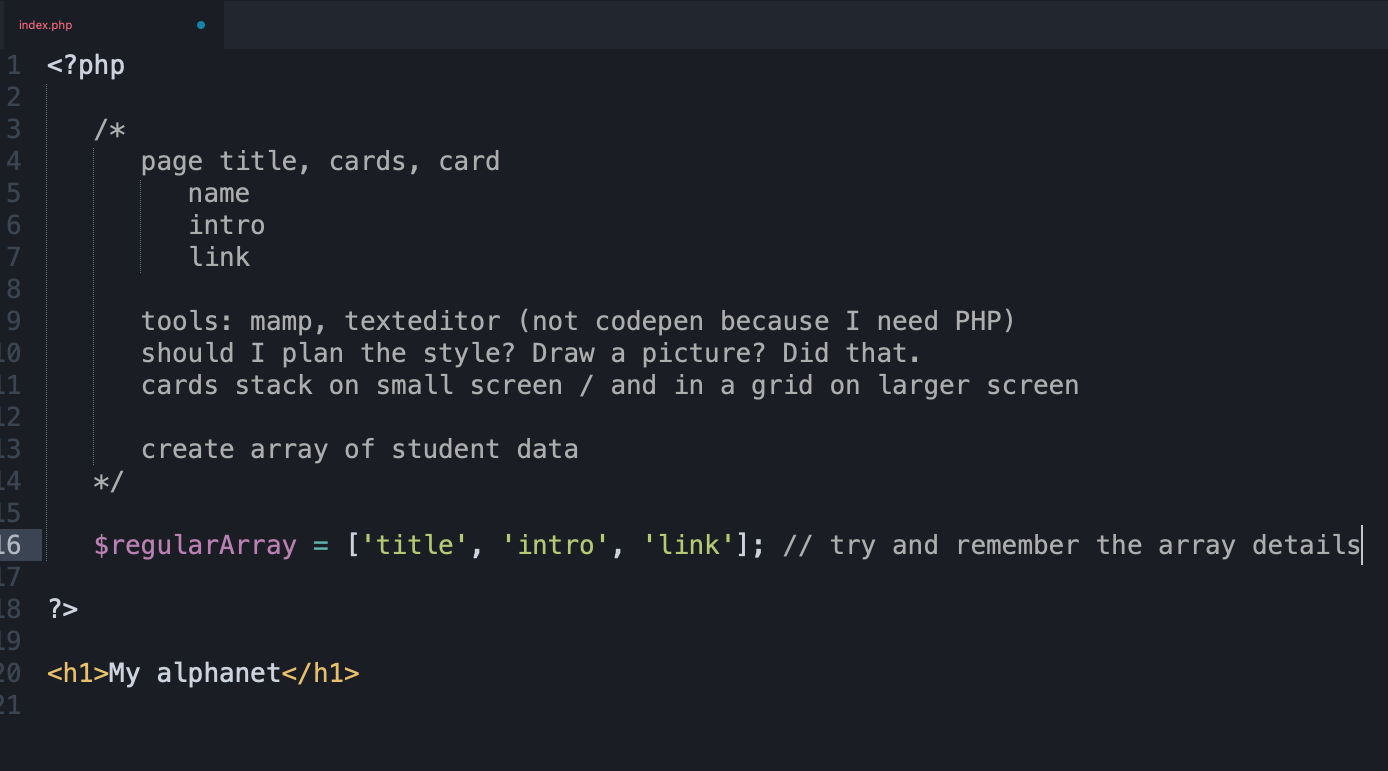
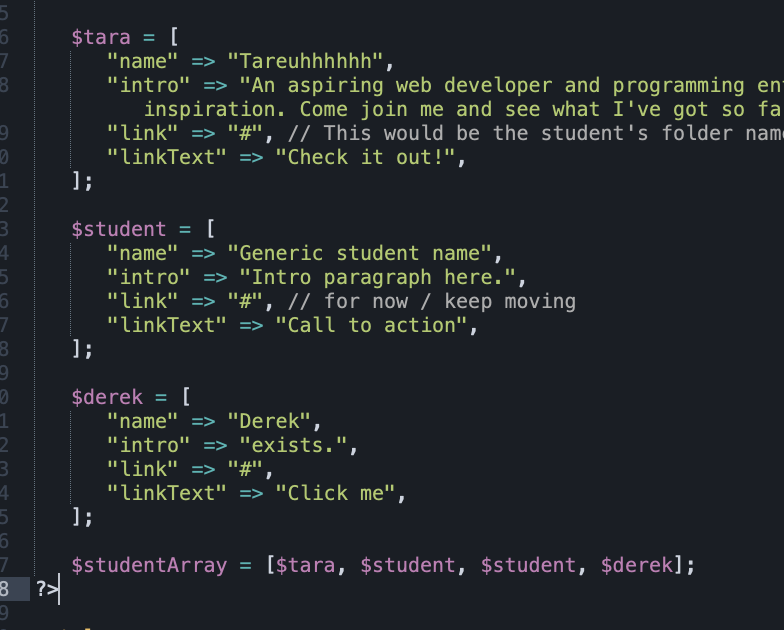
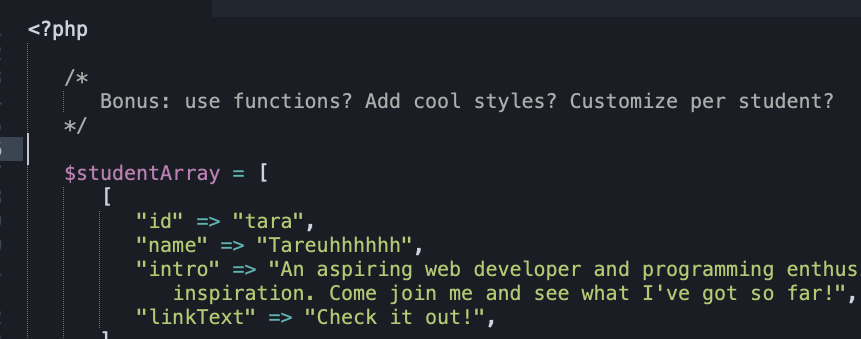
Tara suggested we work out the data. She wasn’t super confident with how the data would work. She knew it was an “associative array” or something.
In moments like this, you can take a step or two back to something you are comfortable with. Here we went over a basic array (list) of strings. That help orient things a bit.
Data "shape"
Who knows why people call it that… but what is the shape of the data? What does the data structure look like? In this case, it’s just one layer deep. It’s just a few key:value pairs.
You can “mock” it out and just try things.
Feedback
This is a great time to check in. “Does this look good? Anything else to consider? What you all use for the keynames?”
It also might be a good time to create a Git repo and commit the state of things. You could push that repo to the cloud / and then share a link too. This way, other students could comment on your code on Github.
Generic data
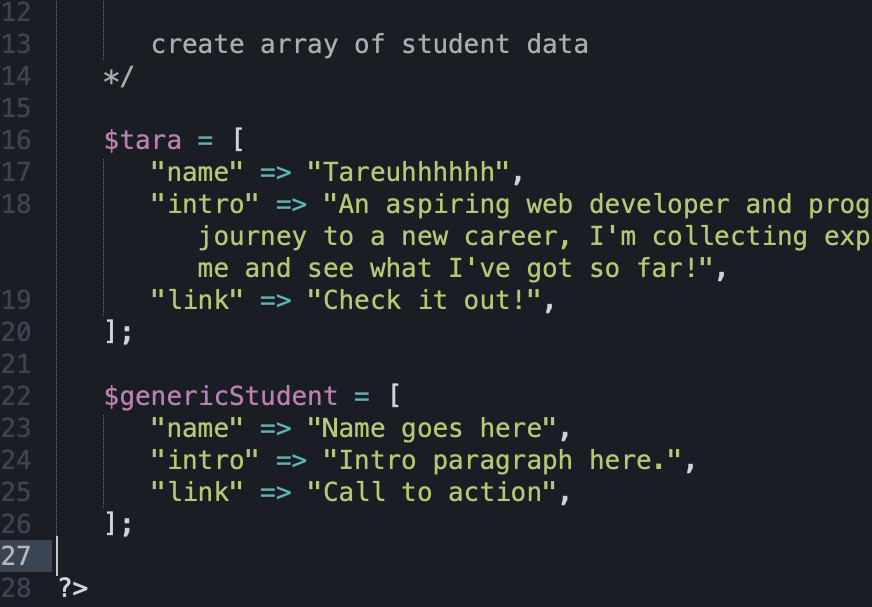
If it’s going to repeat, then what is some general data to use? What if the names are looooonnnng. What if the paragraphs are short? Or long? Are there things that some people have / and others do not? Write more out so you can see the pattens.
Many students in one structure
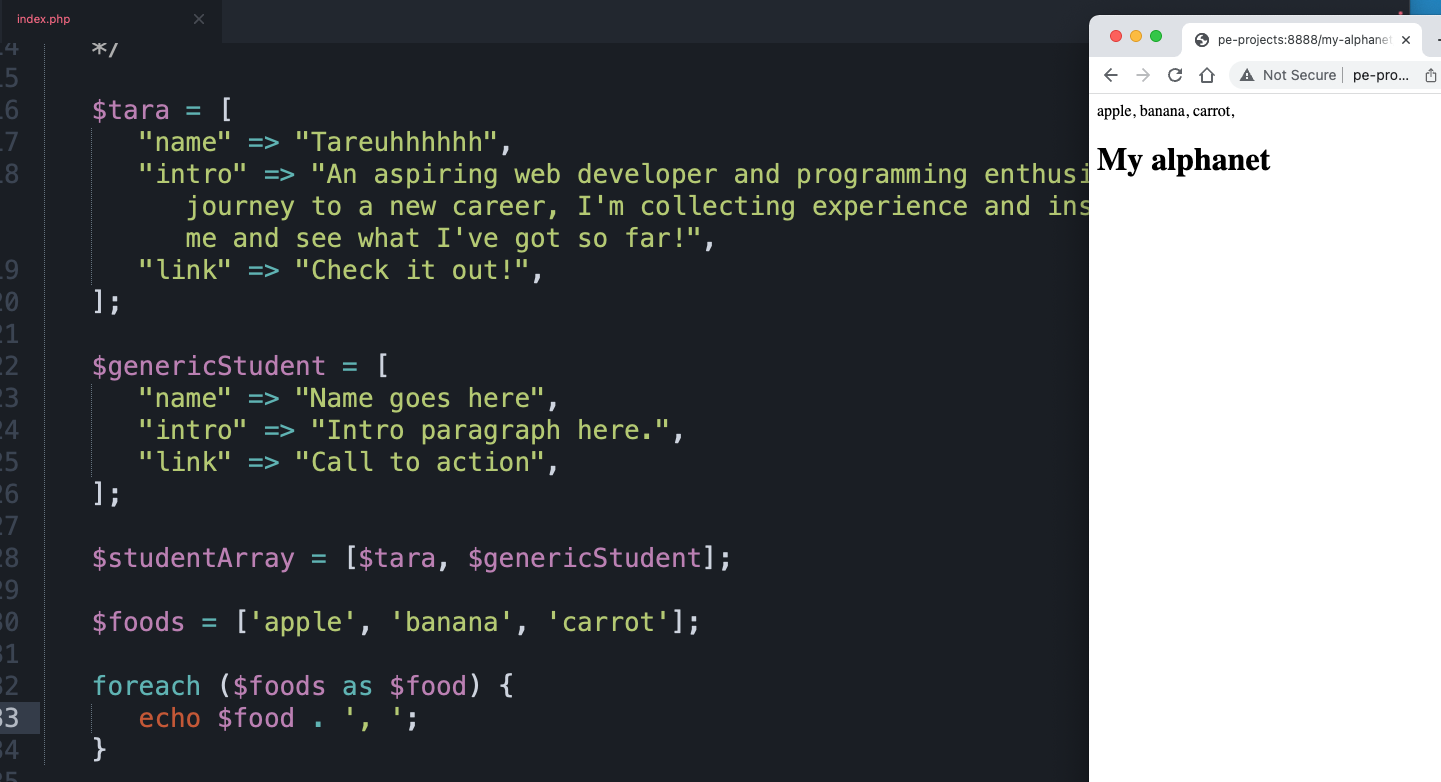
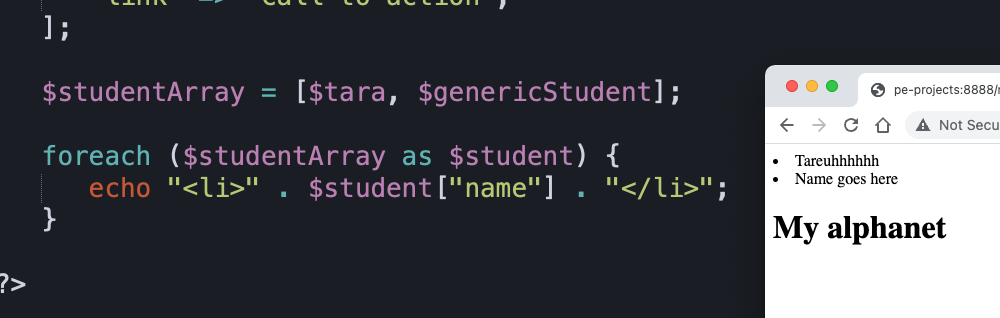
Here’s one way to get the students into an array.
But Tara wasn’t so sure how to loop through them. (the associative array things ARE kinda ugly and confusing)
So, – again: back to something more basic. How about a regular ol’ array and trying to loop through that. She remembered the syntax. It works!
Nested keys
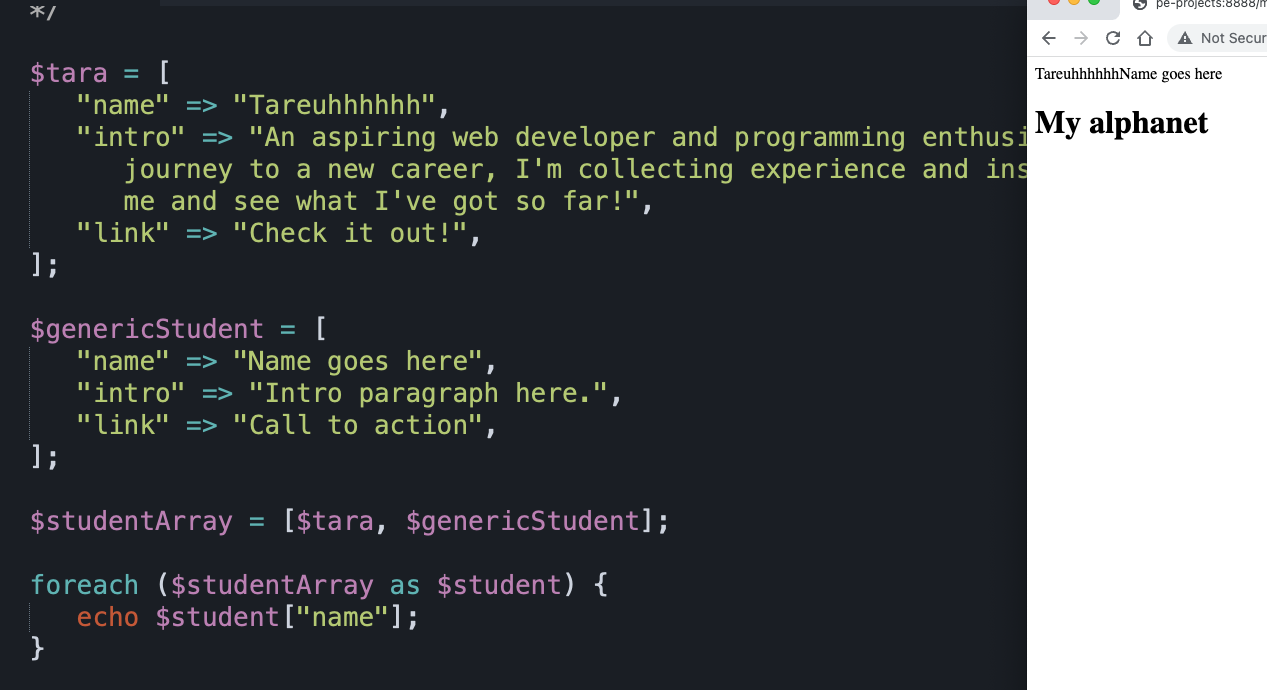
At first, she expected to be able to call “name” – without drilling into the $student in the loop.
The loop is essentially a block of code that runs over and over for every item in a list. The list item is represented by what the the “as $item” is. You don’t have to use the $student nessesariy. You could just run the block of code based on the number of students if you wanted. But in this case, we definitely needed the data from the student.
Break
Maybe you want to try some things before moving on? Here’s your chance.
Mixing it up
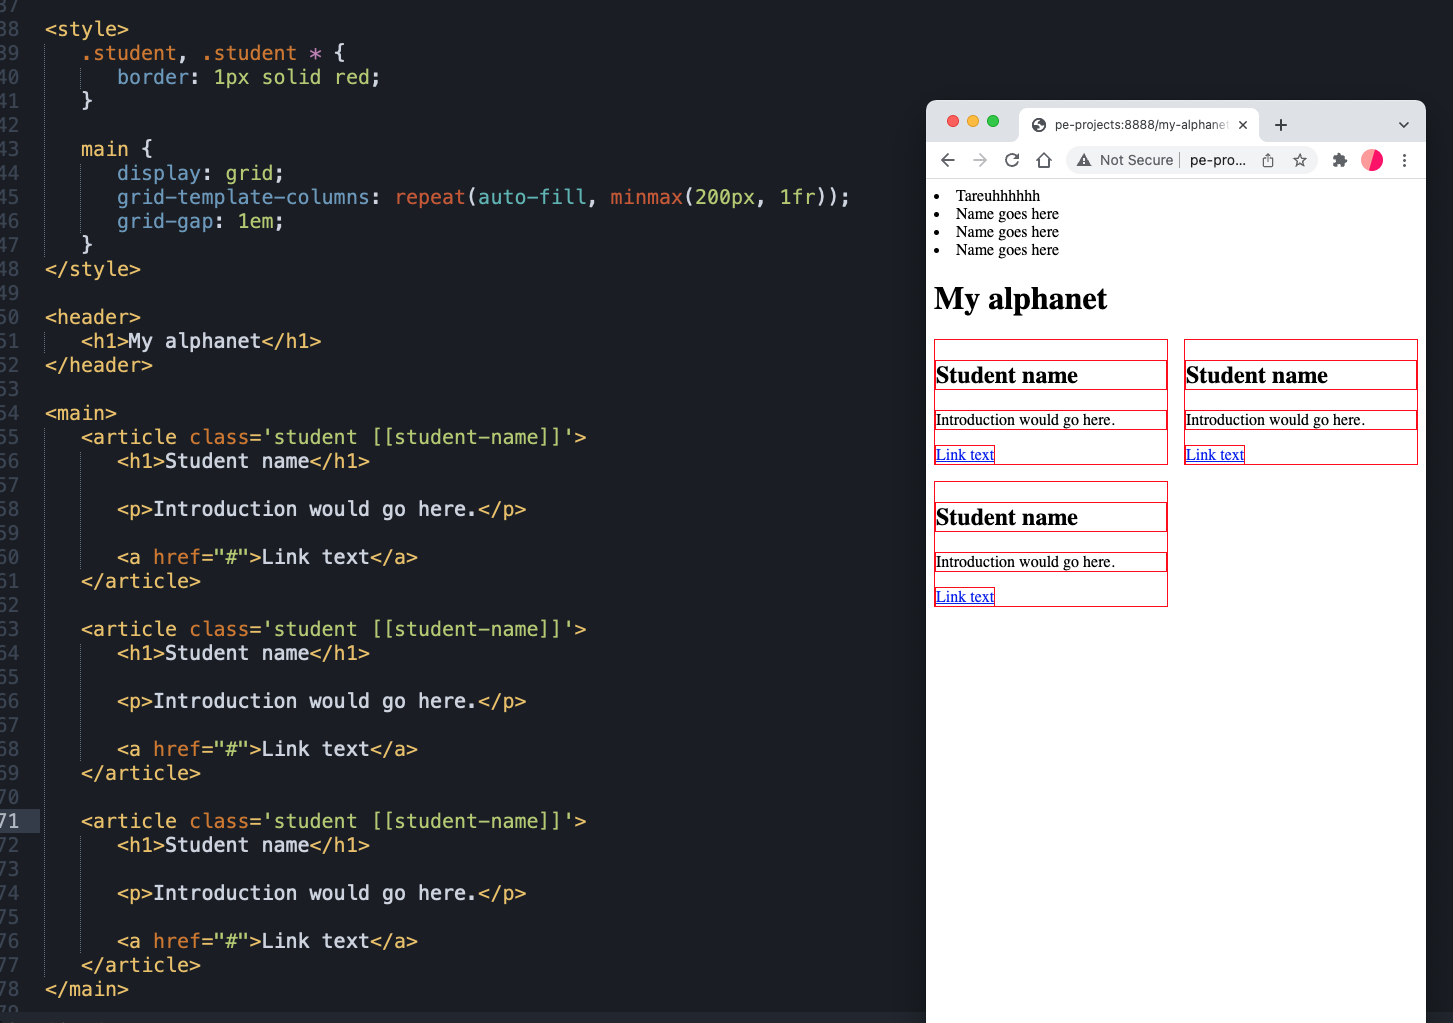
Because PHP is a scripting language / but kinda sorta a templating language… the biggest hump to get over is just realizing that you can combine the HTML and the PHP code – in any way you want. (as long as you mark where the PHP starts and ends. That takes time – and just lots of practice to sink in.
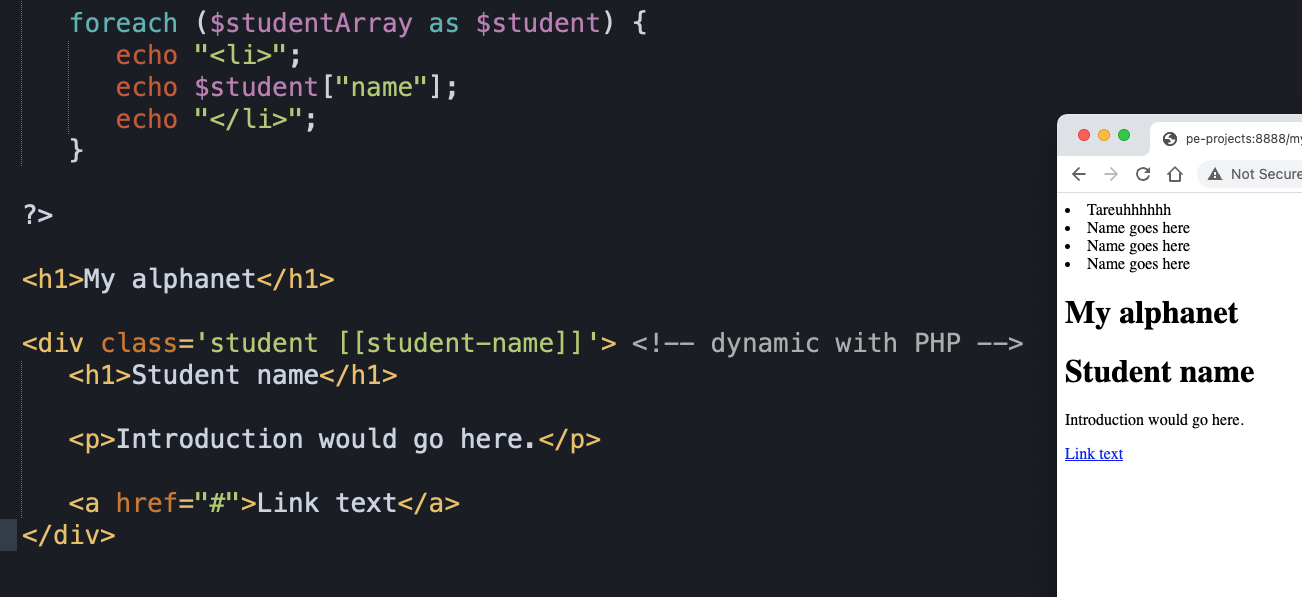
Tara wanted to get things in a proper HTML list.
(note: there’s no<ul> list element – but that doesn’t matter yet)
PHP or HTML
If you get tripped up with the PHP, just switch over to your HTML only mindset and create the ideal markup. Then you can use that as a map.
In this case, you could echo out each line of HTML as strings in PHP / of the inverse.
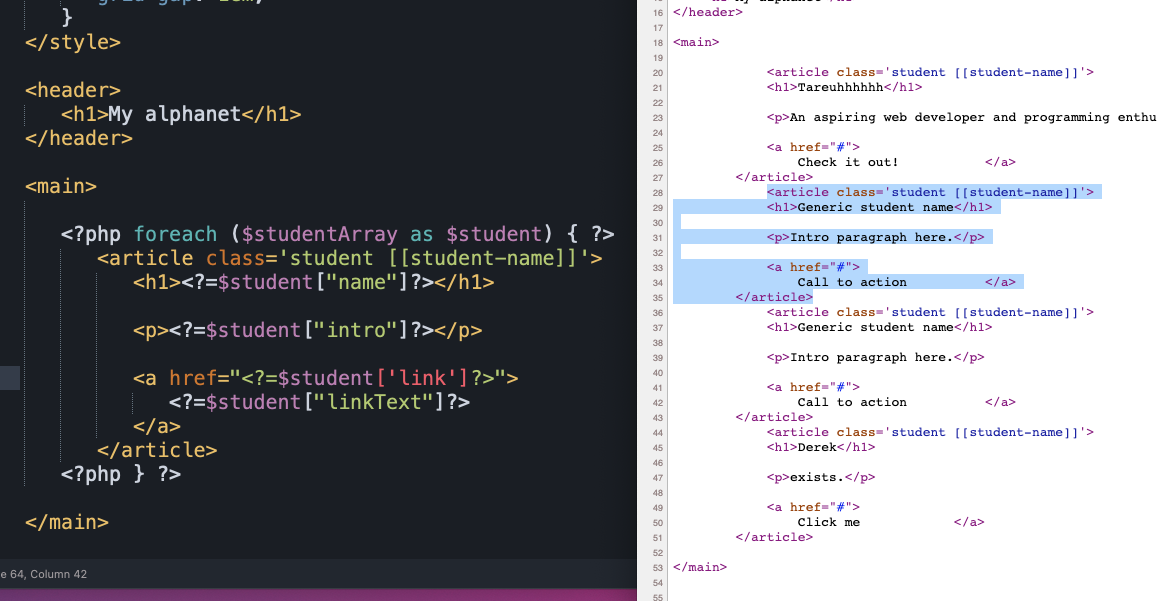
Here’s Tara’s markup for the card. She also wanted to note that the card would need a class – specific to the student. If you have something dynamic, you can temporarily denote that with [[things]] like {{this}} or something as a reminder.
Seee it
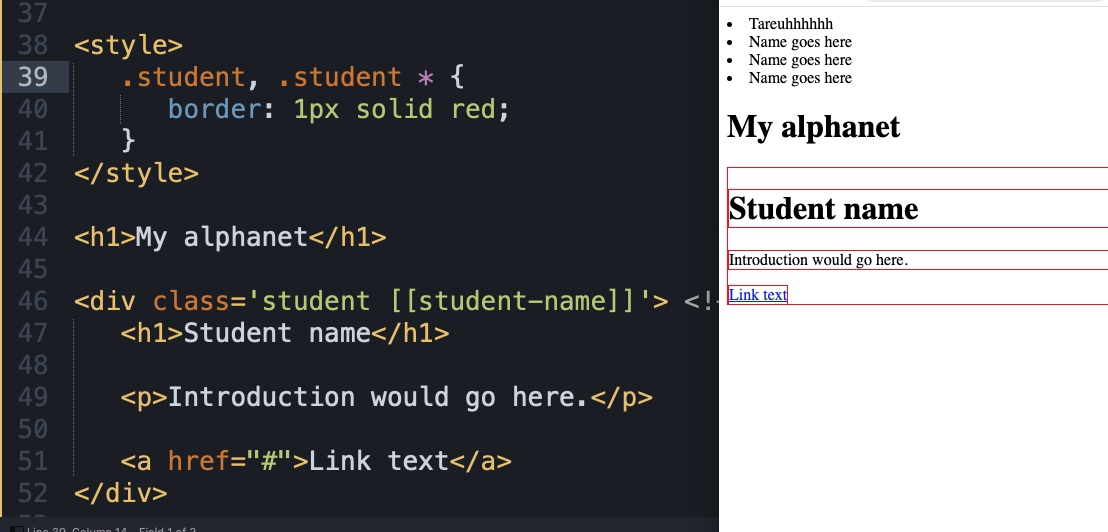
Derek suggested they drop in a little CSS to see what is happening.
(note that this rogue style information element isn’t legit / but it works for now)
Copy Pasta
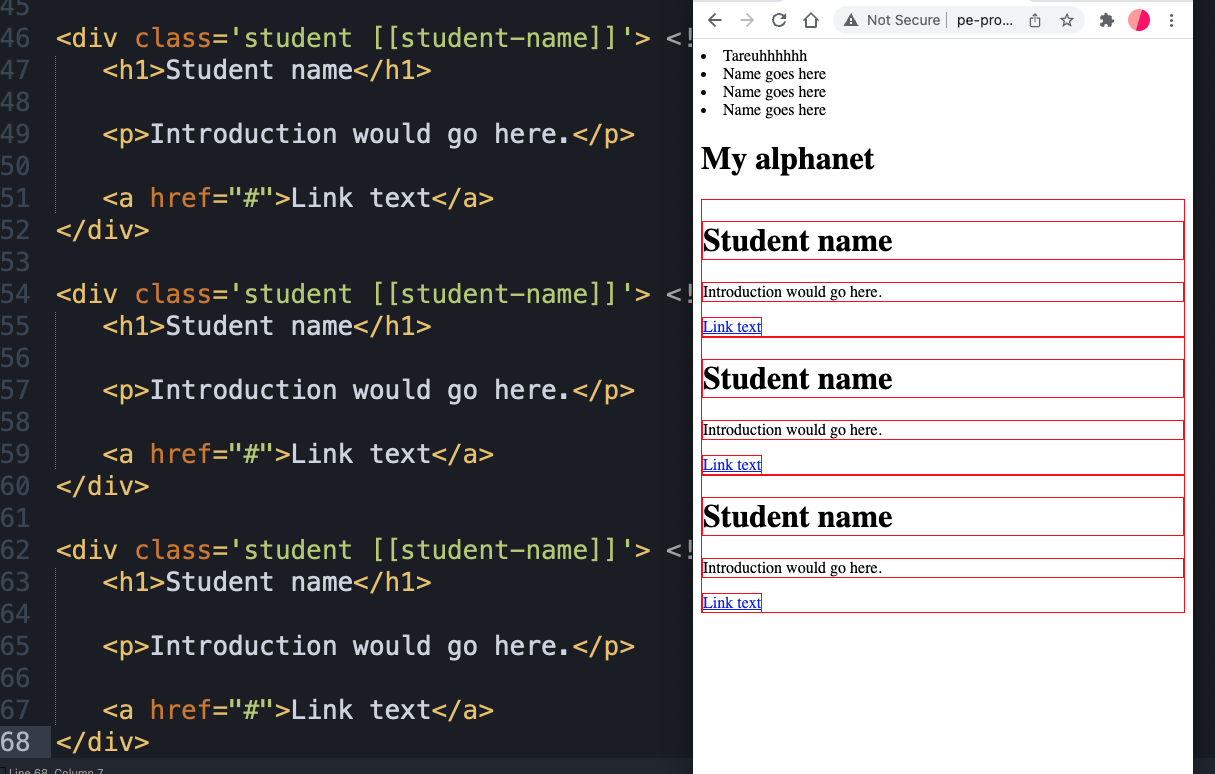
If you’re having trouble visualizing things, don’t be shy about just duplicating things. It might help you see it in a way that is more clear. Not it’s a little more obvious that it really does need to be repeated.
Structure
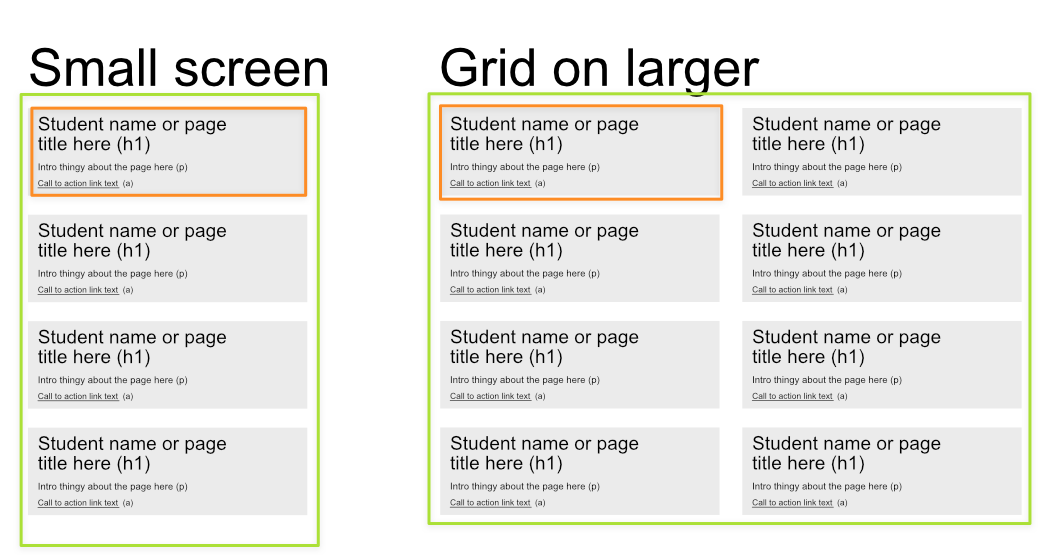
It helps to have the bigger picture in place. Tara knew she wanted a grid. Derek suggested a little more markup. A header, a main area – and to change the cards to the article element.
At this point in the course, we haven’t talked about CSS Grid. It’s complicated. So: for now, we’ve suggested you just use this snippet from the responsive layout checklist. It just makes a basic grid. Set it on the parent and fo get aboudit.
Generating the cards
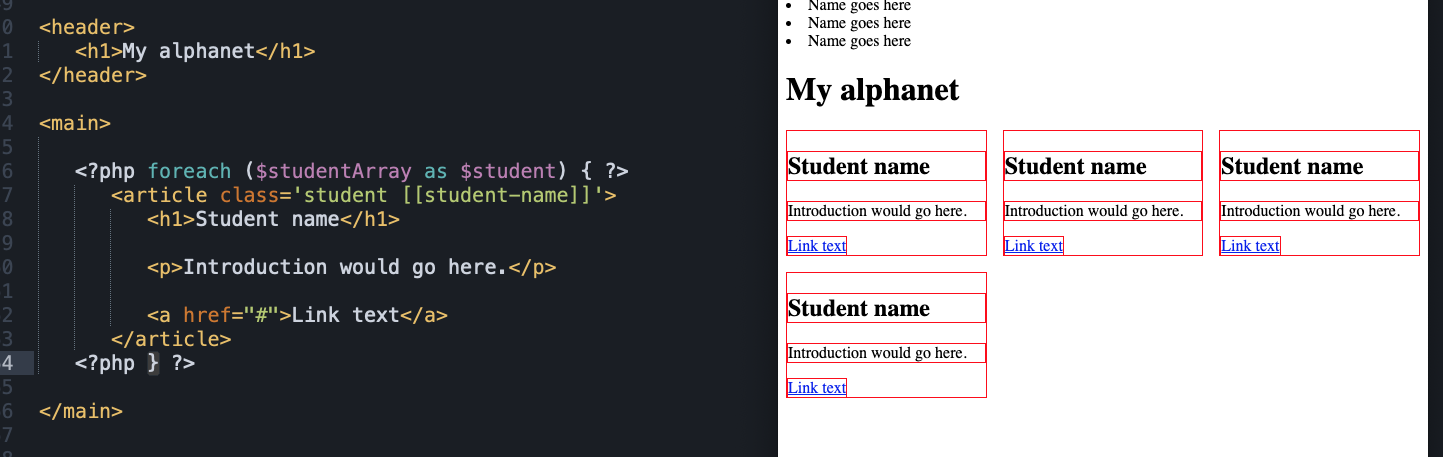
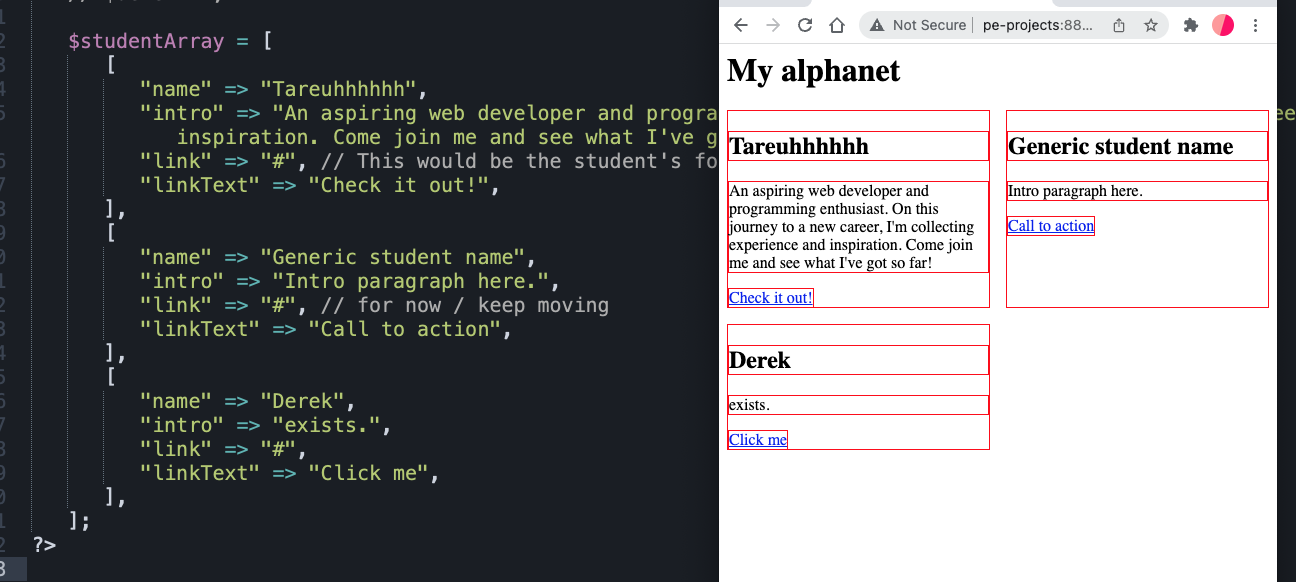
Since we’re just gaming things out / we copy and pasted a few more students into the array so we could see more students.
You can plop the HTML right into a loop / even if there’s no dynamic data yet. It’ll do whatever is in that code block / as many times as there are items in the array. Note how many little steps we’re taking – and how many sanity checks are along the way.
We have a little mini-template for the card. We have a way to look at the array and “do stuff” for each item in that array. Here’s our proof of concept.
Dynamic data
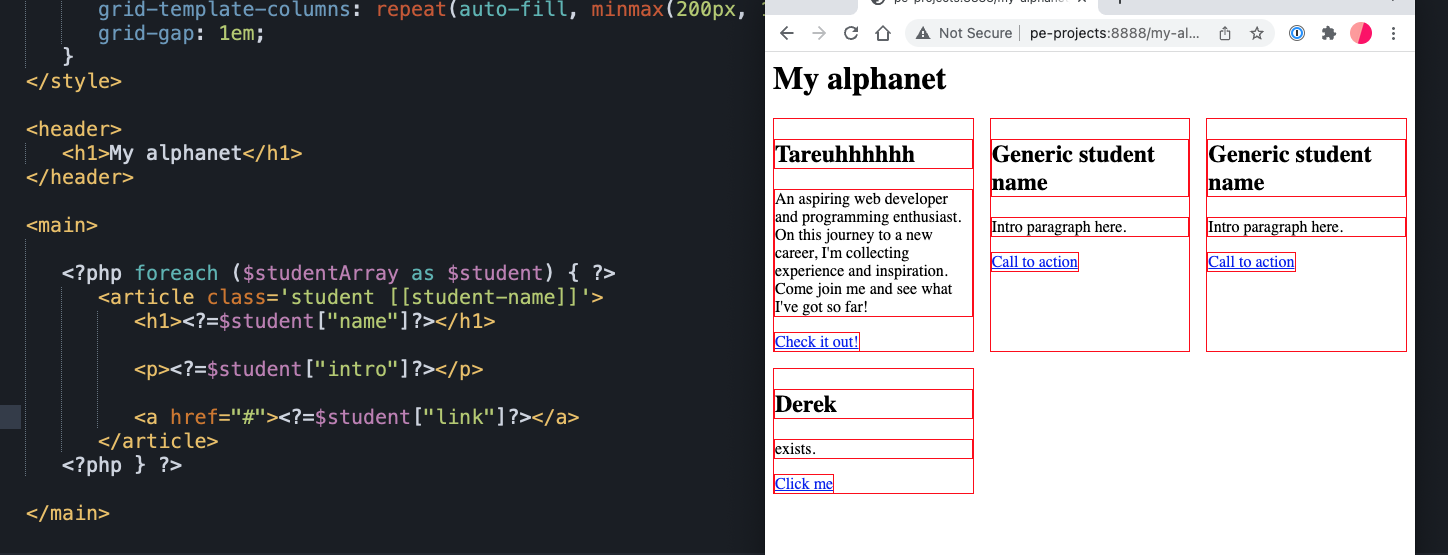
Once you have the loop working, you can add 1 dynamic thing in there and check it.
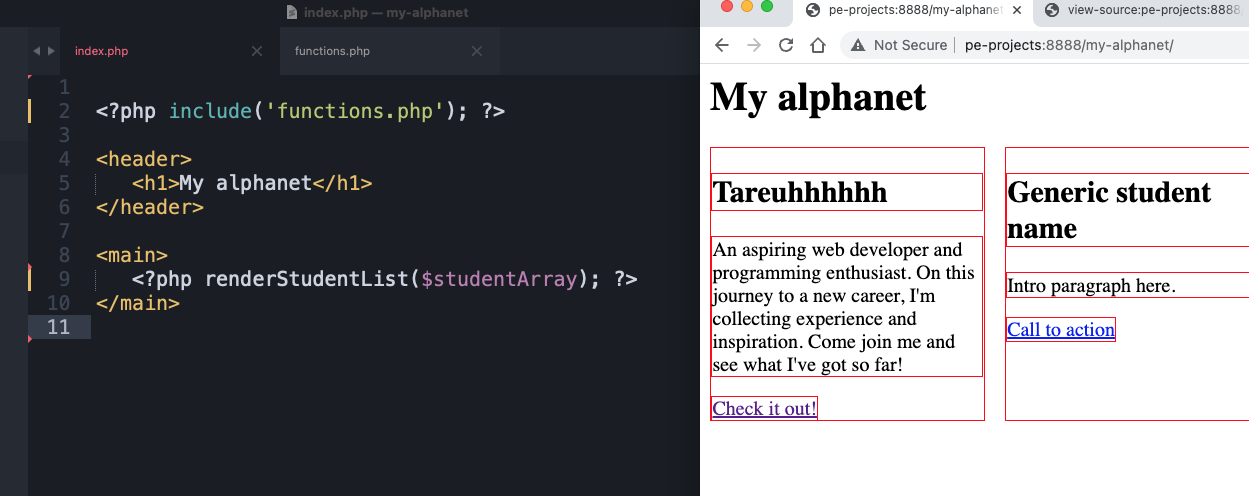
Here’s a shot with the name, intro, and link all showing up. Good!
This feels pretty concise. You could ask for feedback here, but – it’s probably not necessary – unless you have questions. It’s working! That’s Good!
Probably a good time to commit your changes to your repository and push to the cloud.
URL vs link text
Tara noticed that there was no URL for the links yet. And really, what she was calling “link” was more like the text in the link element.
Check the output
Remember: PHP is scripting language. So that means – that when the server requests index.php – it’s going to evaluate and run this code – and turn it into HTML. That’s the final outcome. You can view the page source – and see what it is generating.
(the formatting might not be as pretty as we’d like… but that’s the breaks)
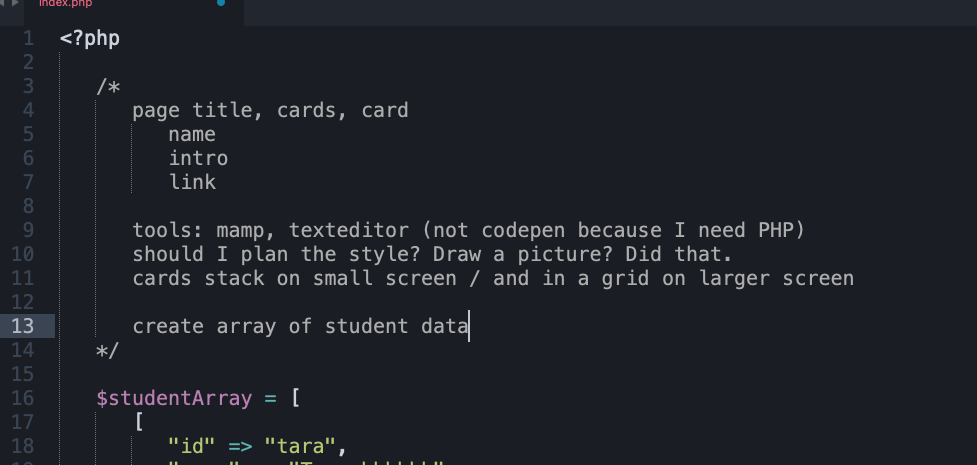
Too many variables
The way this data is stored so far is a little more work than it could be. What if you want to add a new student? You would have to save it to a variable and then also make sure you didn’t forget to add that variable to that other studentsArray. If we’re talking about hundreds of students, this is going to get confusing.
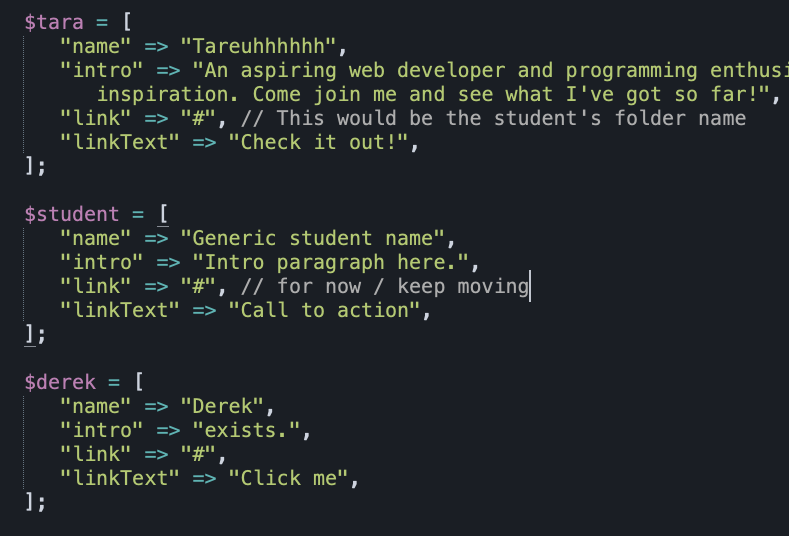
Instead
Instead, you can create an array of arrays. Technically – an array of associative arrays. Which is then technically a “multidimensional array” – and yeah…
It’s a list of stuff. A list of little groups of key:value pairs. A list of students and their attributes. This is A LOT like JSON (JavaScript Object Notation) which is the preferred data exchange format these days. So, if you can write – and read this: then you’ll be 90% there to read all the rest of the data in the course.
The loop will work the same way now. You could change all of this data – or switch if out for a whole new set of student data / and the loop and the card should still work.
Check the plan
OK. So, how far are we now?
Create student array: check
cards should stack and then be a grid: check
Drew a picture: check
Data points all check out so far.
Good. You can delete this then, right?
Commit the changes.
Success
If you got to this stage on day one, and you got the site up live / and on Github: we’d say that was pretty successful. You can add the real student data if you want, but that’s just kinda the busy work. The heavy lifting is done. It works!
But – if you have more time left, then surely – improve or refactor it.
What's next?
What are the next things to do? Update your list with any ideas.
The goal here is to try and use everything we’ve learned so far in the course. So, HTML, CSS, PHP, variables, conditional logic, arrays, functions…
The links
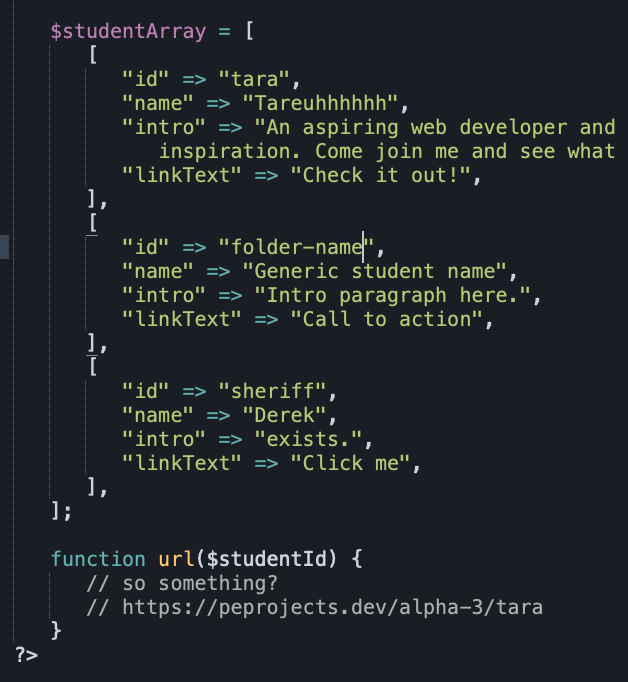
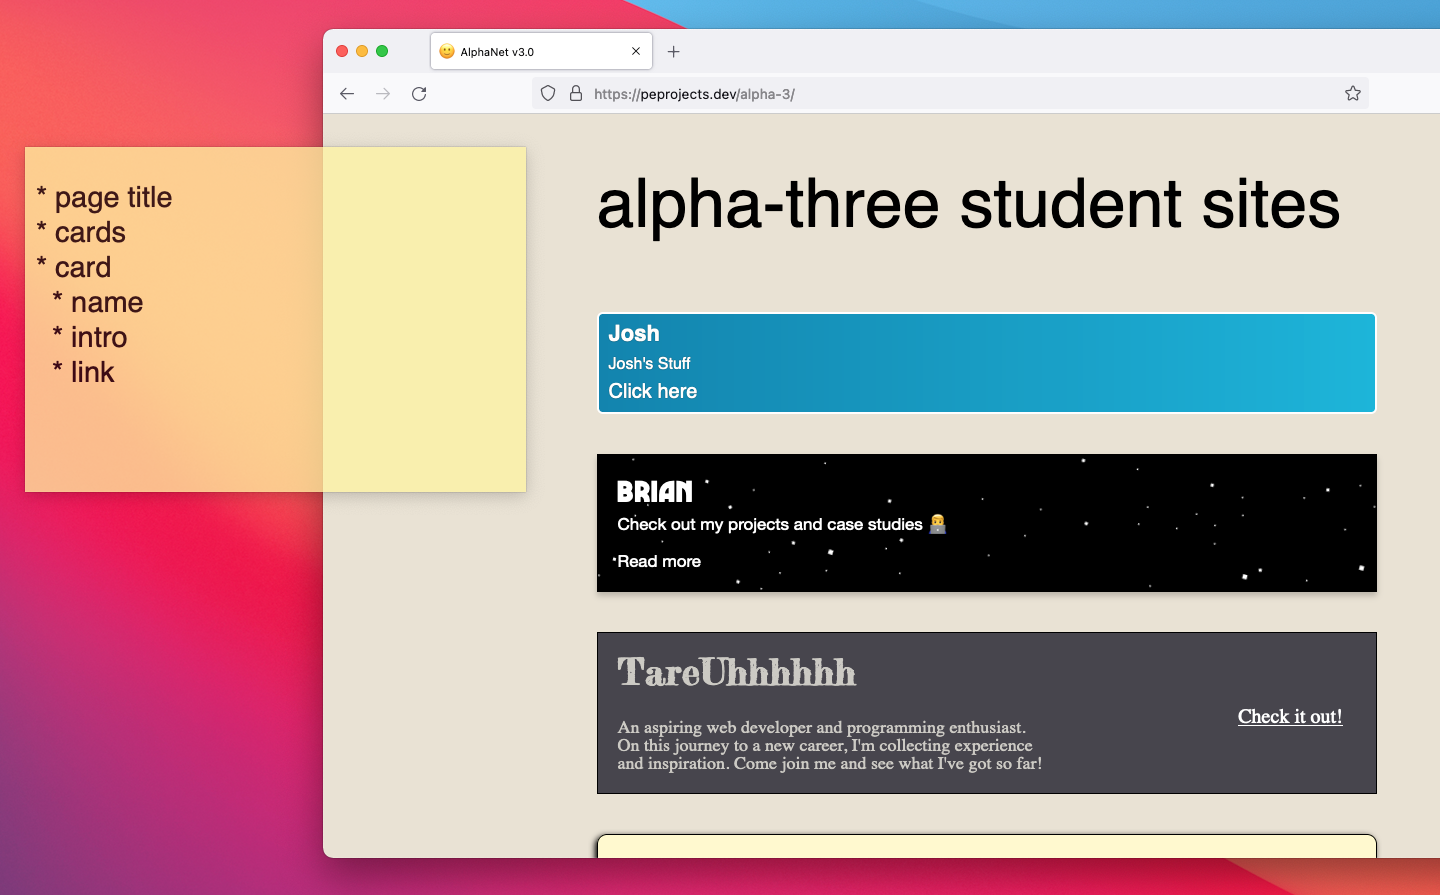
Each student has a folder. And their folder is based on their PE login username.
You could put the whole https://peprojects.dev/alpha-x/username in there. BUT that might change one day. And it’s a lot to type.
Tara wanted a special class for the card CSS. So, the username is good for that. It could be a unique identifier (“id”). AND then you could use that ID to generate the URL for the folder.
Sounds like a use case for a simple function. What could that look like.
Tara knew the syntax for the function. The function keyword. Then the function needs a name (like a variable) – so that you can refer to it. And it would need to know about the student’s id.
Building the URL string
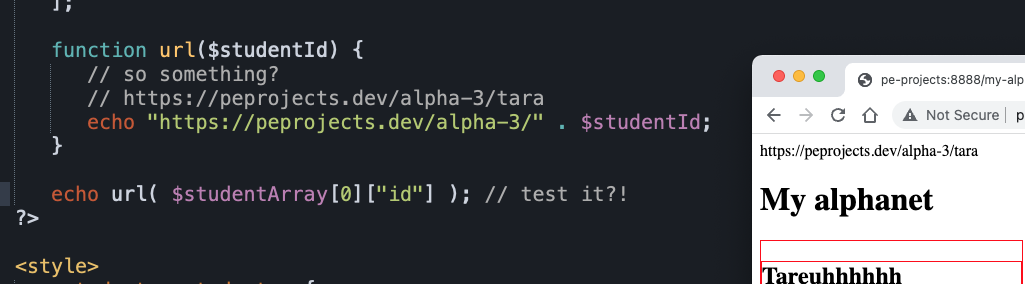
The function is a stand-alone recipe. You can define it with your idea system in mind. It’s a skill to stay extra abstract with it.
To test it (outside of the loop and other code), we sent in the id of the first student.
(if this bracket notation is confusing then as for some challenges for that to practice)
All together now
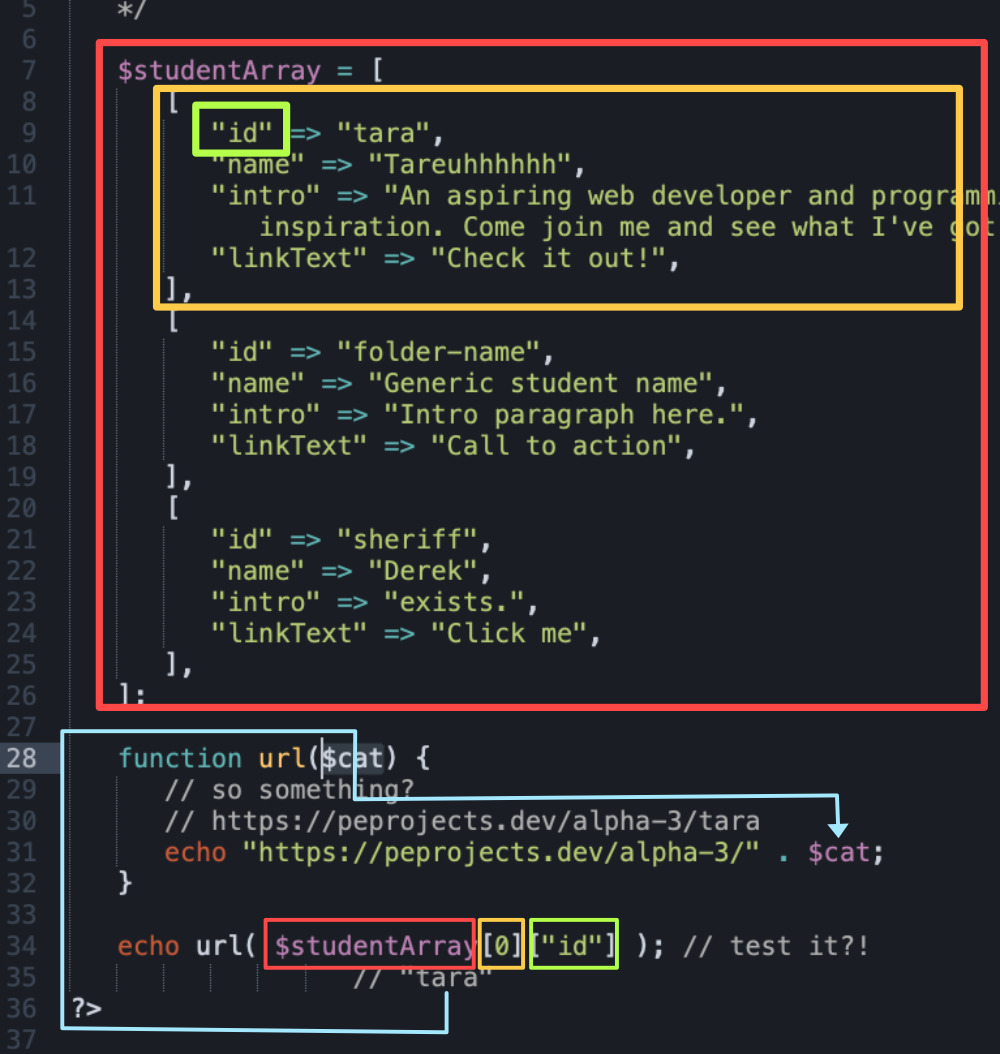
This function does just one thing. It accepts a string / and then it appends that string to the end of another string. It concatenates 2 strings. Then it’s spits out (echos) that string onto the page wherever it’s run. It can be used over and over. This is just how we’re testing it out. It works!
Function in the template
Here’s that url generator function in action. Pretty slick!
"Partials"
Tara is asking for feedback / and so (since we’re doing this in real-time) Derek is playing that part.
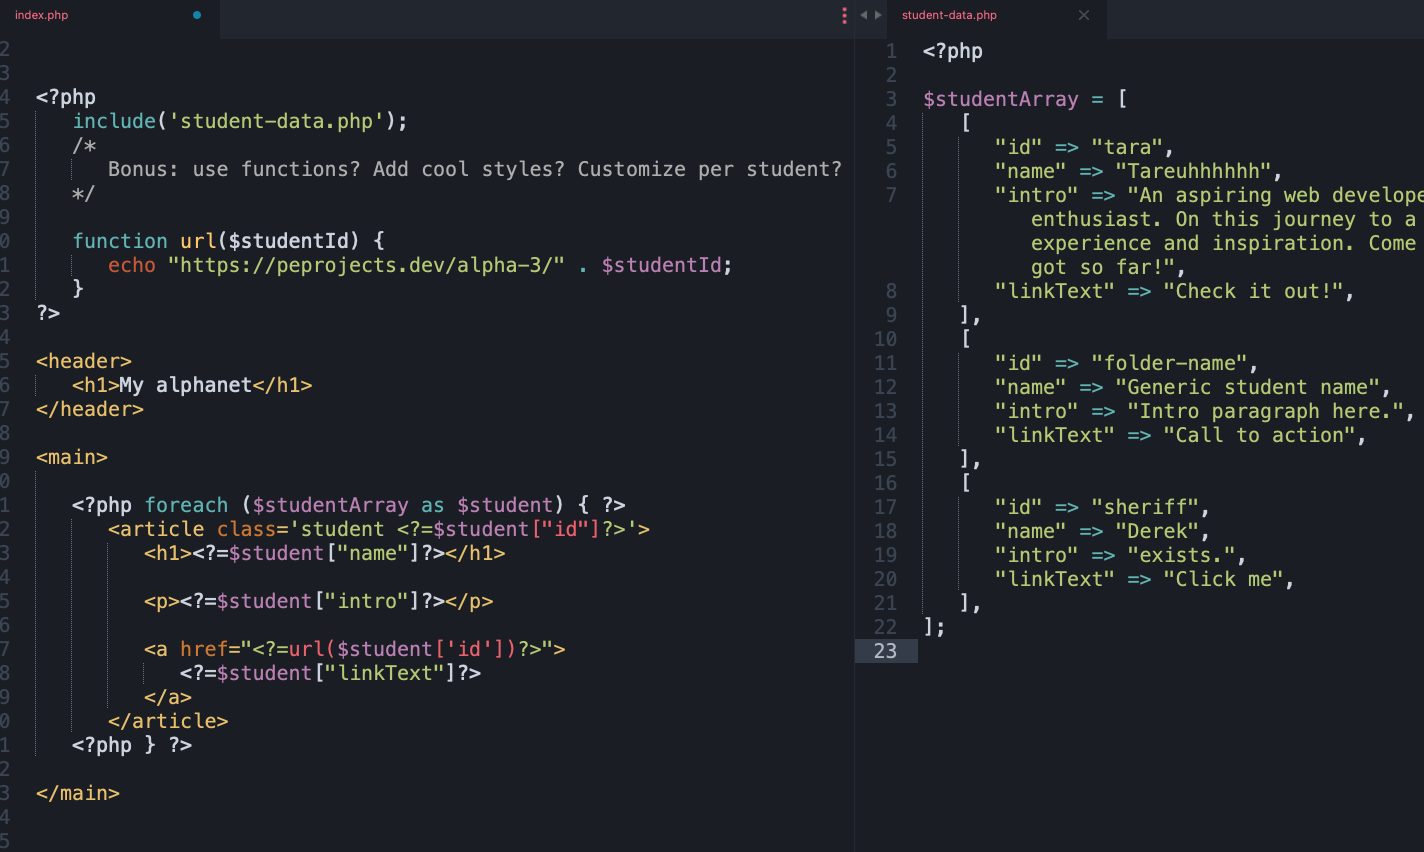
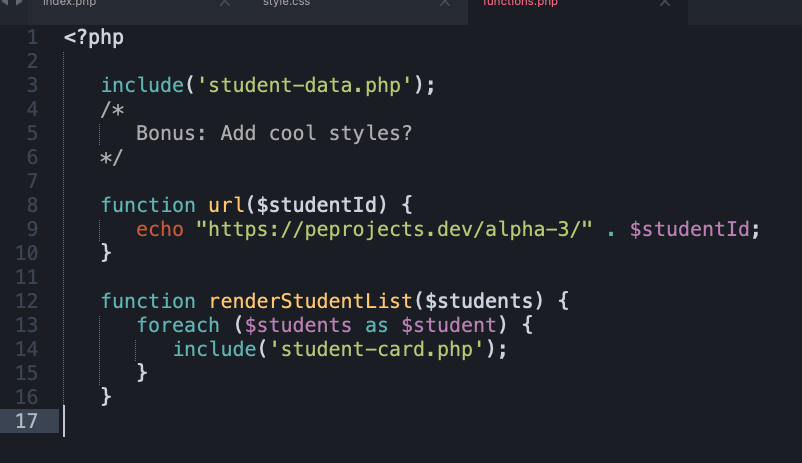
You could put that data stuff- in its own file and clean up the index. This way, the students could actually just go edit that file and add their own data on Github without messing with any of the other code. Plus the file is easier to search for / and it’s out of the way. These “parts” of the project that are broken up are often called “partials.”
Components
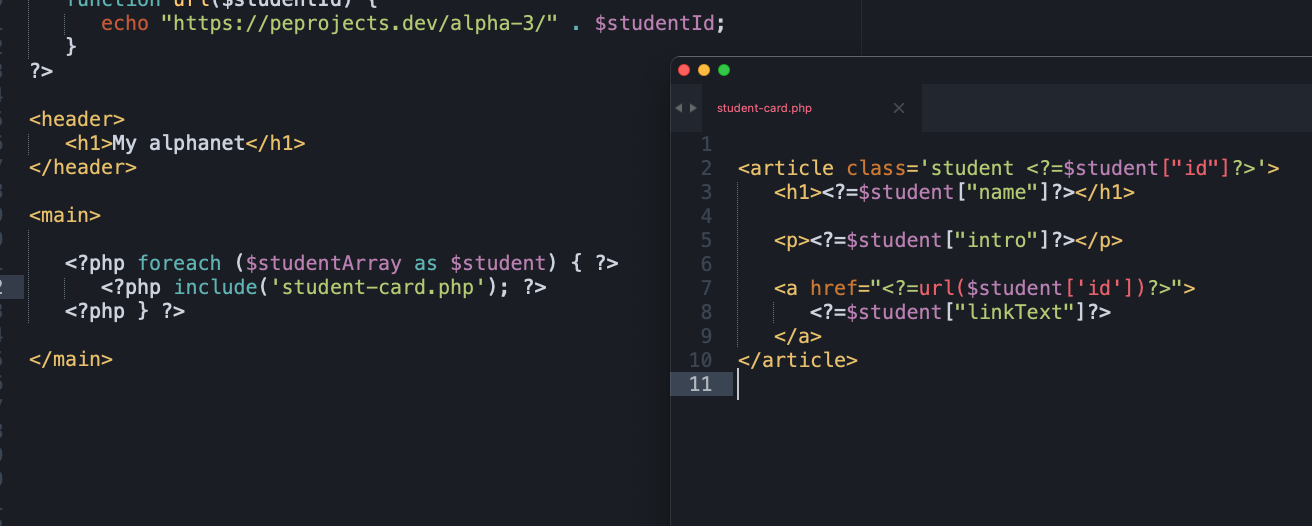
You could put the student card into it’s own file. Then it’s easy to work on just one small part at a time.
Simplify

Tara wanted to get rid of some of those PHP opening and closing brackets. Cleanin it up.
Abstract away
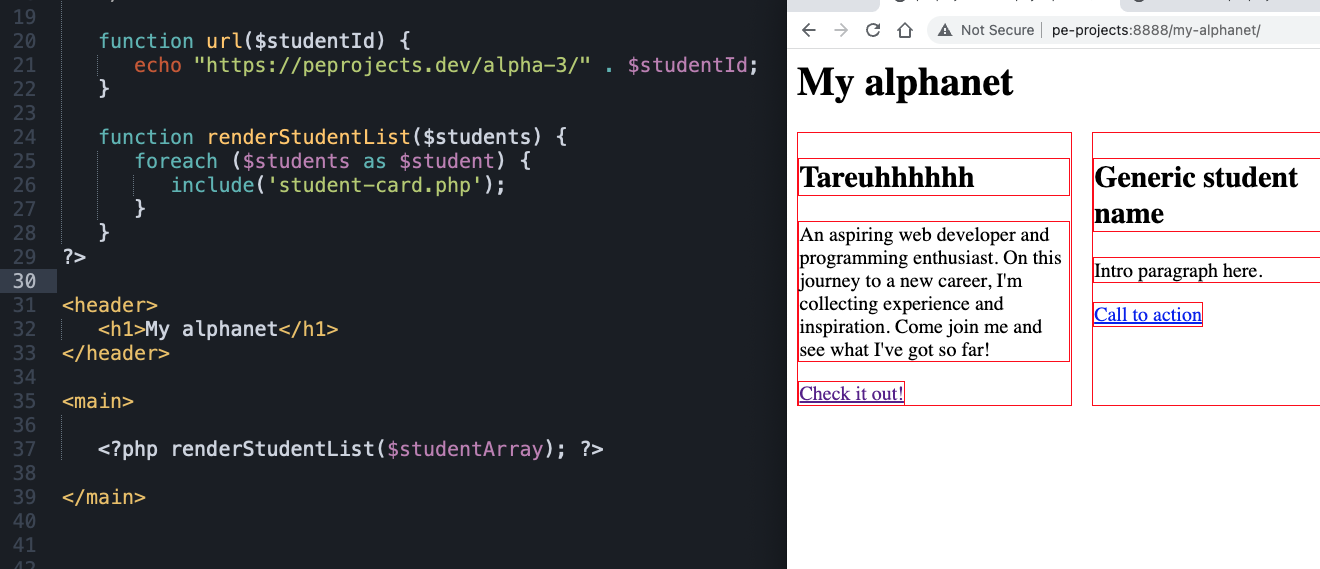
You could put that loop into a function and “abstract” it away to something clean and human-readable.
Separate functions file
You could take all of that PHP stuff and put it in a functions specific file.
Proper HTML page structure
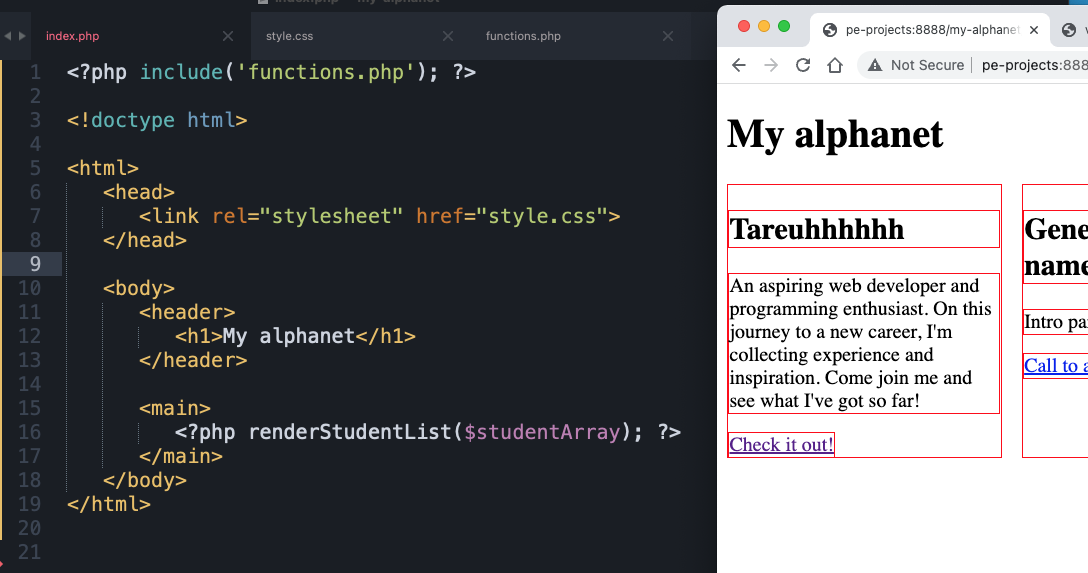
You could now take the time to put all the official HTML document structure in place.
(but – if you were extra smooth, you would have started this project with your boilerplate – and that would have all been done already)
This stuff only matters if it’s going to be a real website. If it’s just a practice page or a quick test or challenge / do not waste your time. The less code the better in those situations.
Where were we
OK. Now… and only now – IF you have time, you can add some styles. Because the core functionality matters way more than the look.
Card styles
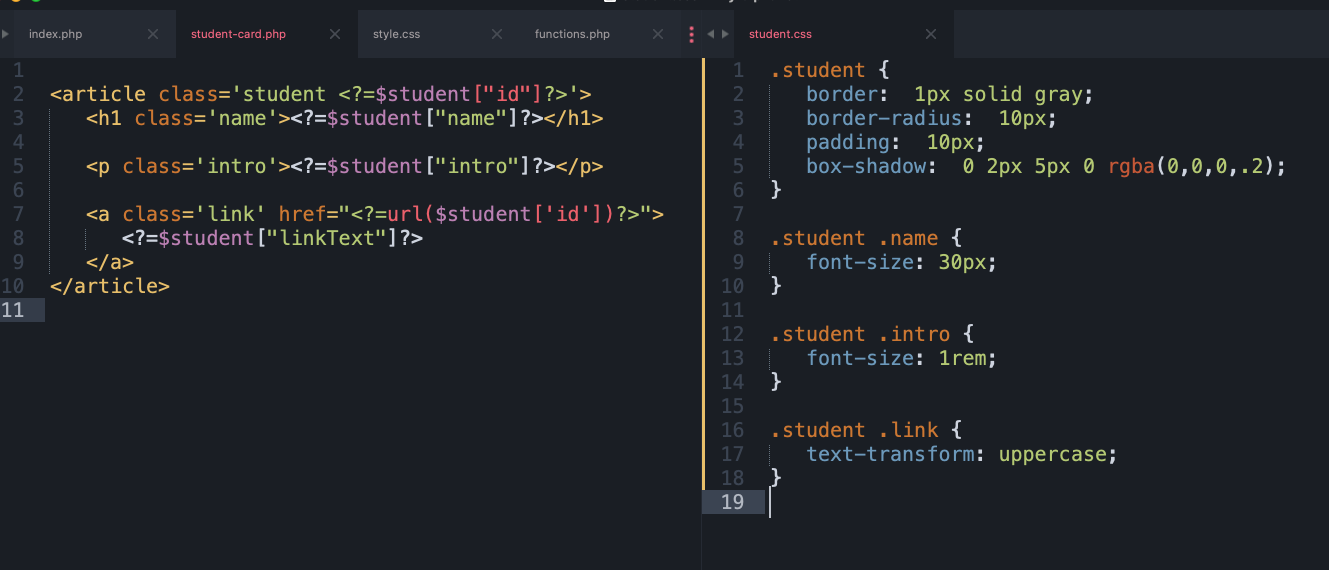
You could create a student-card specific CSS file. Look how nice and clear these two little files are!
(Don’t forget to import it into your main CSS file)
JSON
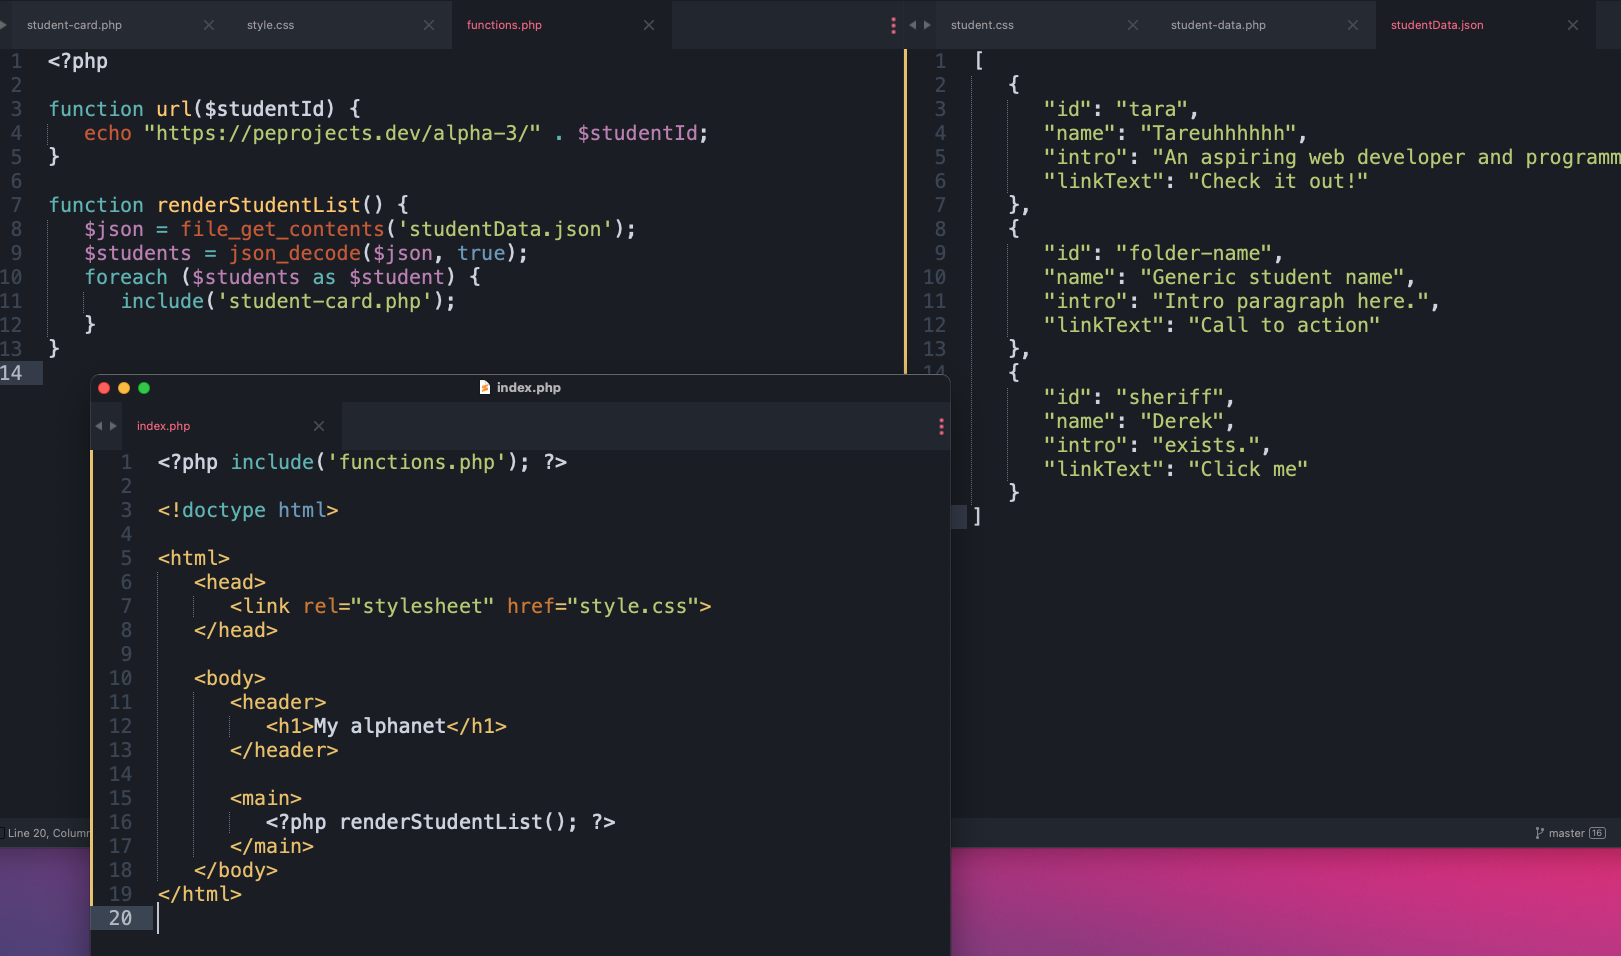
You could transfer your data to JSON format. That’s the most standard. Then it could be used in any type of language. PHP has built-in functions to get the file and then decode it into the PHP multidimensional associative array style. This is for fun. And Again, you could put this on GitHub and ask the students to add their own data. You could also set it up so that the data is only retrieved when the renderStudentList function is run. Then you don’t need a global variable for the data (which could get moved or changed).
Speed run
You aren’t expected to be able to know how to do all of this stuff. You aren’t expected to be able to type this out in only 20 minutes. BUT over the course of a whole day / and with a group of buddies / and lots of questions and help — we would expect it to come together. A major part of these exercises is time management. People usually get stuck on the “life” stuff / and not the code.