Automatic FTP deployment
Introduction
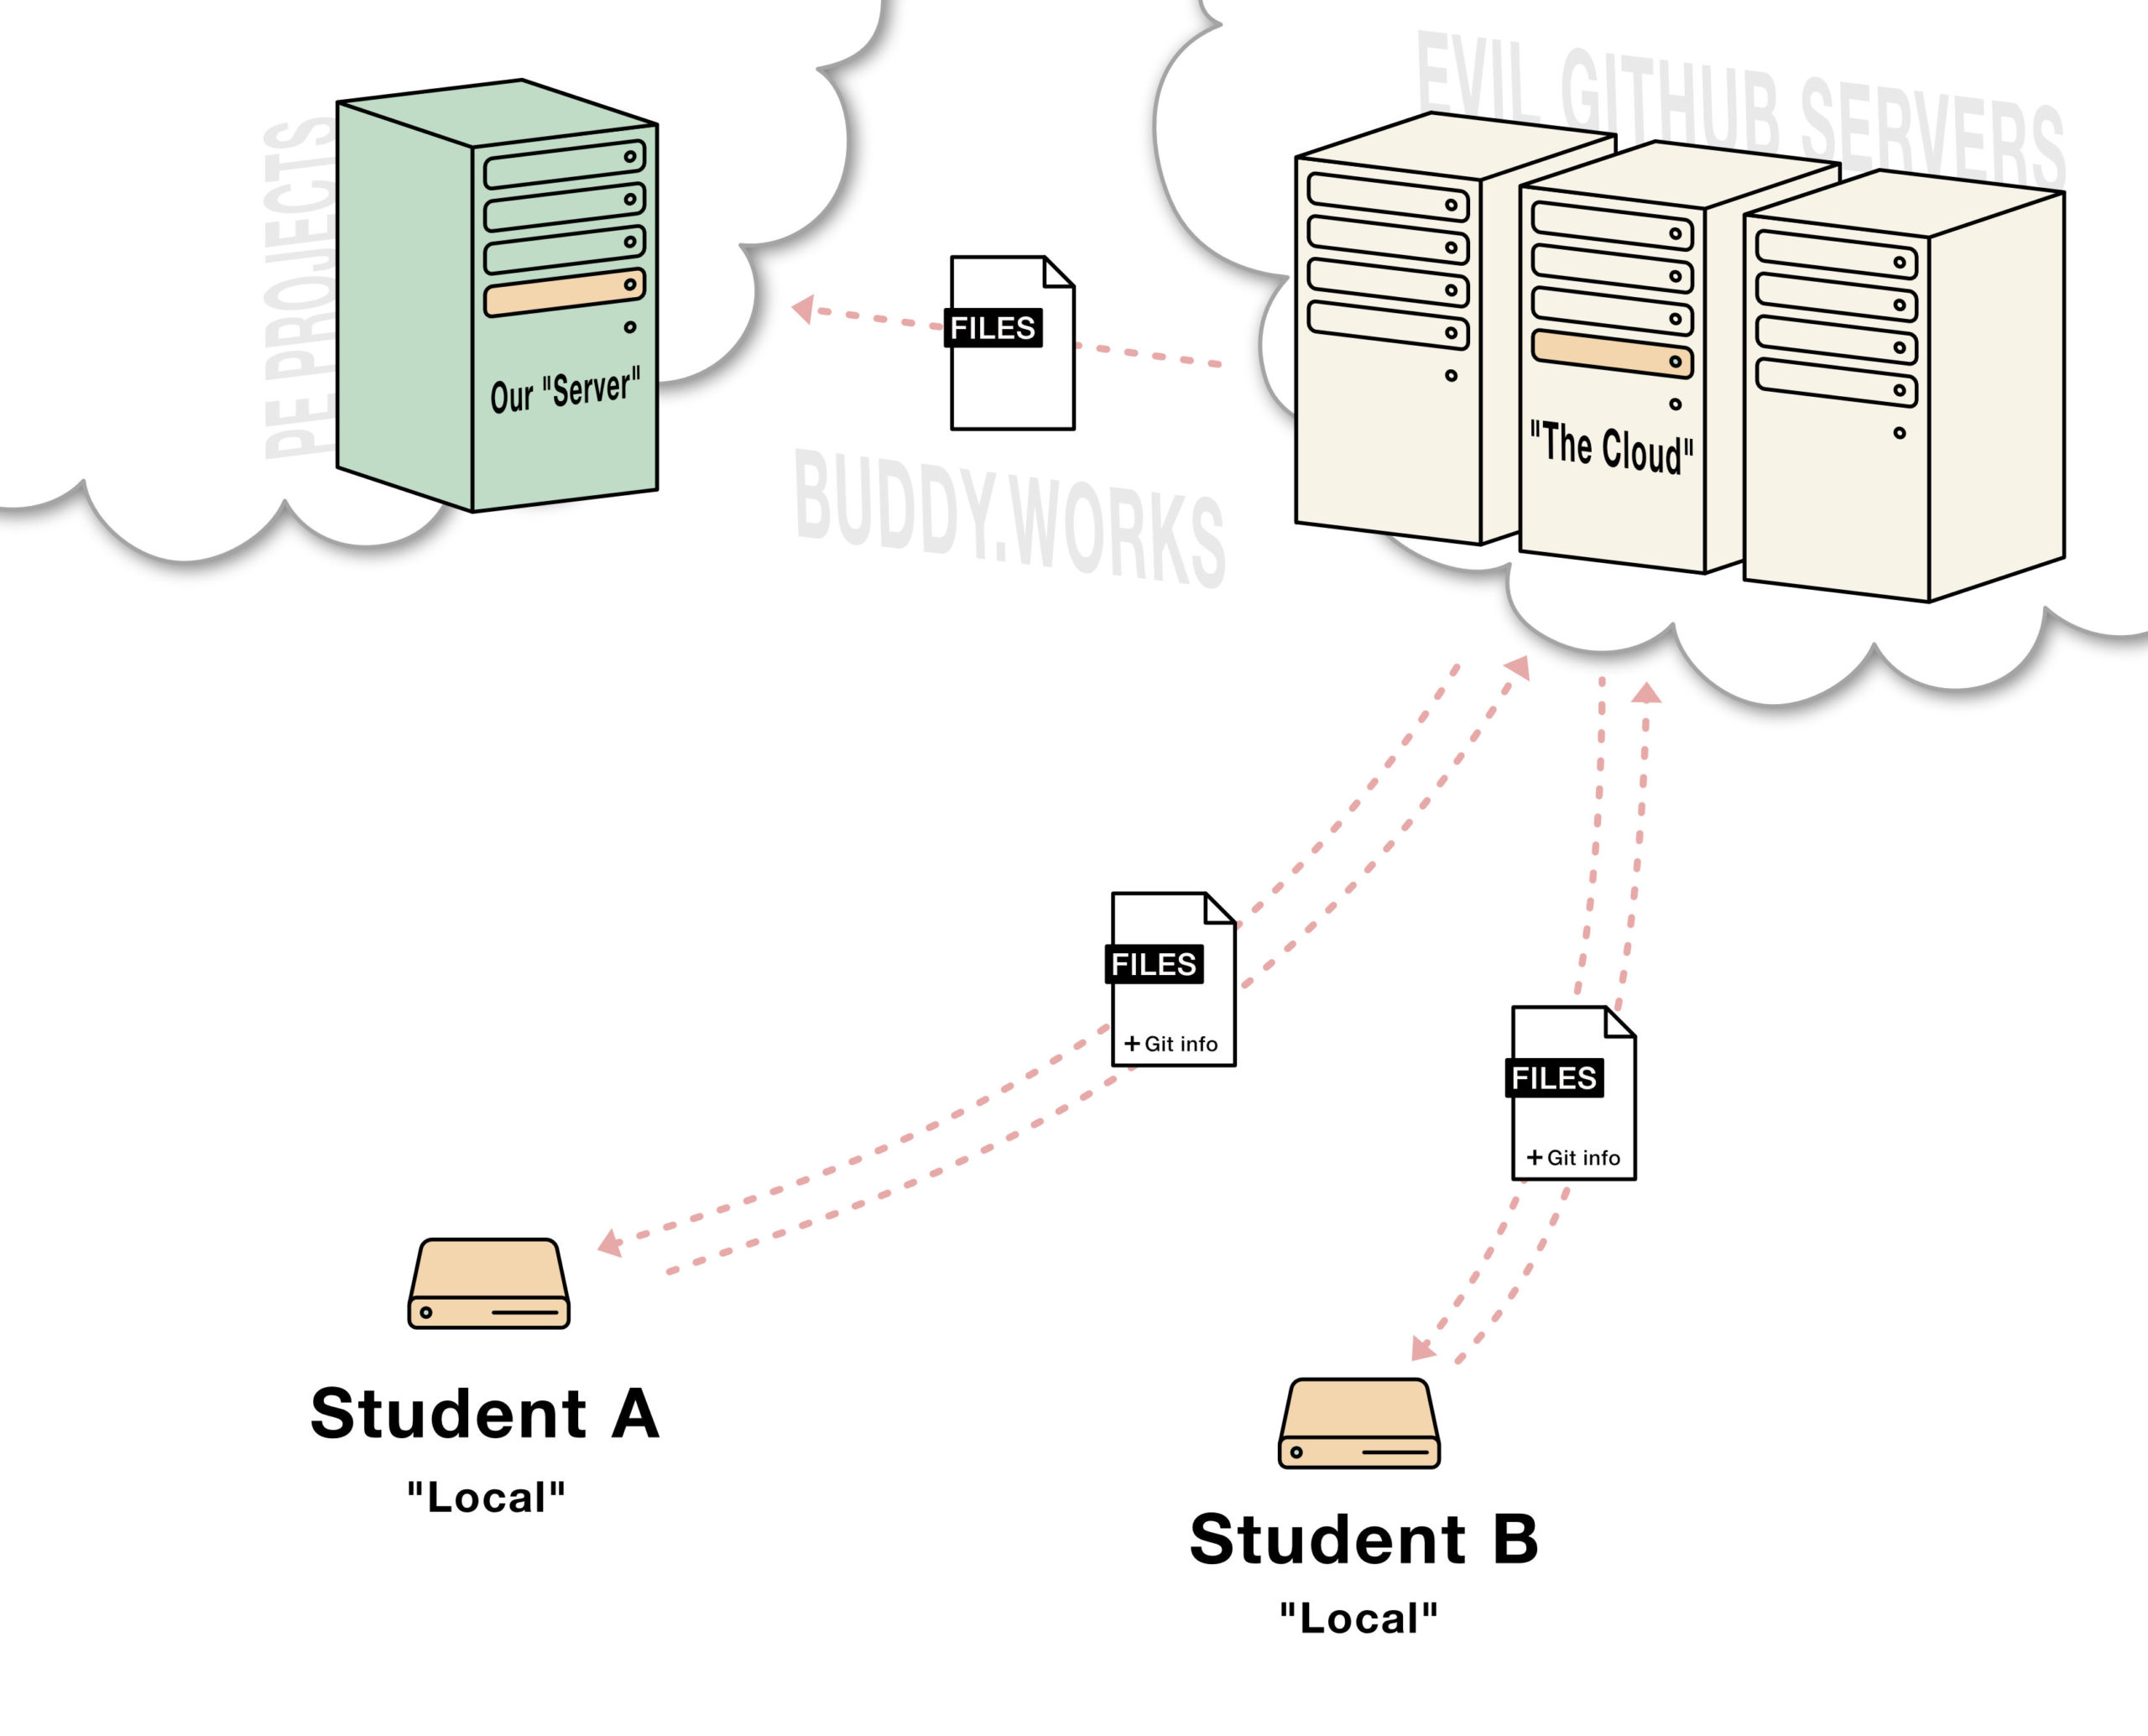
Whenever you “do something” some other thing somewhere usually knows about it. This allows us to hook into that event – and fire off any other number of events or processes.
Buddy is a way to configure these events and “deploy” your code to a server automatically – without writing any code.
Some recap and how to switch over to Buddy
- Sign up for Buddy (may as well use GitHub for the login since this is only for that anyway)
- Create your ‘account’: authorize with GitHub (that’s your user login basically – instead of email/password)
- Create a new ‘project’
- Choose GitHub as your hosting provider
- Name your project something like
pe-projectsorpersonal-website - Add ‘GitHub Integration’ which allows buddy to talk to GitHub and verify your identity (more?) (what is happening here?)
- Your account might have connections to many organizations like PE or clients or whatever GitHub repos you’ve participated in…
- If you don’t see yours (your username)
- Add your ‘organization’ (installs and authorizes Buddy to read and write things on your GH account) (installs a connection key for you) (read it)
- Choose if you want to give Buddy access to all your repos or just one
- Install + Authorize
- You may need to use two-factor auth
- You should now see your org in the list and be able to choose it
- If it doesn’t, refresh or something until it does?
- Choose your account in the organizations list (confusing!)
- Then choose the repo you want to use for this project (it’s probably called
pe-projects) - Project created???
- (You have to now “sync” the repo or something… change in UI)
- Create a ‘Pipeline’
- Call it something like “Push personal-website to peprojects” (so it’s clear when you come back one day)
- Leave the defaults (on push event… trigger actions)
- Add Pipeline
- Find FTP (because that’s the actions you need to use)
- You want ALL the files in your repo, so leave the repo path as
/ - Hit that Add this action button
- This will bring up the FTP login info
- Host/IP address:
peprojects.dev - user:
yourusername@peprojects.dev - password:
filetransfer(most likely) (if not – let us know and we’ll change it to this) - Test the connection
- If it’s all good: Add the Action (same button again?)
- And – it should all be good to go
From then on, when you push your updates to GitHub, it’ll automatically transfer your files up to the server (or any other server you setup)
(Got improvements to ^ this list? Let us know!)
It’s certainly something that could be WAY better.
Previous version of this video ... (made a second one by accident!)
Who knows if this will be free forever / but for now – seems like the best no-code option for auto deployment.
—> Consider this as a bonus UX challenge (if you’re on that track). This workflow could be so much more clear!
We're not using deploybot anymore (for you)
So – ignore everything below… but we’re leaving it here – because you might want to rework this UX as a project!
What steps to take
This is just going to be text, so – read it carefully.
-
Ask to be added as a user in the DeployBot system
You can just ask us in the chatroom etc.
Make sure we get the email you use on Github specifically.
Then we’ll log into DeployBot – and create a user for you. Get together with Derek and walk through this – and help us flesh it out!!
(Someone on staff will log into DeployBot, users, invite user, opens form, input full-name, input email)
(also – everyone is an admin – so anyone who’s already setup – could add you)
(That email would likely need to be the GitHub one, right?)
(Make sure they are checked as Admin or they can’t add their own repos)
-
Check your email (in your desktop web browser)
You’ll have an email: Please complete your account login.
There will be a link below. Follow that link.
-
It will open up in a new tab/browser window
There will be a weird warning: “Did you mean Perpetual Education?”
No. You did not. It’s confusing. You want to follow the DeployBot link. It’s trying to alert you that this looks fishy, but it’s not fishy. (We’ve talked to them about this). So, click “ignore.” (they might have fixed this – let us know if you see it)
-
Create account
You’ll be directed and asked to “complete your profile” to join the DeployBot Account.
Choose a password and create your account.
-
Log in to DeployBot
You’ll be directed to a login form.
note: perpetual-education.deploybot…
Enter your email and your password and login.
-
Arrive at the main dashboard
You’ll be logged in and directed to the dashboard.
You’re here! What are we doing again?
The goal: To connect our GitHub repo and set it up so that when we push our changes to that repo – DeployBot automatically takes that code and sends it to the PE server with FTP.
-
Now what!?
The goal: To get our website files (that we’ve been writing locally) (and that also pushed up to GitHub) pushed up to the PE server. So – whatever repository that is, right?
Which repo?
Traditionally, students often name their local folder
pe-projectsand that is where they’ve initialized a local Git repo. That is the folder being tracked. THEN they have a repository namedpe-projectsup in the Cloud on Github. (so the names match – and it’s easier to understand what is connected to what)But some of you – might not have created a repo for this yet. In that case, you need to create a new repository. You could name it
pe-projectsorpersonal-websiteorportfolioor whatever you think is most descriptive and useful.So, – figure out what is going on. Do you have a repo you want to add/connect to this DeployBot system?
-
Choose a repository
Get the URL of the GitHub repo that you want to connect. On the GitHub page for the repo, there is a stupid green button/dropdown thing that says “code” – so, obviously – that’s where it is – right? Thanks, Microsoft!
Copy it to your clipboard.
-
Connect your repo to DeployBot
Go back to the DeployBot dashboard and see where you can add a repo.
Does anything seem like a good thing to click? What are the top-level choices?
“Dashboard” (we’re already there)
“Repositories” (seems pretty good!)
“Users” (nope)
“Settings” (maybe)
Hint: It’s repositories.
Click that link.
You’ll land on the repositories page.
There will be a list of all of the repositories – and at the top of that list – is a button that says “Add Repository.”
Click it.
You’re now given a choice of cloud Git services. There are many different companies that do this stuff. GitHub is the most famous. And – it’s the one we’re using. So – choose GitHub? Nope. Don’t. Choose “other.”
(whoever built this didn’t consider that many people may have the same GitHub repos – and for some reason / it only allows one repo of each name if you choose GitHub / so,
personal-websitewill be blocked – if someone already has a repo called that. Strange / but OK.)Add your information in there – and connect the repo. (anything interesting about this / SSH vs – ).. ??
Great. You have a repo locally – and in the cloud. They are connected to each other. Now you have a username and login to DeployBot and you’ve given DeployBot permissions to connect to the GitHub repository. But now what?
…
…
…
-
Give DeployBot directions to connect to the FTP server
…
“Create enironment and server”
“Name” ?? PE Project Server
automatic, right?
Choose FTP
Add new FTP server
Name it /// (another name?) … uh…
…
host:
peprojects.devfolder/path:
yourFolderName(whatever your folder is called on the server)password: (your FTP password / which you likely don’t remember / and transmit won’t show you – so, ask us to reset it.
should see “connection established”
….
Now set up the webhook in Github
repo > settings > webhooks > add webhook (it’ll ask for a “payload URL”
get refresh URL in deploy bot — (Set it to JSON?)